Set Up TSLint and Prettier in VS Code for React App with Typescript
It is very useful to add linting to your project as it keeps your code more readable, clean, standardized and maintainable.
Below you will find full configuration of the files that I am currently using in my working React project, and you can use it as a point of reference of your own.
First, install the following VS Code extensions:
-
Prettier — Code formatter. VS Code package to format your JavaScript / TypeScript / CSS using Prettier.
-
TSLint. Adds tslint to VS Code using the TypeScript TSLint language service plugin.
After you have installed this plugin you need to enable it in tsconfig.json:
{
 “compilerOptions”: {
 …,
 “plugins”: [{“name”: “typescript-tslint-plugin”}]
 },
 …
}
In case, you might want to format your code using the Prettier extension after saving a file, you will need to configure VS Code Workspace Settings.
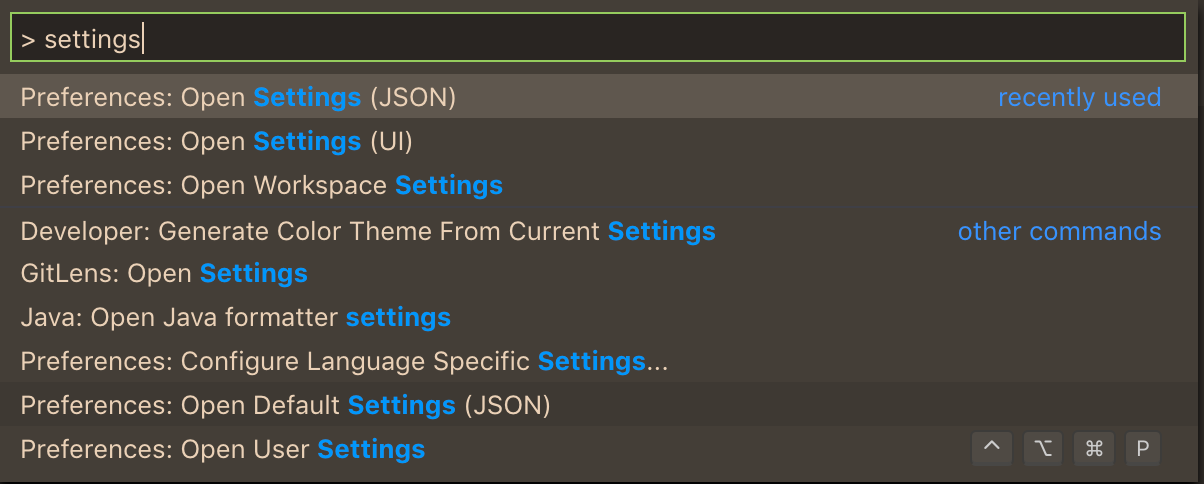
You can quickly get there through the Command Palette… (cmd + shift + P, by default on MacOs) and type “>settings”:

Choose the first option from the above, Preferences: Open Settings (JSON), and add the following rule to the settings.json:
“editor.formatOnSave”: trueIf you open the workspace settings, you will see that the rule is reflected immediately after you save the changes to your settings.json file like so:

Add Prettier to your project
Prettier is a fully automatic “style guide” worth adopting.
“When you’re a beginner you’re making a lot of mistakes caused by the syntax. Thanks to Prettier, you can reduce these mistakes and save a lot of time to focus on what really matters.”
npm install prettier --save-devSpecify the formatting rules you want in a .prettierrc file, which you create at the root level of your project, same as package.json:
{
 "printWidth": 80,
 "tabWidth": 2,
 "singleQuote": true,
 "trailingComma": "es5",
 "semi": true,
 "newline-before-return": true,
 "no-duplicate-variable": [true, "check-parameters"],
 "no-var-keyword": true
}
Add TSLint dependencies to your React project
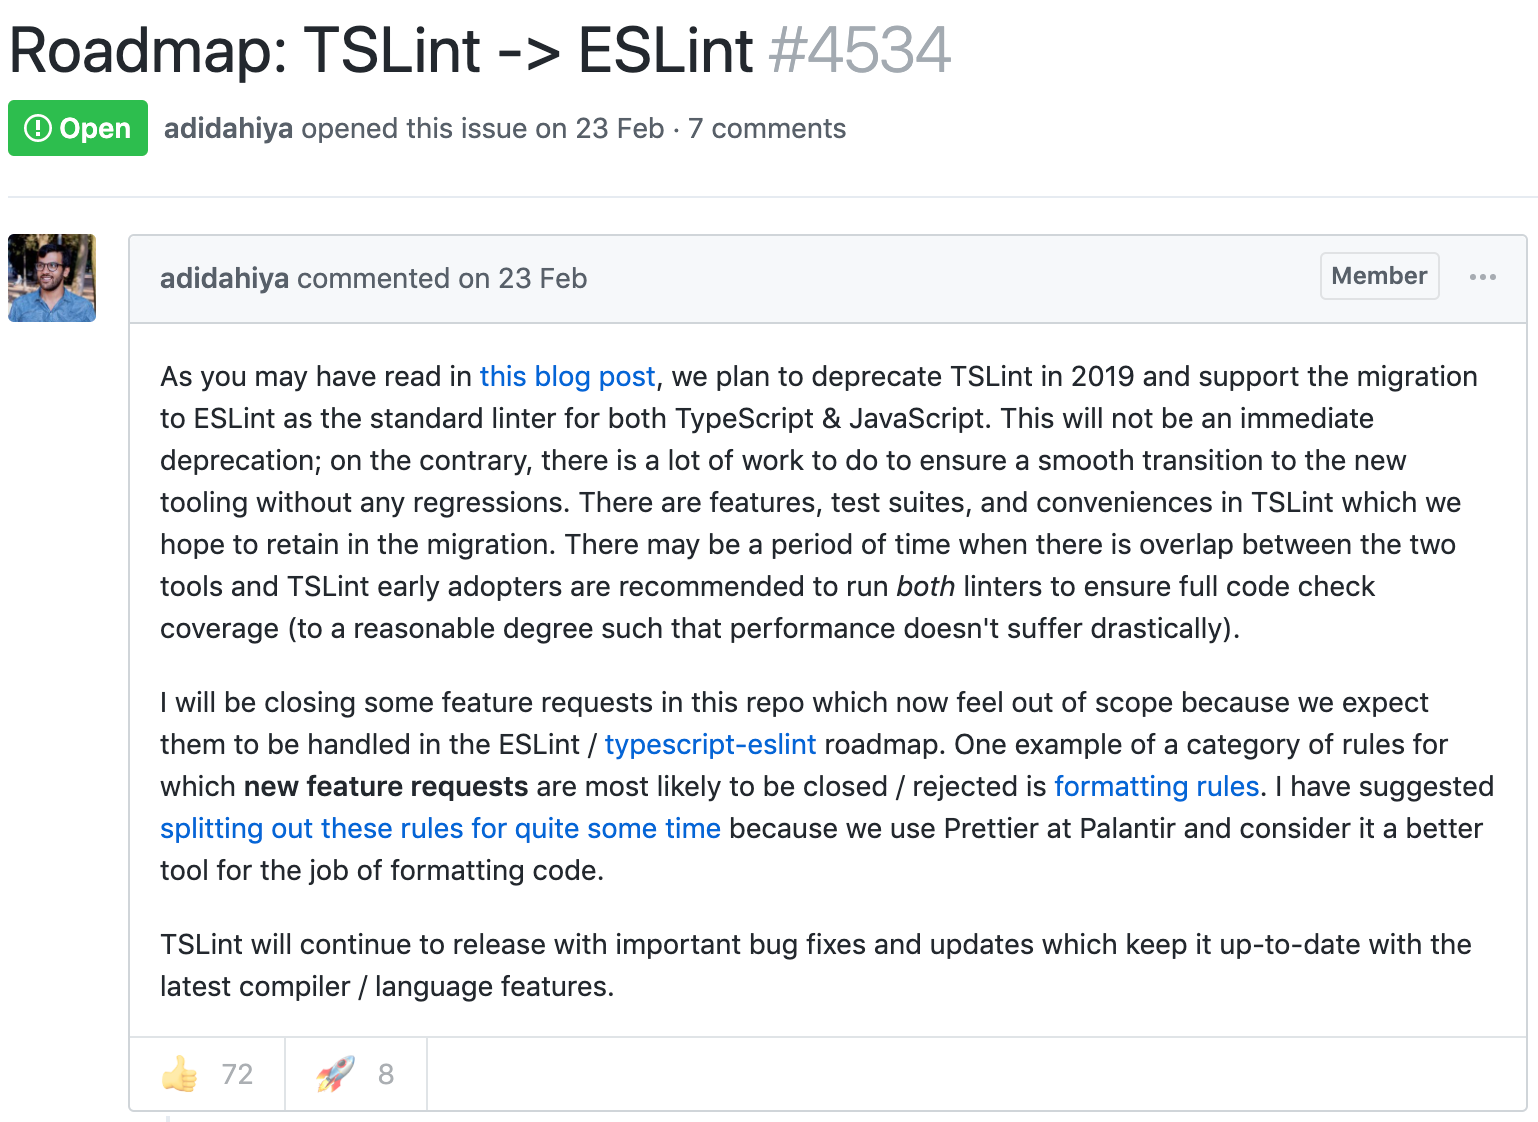
npm i --save-dev tslint tslint-reactTSLint will be deprecated some time in 2019. See this issue for more details: Roadmap: TSLint → ESLint.

So, in case if you are interested in migrating from
- tslint-react. Lint rules related to React & JSX for TSLint.
Adding Linter Configuration
Now, let’s configure our linter, TSLint, by adding a file called tslint.json at the root level (same as package.json) of your project.
Below follows the configuration that I am currently using in my CRA project. Feel free to copy and adjust the “rules” (on line 9) according to the needs of your project.
{
  "defaultSeverity": "error",
  "extends": [
    "tslint:recommended",
    "tslint-react",
    "tslint-config-prettier"
  ],
  "jsRules": {},
  "rules": {
    "jsx-no-lambda": false,
    "ordered-imports": false,
    "arrow-return-shorthand": true,
    "callable-types": true,
    "class-name": true,
    "comment-format": [
      true,
      "check-space"
    ],
    "curly": true,
    "eofline": true,
    "forin": true,
    "import-spacing": true,
    "interface-name" : false,
    "interface-over-type-literal": true,
    "label-position": true,
    "max-line-length": [
      true,
      140
    ],
    "member-access": false,
    "member-ordering": [
      true,
      {
        "order": [
          "static-field",
          "instance-field",
          "static-method",
          "instance-method"
        ]
      }
    ],
    "no-arg": true,
    "no-bitwise": true,
    "no-console": true,
    "no-construct": true,
    "no-debugger": true,
    "no-duplicate-super": true,
    "no-empty": false,
    "no-empty-interface": true,
    "no-eval": true,
    "no-inferrable-types": [
      true,
      "ignore-params"
    ],
    "no-misused-new": true,
    "no-non-null-assertion": true,
    "no-shadowed-variable": true,
    "no-string-literal": false,
    "no-string-throw": true,
    "no-switch-case-fall-through": true,
    "no-trailing-whitespace": true,
    "no-unnecessary-initializer": true,
    "no-unused-expression": true,
    "no-var-keyword": true,
    "object-literal-sort-keys": false,
    "one-line": [
      true,
      "check-open-brace",
      "check-catch",
      "check-else",
      "check-whitespace"
    ],
    "prefer-const": true,
    "quotemark": [
      true,
      "single",
      "jsx-double"
    ],
    "radix": true,
    "semicolon": [
      true,
      "always"
    ],
    "triple-equals": [
      true,
      "allow-null-check"
    ],
    "typedef-whitespace": [
      true,
      {
        "call-signature": "nospace",
        "index-signature": "nospace",
        "parameter": "nospace",
        "property-declaration": "nospace",
        "variable-declaration": "nospace"
      }
    ],
    "unified-signatures": true,
    "variable-name": false,
    "whitespace": [
      true,
      "check-branch",
      "check-decl",
      "check-operator",
      "check-separator",
      "check-type"
    ],
    "indent": [
      true,
      "spaces",
      2
    ],
    "trailing-comma": [
      true,
      {
        "multiline": "always",
        "singleline": "never"
      }
    ],
    "linebreak-style": [
      true,
      "LF"
    ],
    "typedef": [
      true,
      "call-signature",
      "parameter",
      "arrow-call-signature",
      "arrow-parameter",
      "property-declaration"
    ],
    "no-consecutive-blank-lines": true
  },
  "rulesDirectory": [],
  "linterOptions": {
    "exclude": [
      "config//*.js",
      "node_modules//*.ts",
      "coverage/lcov-report/*.js"
    ]
  }
}
Adding TypeScript-specific configuration
Another file that you have in your CRA-based project is tsconfig.json, which contains TypeScript-specific options for your project.
{
  "compilerOptions": {
    "outDir": "build/dist",
    "module": "esnext",
    "target": "es5",
    "lib": [
      "es6",
      "dom"
    ],
    "plugins": [
      {
        "name": "typescript-tslint-plugin"
      }
    ],
    "sourceMap": true,
    "allowJs": true,
    "jsx": "preserve",
    "moduleResolution": "node",
    "rootDir": "src",
    "forceConsistentCasingInFileNames": true,
    "noImplicitReturns": true,
    "noImplicitThis": true,
    "noImplicitAny": true,
    "importHelpers": true,
    "strictNullChecks": true,
    "suppressImplicitAnyIndexErrors": true,
    "noUnusedLocals": true,
    "skipLibCheck": true,
    "esModuleInterop": true,
    "allowSyntheticDefaultImports": true,
    "strict": true,
    "resolveJsonModule": true,
    "isolatedModules": true,
    "noEmit": true
  },
  "exclude": [
    "node_modules",
    "build",
    "scripts",
    "acceptance-tests",
    "webpack",
    "jest",
    "src/setupTests.ts"
  ],
  "include": [
    "src"
  ]
}
Also, there are tsconfig.prod.json and a tsconfig.test.json in case you want to make any tweaks to your production or test builds.
{
  "extends": "./tsconfig.json"
}
{
"extends": "./tsconfig.json",
"compilerOptions": {
"module": "commonjs"
}
}Add the rest of the dependencies
To make Prettier compatible with TSLint, install the tslint-config-prettier rule preset:
npm i --save-dev tslint-config-prettierUsage
Now, to actually lint your .ts and .tsx files, run tslint -c tslint.json 'src//*.{ts,tsx}' command in your terminal.
Additional plugins
In case you want to add tslint-plugin-prettier to your project, and it will run Prettier as a TSLint rule and report differences as individual TSLint issues.
npm i --save-dev tslint-plugin-prettierYou will then have to add few lines to the *TSLint *configuration file tslint.json like below:
{
  "extends": [
    "tslint:recommended",
    "tslint-react",
    "tslint-config-prettier"
  ],
  "rulesDirectory": [
    "tslint-plugin-prettier"
  ],
  "rules": {
    "prettier": true,
    "interface-name": false
  }
}
However, I did not try using it in my own project, so this is just additional info.
Finally
I created the following script in mypackage.json, and named it lint:ts. You can name it whatever you want.
"scripts": {

"lint:ts": "tslint 'src//*.{ts,tsx,js}'",

},
By adding this configuration you can now run linting on your project files in terminal like so:
➜ my-app git:(feature/new-feature) ✗ npm run lint:tsRunning this command and fixing errors (if any) before pushing your code to the repo will help you avoiding failed Jenkins builds. 👌 🎊
P.S. Check out my article on how to easily migrate from TSLint to ESLint Painless Migration from TSLint to ESLint for React with TypeScript *So, the project I am working on, our team is using React with Typescript, and TSLint to lint all the typescript code…*medium.com
Comments