
when we start development, we have lot of questions in mind related to what tools and what different library should be used.
Editor ?
Which one? Which plugins? Use built in terminal? Editor config
Module format ?
ES6 Modules, CommonJS…
HTML generation ?
Minify? Use plugin? Inject prod only concerns? Templating language?
Transpiling ?
Native ES or diff language? Use experimental features? Which plugins? Production vs dev config
Project structure ?
By file type or feature? Centralize API? Allow Inline JS? Extract to POJOs?
HTTP ?
Library Mock schema format Mock data generation Mock server
Production build ?
Minification Sourcemaps Bundle splitting Cache busting Error logging
Bundler ?
Webpack, Browserify, Rollup…
Linting ?
Which linter? Enable which rules? Warning or error? Which plugins? Use a preset?
Testing ?
Framework? Assertion Library? Helpers? Test file location? File naming? What environment? Mocking? Code Coverage Continuous Integration
Starter kits to speed up development, increase quality and reduce fatigue.
Lets talk about best practices and setup for fast development setup for developers.
- Selecting a JavaScript Editor
JavaScript Editors: What to Look For. Strong ES2015+ support
- **Autocompletion
- Parse ES6 imports
- Report unused imports
- Automated refactoring/Automated Consistency via Editorconfig
Framework intelligence Built in terminal**
EditorConfig helps developers define and maintain consistent coding styles between different editors and IDEs. The EditorConfig project consists of a file format for defining coding styles and a collection of text editor plugins that enable editors to read the file format and adhere to defined styles. EditorConfig files are easily readable and they work nicely with version control systems.
root = true
 [*]
 indent_style = space indent_size = 2
 end_of_line = lf
 charset = utf-8 trim_trailing_whitespace = true
 insert_final_newline = true
[*.md]
trim_trailing_whitespace =
false
Package Managers

Yarn, that claims to best npm at Dependency Management. Yarn is super-simple to install and use. It installs over npm, and replaces npm in you terminal. You can install it using Bash or npm or any other methods listed here.
curl -o- -L [https://yarnpkg.com/install.sh](https://yarnpkg.com/install.sh) | bashor
npm install --global yarnUsage is quite similar to npm
yarn                    # Install all dependencies from package.json
yarn install            # Alias for yarn
yarn init               # Initialize an npm repository
yarn add [package]      # Install npm package
yarn upgrade [package]  # Upgrade npm package
yarn remove [package]   # Uninstall npm package
Yet another dependency manager? Why use Yarn?
According to Facebook’s announcement, the immediate need for Yarn was the npm’s dependency on having an active internet connection, which broke down Continuous Integration on their offline Sandbox environments i.e. npm install doesn’t work if your Environment is offline.
Automation of Workflow & tasks
What’s Wrong with Gulp and Grunt?
Over time, I’ve noticed three core issues with task runners like Gulp and Grunt:
-
Dependence on plugin authors
-
Frustrating debugging
-
Disjointed documentation
Let’s consider each of these issues.
Dependence on Plugin Authors
When you’re working with new or unpopular technologies, no plugin may exist at all. And when a plugin exists, it may be outdated. For example, Babel 6 was recently released. The API changed significantly, so many Gulp plugins were incompatible with the latest version. When using Gulp, I was stuck because the Gulp plugin I needed wasn’t updated yet.
With Gulp or Grunt, you must wait for plugin maintainers to provide updates, or fix it yourself. This delays your ability to utilize new versions of modern tools. In contrast, when I use npm scripts, I consume tools directly without an extra layer of abstraction. This means when new versions of Mocha, Istanbul, Babel, Webpack, Browserify and so on are released, I’m able to utilize the new versions immediately.
In terms of selection, nothing beats npm:
 Gulp has ~2,100 plugins. Grunt has ~5,400. npm offers over 227,000 packages, growing at a rate of 400+ daily.
When you use npm scripts, you don’t search for a Grunt or Gulp plugin. You choose from over 227,000 npm packages.
Transpilers

Transpilers, or source-to-source compilers, are tools that read source code written in one programming language, and produce the equivalent code in another language. Languages you write that transpile to JavaScript are often called compile-to-JSlanguages, and are said to target JavaScript.
Oh, and, even though people tend to use “compile/r” and “transpile/r” interchangeably, I’ll prefer the latter term in this article.
Babel has the ability to dish out verbose outputs in human readable form, thus making it easier to debug your code. The tool also has a wide variety of plugins available for it. Some of the important plugins that you might find yourself using are: ES2015, ES2016, ES2017 and React. Babel also has a plugin set known as “latest” which is updated regularly with all possible tools that one might need to keep up with the latest innovations in JS.
Simply put,
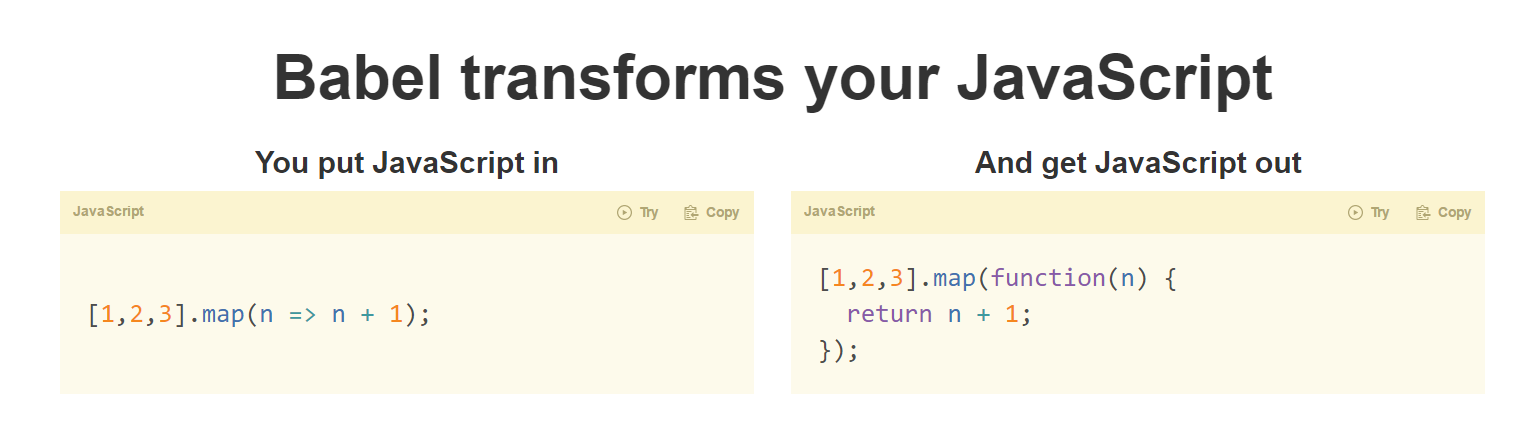
There are many great ES6 features that you can now write in your code. Babel will convert it, so it can be supported by the latest browsers.
I will be writing articles about these ES6 features, which are a big improvement over the common ES5 features supported at this time.
Development setup for Front End : all about tools & editors-part-02

Lets talk about transpilation for you code
Transpilers, or source-to-source compilers, are tools that read source code written in one programming language, and produce the equivalent code in another language. Languages you write that transpile to JavaScript are often called compile-to-JS languages, and are said to target JavaScript
List of languages that compile to JS
jashkenas/coffeescript coffeescript — Unfancy JavaScriptgithub.com

TypeScript Enhanced Autocomplete, Enhanced readability, Safer refactoring Additional non-standard features Babel Write standardized JS Leverage full JS Ecosystem Use experimental features earlier No type defs, annotations required ES6 imports are statically analyzable Test, Lint, Babel, Great libs, IDE = safety
ECMAScript 2015 (also known as ES 2015 or ES6) is the current version of JavaScript, and its biggest update till date. It comes with a number of language improvements and API updates to make JavaScript developers more productive. The specification of the language was frozen in June 2015. Browsers have started implementing the new features, although they still need some time to implement all the features. Meanwhile, as we saw in previous articles on ES6, transpilers have filled in the gaps and have allowed us to use these new features, till the browsers implement them all.
Transpiling using Babel
Babel can be used to transpile the JavaScript code through its command line interface (CLI) or can be used as part of the JavaScript build tools like npm scripts, Gulp and Grunt. We will see how to transpile using Babel through command line and using Gulp.
Using Babel CLI
To use Babel through command line from any folder in the system, we need to install the global npm package of Babel. The global package has to be used only to play around with the features of the tool. To use it in a project that is being built by a team of people, we should install it in the project. We will see both of these use cases.
Using Global Babel Package
To install Babel globally, we need to use the following command:
npm install –g babel-cli
To check if Babel is installed properly, you can run the following command to check the version of Babel package installed on your system:
babel –V
If this command is unsuccessful, you need to try installing Babel again. Once Babel is installed, we can use the command with different options to transpile the JavaScript code.
To transpile a single file, you can pass name of the file to the Babel command:
babel script.js
This command transpiles the code in script.js file and displays result in the console. If you want to save the output of this command into a file, you need to use the — out-file option of the Babel command and provide a path of the target file.
babel script.js --out-file script-transpiled.js
This command doesn’t convert the ES6 code to ES5. To do so, we need to install the ES2015 preset of Babel and make it available to Babel through its configuration file, .babelrc. Babel’s ES2015 preset contains all of the plugins required to convert every new API and feature of ES6 to its ES5 equivalent. You can see the list of plugins installed with the ES2015 preset on this page. The preset is an npm package, we can install it using the following command:
npm install babel-preset-es2015 –save-dev
We need to store the configuration required for Babel in a file named .babelrc. The following JSON snippet shows how the preset has to be loaded:
{presets: ["es2015"]}
Next up: Let’s set up a bundler!
When working on a project, you may wonder why all the modern machinery and tooling is needed.
What are tools like Webpack and SystemJS doing? Or what do AMD, UMD or CommonJS mean? How do they relate to each other? And why do you need them at all?
So let’s get started to understand module pattern and module system.
What is a module?
A module is a reusable piece of code that encapsulates implementation details and exposes a public API so it can be easily loaded and used by other code.
Why do we need modules?
Modules are a pattern that developers have been using in many different forms and programming languages since the 60’s and 70's.
In JavaScript, modules should ideally allow us to:
-
abstract code: to delegate functionality to specialised libraries so that we don’t have to understand the complexity of their actual implementation
-
encapsulate code: to hide code inside the module if we don’t want the code to be changed
-
manage dependencies: to easily change dependencies without rewriting our code
Module patterns in ES5
EcmaScript 5 and earlier editions were not designed with modules in mind. Over time, developers came up with different patterns to simulate modular design in JavaScript.
To give you an idea of what some of these patterns look like, let’s quickly look at 2 easy ones: Immediately Invoked Function Expressions and Revealing Module.
Immediately Invoked Function Expression (IIFE)
(function(){
  // ...
})()
An Immediately Invoked Function Expression (IIFE) is an anonymous function that is invoked when it is declared.
Notice how the function is surrounded by parentheses. In JavaScript, a line starting with the word function is considered as a function declaration:
// Function declaration
function(){
  console.log('test');
}
Immediately invoking a function declaration throws an error:
// Immediately Invoked Function Declaration
function(){
  console.log('test');
}()

// => Uncaught SyntaxError: Unexpected token )
Putting parentheses around the function makes it a function expression:
// Function expression
(function(){
  console.log('test');
})

// => returns function test(){ console.log('test') }
The function expression returns the function, so we can immediately call it:
// Immediately Invoked Function Expression
(function(){
  console.log('test');
})()

// => writes 'test' to the console and returns undefined
Immediately Invoked Function Expressions allow us to:
-
encapsulate code complexity inside IIFE so we don’t have to understand what the IIFE code does
-
define variables inside the IIFE so they don’t pollute the global scope (varstatements inside the IIFE remain within the IIFE's closure)
but they don’t provide a mechanism for dependency management.
Revealing Module pattern
The Revealing Module pattern is similar to an IIFE, but we assign the return value to a variable:
// Expose module as global variable
var singleton = function(){

// Inner logic
  function sayHello(){
    console.log('Hello');
  }

// Expose API
  return {
    sayHello: sayHello
  }
}()
Notice that we don’t need the surrounding parentheses here because the word functionis not at the beginning of the line.
We can now access the module’s API through the variable:
// Access module functionality
singleton.sayHello();
// => Hello
Instead of a singleton, a module can also expose a constructor function:
// Expose module as global variable
var Module = function(){

// Inner logic
  function sayHello(){
    console.log('Hello');
  }

// Expose API
  return {
    sayHello: sayHello
  }
}
Notice how we don’t execute the function at declaration time.
Instead, we instantiate a module using the Module constructor function:
var module = new Module();to access its public API:
module.sayHello();
// => Hello
The Revealing Module pattern offers similar benefits as an IIFE, but again does not offer a mechanism for dependency management.
So for dependency management and to see other things we need to go outside

Some of the most widely adapted and well known formats are:
-
Asynchronous Module Definition (AMD)
-
CommonJS
-
Universal Module Definition (UMD)
-
System.register
-
ES6 module format
Next comes Loader who load specific Formate of Module
Module loaders
A module loader interprets and loads a module written in a certain module format.
A module loader runs at runtime:
-
you load the module loader in the browser
-
you tell the module loader which main app file to load
-
the module loader downloads and interprets the main app file
-
the module loader downloads files as needed
If you open the network tab in your browser’s developer console, you will see that many files are loaded on demand by the module loader.
In daily code we are writing and using these different modules like common js with require and import export with ES6 modules.

A few examples of popular module loaders are:
-
***RequireJS***: loader for modules in AMD format
-
***SystemJS***: loader for modules in AMD, CommonJS, UMD or System.register format
Similarly we have webpack browserify Rollup and JSPM
lets use Transpiler & Bundler together
we can use webpack and loader to load ES6 or common js modules & to manage dependancies. tkssharma/ng-react-redux-immutable ng-react-redux-immutable — react redux app with immutable jsgithub.com
In this webpack config we are using babel-loader to transpiler es6 code to es5. Babel will tak action on all .js files to transpile them to es5 code so here we are using webpack as bundler and babel as transpiler.
How to integrate Eslint & Prettier in React
Bouns Tips
You can install extensions in your favourite IDE or code editor to highlight the eslint error and auto format the code accordingly to the rules you set.
My favourite is code editor is Visual Studio Code and this is how you can setup vscode.
Extensions
First thing first to add support for Eslint and Prettier, you need to install below two extensions.
Install Eslint and Prettier
Second thing to do is installation so run below commands!
Eslint, it’s configuration by Airbnb and it’s required packages…
npm i -D eslint eslint-config-airbnb eslint-plugin-import eslint-plugin-jsx-a11y eslint-plugin-reactPrettier, it’s configuration to avoid conflict with Eslint and it’s required packages…
npm i -D prettier eslint-config-prettier eslint-plugin-prettierNow to stop letting user committing 💩 into the repository we will install below packages.
package json will look like
"babel-eslint": "^10.0.1",
"cli-glob": "^0.1.0",
"eslint": "^6.0.1",
"eslint-config-airbnb": "^17.1.0",
"eslint-config-prettier": "6.0.0",
"eslint-plugin-import": "^2.16.0",
"eslint-plugin-jsx-a11y": "^6.2.1",
"eslint-plugin-react": "^7.12.4",
"prettier": "^1.16.4",
Prettier uses cosmiconfig for configuration file support. This means you can configure prettier via (in order of precedence):
-
A "prettier" key in your package.json file.
-
A .prettierrc file, written in JSON or YAML, with optional extensions: .json/.yaml/.yml (without extension takes precedence).
-
A .prettierrc.js or prettier.config.js file that exports an object.
-
A .prettierrc.toml file, written in TOML (the .toml extension is required).
The configuration file will be resolved starting from the location of the file being formatted, and searching up the file tree until a config file is (or isn’t) found.
The options to the configuration file are the same as the API options.
module.exports = {
  "arrowParens": "avoid",
  "bracketSpacing": true,
  "endOfLine": "lf",
  "htmlWhitespaceSensitivity": "css",
  "jsxBracketSameLine": false,
  "printWidth": 80,
  "proseWrap": "preserve",
  "requirePragma": false,
  "semi": true,
  "singleQuote": true,
  "tabWidth": 2,
  "trailingComma": "all",
  "useTabs": false,
  "overrides": [
    {
      "files": "*.json",
      "options": {
        "printWidth": 200
      }
    }
  ]
}
Now our final configuration can be eslint or tslint based on our needs
ESLint is a tool for identifying and reporting on patterns found in ECMAScript/JavaScript code, with the goal of making code more consistent and avoiding bugs. In many ways, it is similar to JSLint and JSHint with a few exceptions:
-
ESLint uses Espree for JavaScript parsing.
-
ESLint uses an AST to evaluate patterns in code.
-
ESLint is completely pluggable, every single rule is a plugin and you can add more at runtime.
Installation and Usage
Prerequisites: Node.js (^8.10.0, ^10.13.0, or >=11.10.1) built with SSL support. (If you are using an official Node.js distribution, SSL is always built in.)
You can install ESLint using npm or yarn:
npm install eslint --save-dev

# or

yarn add eslint --dev
You should then set up a configuration file:
$ npx eslint --initAfter that, you can run ESLint on any file or directory like this:
$ npx eslint yourfile.jsIt is also possible to install ESLint globally rather than locally (using npm install eslint --global). However, this is not recommended, and any plugins or shareable configs that you use must be installed locally in either case.
module.exports = {
  env: {
    browser: true,
    commonjs: true,
    es6: true,
    mocha: true,
  },
  parser: 'babel-eslint',
  extends: [
    'eslint:recommended',
    //  'plugin:import/errors',
    'plugin:react/recommended',
    //'plugin:jsx-a11y/recommended',
    'prettier',
    'prettier/react',
  ],
  // extending recommended config and config derived from eslint-config-prettier
  parserOptions: {
    sourceType: 'module',
    ecmaVersion: 7,
    allowImportExportEverywhere: true,
    ecmaFeatures: {
      jsx: true,
      objectLiteralDuplicateProperties: false,
      experimentalObjectRestSpread: true,
    },
  },
  plugins: ['prettier', 'react'],
  globals: {
    Atomics: 'readonly',
    SharedArrayBuffer: 'readonly',
  },
  rules: {
    'react/prop-types': 0,
    'no-console': 'warn',
    'react/prop-types': 0,
    'prettier/prettier': [
      'error',
      {
        singleQuote: true,
        trailingComma: 'all',
      },
    ],
  },
};
You can use eslint + prettierrc with any tools if you are using typescript replace eslint with tslint and it works.
Comments