
SvelteKit Pokemon App Step by Step
- Github : https://github.com/tkssharma/lets-play-with-sveltejs
- Playlist : https://www.youtube.com/watch?v=lxzyI4WoffM&list=PLT5Jhb7lgSBMqIuNda0gGNEiMS-ahGJM1
Lets start from beginning
create-svelte
Everything you need to build a Svelte project, powered by create-svelte;
Creating a project
If you're seeing this, you've probably already done this step. Congrats!
### create a new project in the current directory
npm init svelte@next

### create a new project in my-app
npm init svelte@next my-app
Note: the
@nextis temporary
Developing
Once you've created a project and installed dependencies with npm install (or pnpm install or yarn), start a development server:
npm run dev

### or start the server and open the app in a new browser tab
npm run dev -- --open
Building
Before creating a production version of your app, install an adapter for your target environment. Then:
npm run buildYou can preview the built app with
npm run preview, regardless of whether you installed an adapter. This should not be used to serve your app in production.
We can see the initial folder structure and routing based on pages, Now first thing we will do is extracting data from apis and store that in Svelte JS Store
import { writable } from 'svelte/store';
export const pokemon = writable([]);
const pokemonDetails = {};
let loaded = false;
export const fetchPokemon = async () => {
if (loaded) return;
const url = `https://pokeapi.co/api/v2/pokemon?limit=150`;
const res = await fetch(url);
const data = await res.json();
const loadedPokemon = data.results.map((data, index) => ({
name: data.name,
id: index + 1,
image: `https://raw.githubusercontent.com/PokeAPI/sprites/master/sprites/pokemon/${index + 1}.png`,
}));
pokemon.set(loadedPokemon);
loaded = true;
};
export const getPokemonById = async (id) => {
if (pokemonDetails[id]) return pokemonDetails[id];
try {
const url = `https://pokeapi.co/api/v2/pokemon/${id}`;
const res = await fetch(url);
const data = await res.json();
pokemonDetails[id] = data;
return data;
} catch (err) {
console.error(err);
return null;
}
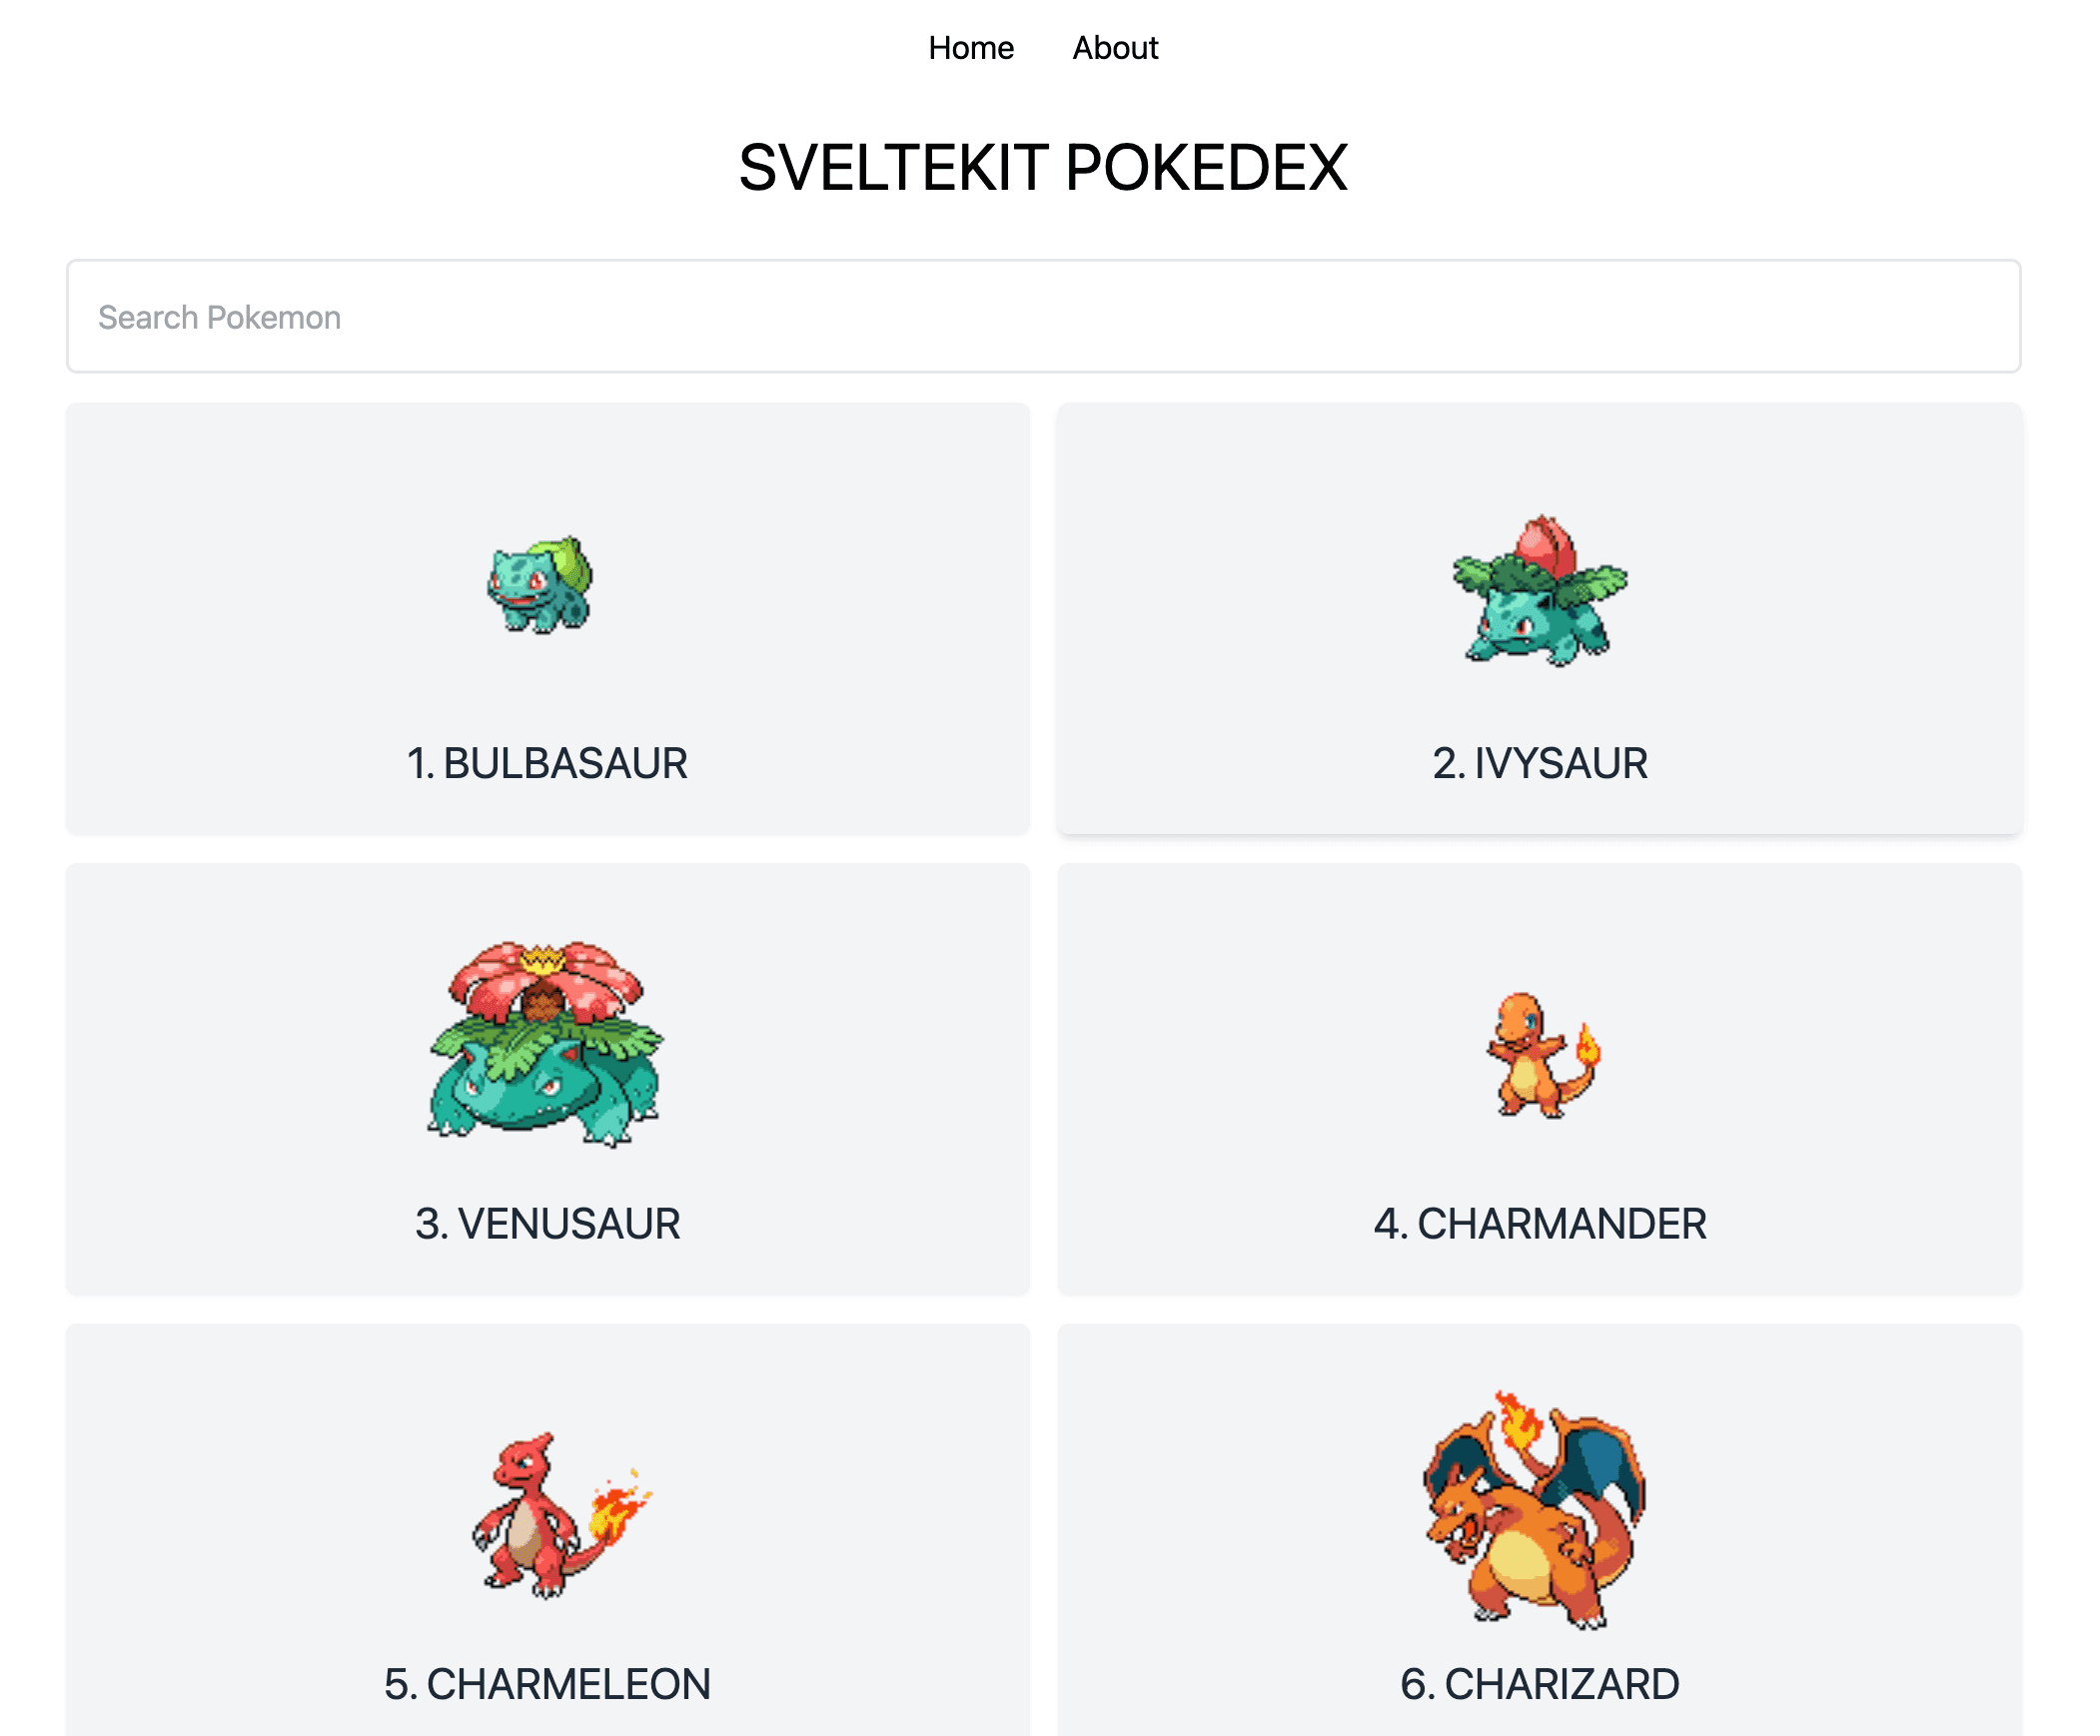
};Lets build our root components where we can use the list of all pokemons and render then on UI and also allow user to search pokemon based on names
// index.svelte
<script>
import PokemanCard from "../components/pokemanCard.svelte";
import {pokemon, fetchPokemon} from "../pokestore";
let searchTerm = "";
let filteredPokemon = [];
$: {
    if(searchTerm){
        filteredPokemon = $pokemon.filter( pokeman => pokeman.name.toLowerCase().includes(searchTerm.toLowerCase()));
    }
    else {
        filteredPokemon = [...$pokemon];
    }
}
fetchPokemon();
</script>
<svelte:head>
	<title>Pokedex</title>
</svelte:head>

<h1 class="text-4xl text-center my-8 uppercase">SvelteKit Pokedex</h1>
<input class="w-full rounded-md text-lg p-4 border-2 border-gray-200" bind:value={searchTerm} placeholder="Search Pokemon">
<div class="py-4 grid gap-4 md:grid-cols-2 grid-cols-1">

    {#each filteredPokemon as pokeman}
            <PokemanCard pokeman={pokeman}/>
    {/each}
</div>- In above example we are getting list from writable store
- Added input field on UI to search pokemon based on name
- rendering all pokemons by rendering on all list from store
we also have simple layout which will be root of all components
// src/routes/__layout.svelte
<script>
import Nav from "../components/nav.svelte";
</script>
<div class="p-8 max-w-6xl mx-auto">
    <Nav/>
    <slot>
    </slot>
</div>
<style>
@tailwind base;
@tailwind components;
@tailwind utilities;
</style>
For routing now we have to create child router to redner individual pokemon info src/routes/pokemon/[id].svelte
we can create file [id].svelte in src/routes/pokemon directory
<script context="module">
    import { getPokemonById } from "../../pokestore";
    export async function load({ params}) {
        let id = params.id;
        const pokeman = await getPokemonById(id);
        return { props: { pokeman }}
    }
</script>
<script>
    export let pokeman;
    const type = pokeman.types[0].type.name;
</script>
<svelte:head>
	<title>Pokedex - {pokeman.name}</title>
</svelte:head>

<div class="flex flex-col items-center">

    <h1 class="text-4xl text-center my-8 uppercase">{pokeman.name}</h1>
    <p>Type: <strong>{type}</strong> | Height: <strong>{pokeman.height}</strong>
        | Weight: <strong>{pokeman.weight}</strong>
    </p>
    <img class="card-image" src={pokeman.sprites['front_default']}
    alt={pokeman.name}
    />
</div>
This example talks about how we extract path param and get that one pokemon data
<script context="module">
    import { getPokemonById } from "../../pokestore";
    export async function load({ params}) {
        let id = params.id;
        const pokeman = await getPokemonById(id);
        return { props: { pokeman }}
    }
</script>
We can create few components which we needed like pokemonCard component, we would need this to show list of pokemons using cards
<script>
import { fade } from 'svelte/transition';
export let pokeman;

</script>
<a class="list-none p-6 bg-gray-100 text-gray-800 text-center rounded-md shadow-sm hover:shadow-md flex flex-col items-center" href={`/pokemon/${pokeman.id}`} transition:fade>
    <img class="h-40 w-40 " src={pokeman.image} alt={pokeman.name}/>
    <h2 class="uppercase text-2xl">{pokeman.id}. {pokeman.name}</h2>
</a>
Conclusion
We build this application to learn how svelte js routing works and how to build basic application using sveltekit
Comments