
Nest js with AWS Dynamo DB using dynamoose 🚀🚀
What is DynamoDB?
DynamoDB is a hosted NoSQL database offered by Amazon Web Services (AWS). It offers:
reliable performance even as it scales; a managed experience, so you won't be SSH-ing into servers to upgrade the crypto libraries; a small, simple API allowing for simple key-value access as well as more advanced query patterns. DynamoDB is a particularly good fit for the following use cases:
Applications with large amounts of data and strict latency requirements. As your amount of data scales, JOINs and advanced SQL operations can slow down your queries. With DynamoDB, your queries have predictable latency up to any size, including over 100 TBs!
Serverless applications using AWS Lambda. AWS Lambda provides auto-scaling, stateless, ephemeral compute in response to event triggers. DynamoDB is accessible via an HTTP API and performs authentication & authorization via IAM roles, making it a perfect fit for building Serverless applications.
Data sets with simple, known access patterns. If you're generating recommendations and serving them to users, DynamoDB's simple key-value access patterns make it a fast, reliable choice.
On aws we may want to use Dynamo for our APIs
Lets see how we can do this with nestjs
for Other database like SQL we always use some kind of ORM to deal with database like
- knex
- typeorm
- sequelize
and may be some other ORM, now we are talking here about AWS managed solution Dynamo DB so we don't have pre installed local setup fpr this we have to access AWS managed database only from AWS account.
Some simple javascript solution provided by data mapper library using which we can query dynamo Table
We can setup new nestjs app
Setting up a new project is quite simple with the Nest CLI. With npm installed, you can create a new Nest project with the following commands in your OS terminal:
$ npm i -g @nestjs/cli
$ nest new project-name
The project-name directory will be created, node modules and a few other boilerplate files will be installed, and a src/ directory will be created and populated with several core files.
AWS DynamoDB ORM (Dynamoose) with Node.js #1
In this article, I will show you how to make CRUD operations with Dynamoose on DynamoDB. Let’s do it😎
Dynamodb
DynamoDB is a NoSQL database offered and hosted by AWS.
Before starting, I will talk about DynamoDB with an ORM package. If you wanna use native functions without any package, you can reach the official documentation of DynamoDB and Node.js
As I said at the start of this article, we will talk about how can we make CRUD operations with Dynamoose. Let’s explain the CRUD for those who don’t know.
- Create
- Read
- Update
- Delete
It is not an acrostic poem 😒Those are the names of the database operations as you know. But I nevertheless wanted to remind you.
Installing
npm install dynamoose
I suppose that you stored your AWS credentials in your .env file
After the installation, you should import the package and declare your credentials in your file. Like this;
const dynamoose = require(“dynamoose”);
let AWS_ACCESS_KEY_ID = process.env.AWS_ACCESS_KEY_ID;
let AWS_SECRET_ACCESS_KEY = process.env.AWS_SECRET_ACCESS_KEY;
let AWS_REGION = process.env.AWS_REGION;]
dynamoose setup
After then we have to pass our credentials to dynamoose
dynamoose.aws.sdk.config.update({
accessKeyId: AWS_ACCESS_KEY_ID,
secretAccessKey: AWS_SECRET_ACCESS_KEY,
region: AWS_REGION,
})]
dynamoose config
If you used Mongoose or Sequelize you can know the schema approach.
The schema represents the structure of each row of a table. Let’s define a schema and create a table using this schema.
const dynamoose = require("dynamoose");

const schema = new dynamoose.Schema({
    "id": String,
    "age": Number
}, {
    "saveUnknown": true,
    "timestamps": true
});
example
import * as dynamoose from "dynamoose";
import {Document} from "dynamoose/dist/Document";

// Strongly typed model
class Cat extends Document {
    id: number;
    name: string;
}
const CatModel = dynamoose.model<Cat>("Cat", {"id": Number, "name": String});

// Will raise type checking error as random is not a valid field.
CatModel.create({"id": 1, "random": "string"});

// Will return the correct type of Cat
const cat = await CatModel.get(1);
const UserSchema = new dynamoose.Schema({
id:{
type: String,
hashKey: true
},
name: {
type: String,
required: true
},
username: {
type: String,
required: true
},
password: {
type: String,
required: true
},
phone: {
type: String,
required: true
},
role: {
type: String,
required: true
}
});const User = dynamoose.model(“User”, U)
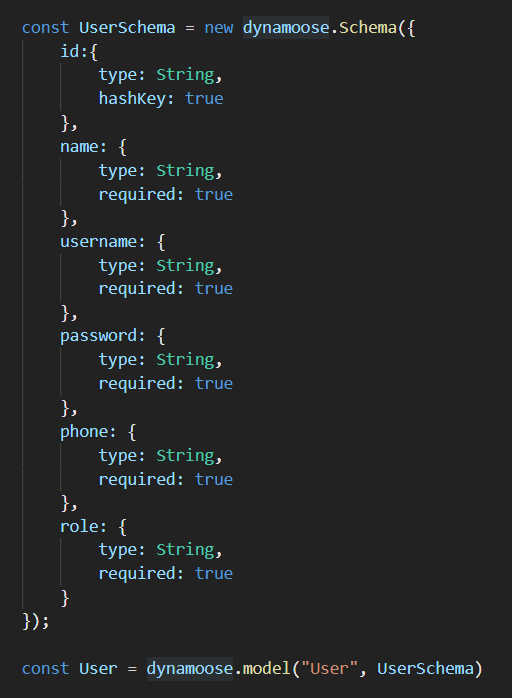
Define a schema and table Dynamoose
We will use the User constant, which refers to the user table from Dynamoose.
Create a new record (Insert) ➕
let newUser = new User({  name,  username,  password,  phone,  role  });
return newUser.save();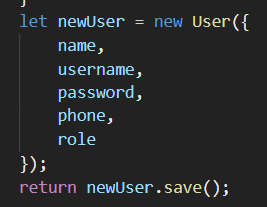
dynamoose insert
When the save() method run, the insertion process is performed.
Update a record 🔃

dynamoose update by primary key
update functions the first argument is the primary key of the record. And the second argument is the updated data of the record. These functions return a promise.
Delete a record ❌

dynamoose delete by primary key
Get a record 🗞️

dynamoose get one row by primary key
Using the ‘where’ with a condition
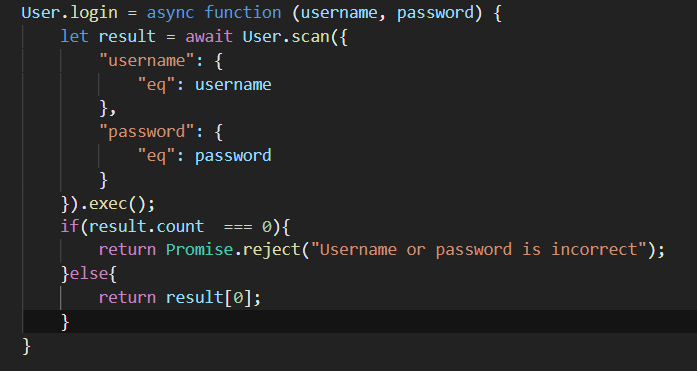
Let’s examine this login function 👌
User.login = async function (username, password) {
let result = await User.scan({
“username”: {
“eq”: username
},
“password”: {
“eq”: password
}
}).exec();
if(result.count === 0){
return Promise.reject(“Username or password is incorrect”);
}else{
return result[0];
}
}
Query a Model example
Cat.query("name").eq("Will").exec((error, results) => {
    if (error) {
        console.error(error);
    } else {
        console.log(results);
        // [ Document { name: 'Will', breed: 'Terrier', id: 1 },
        //   lastKey: undefined,
        //   count: 1,
        //   queriedCount: 2,
        //   timesQueried: 1 ]
        console.log(results[0]); // { name: 'Will', breed: 'Terrier', id: 1 }
        console.log(results.count); // 1
        console.log(Array.isArray(results)); // true
        console.log(results.scannedCount); // 2
    }
});
scan a model example
Cat.scan().exec((error, results) => {
    if (error) {
        console.error(error);
    } else {
        console.log(results);
        // [ Document { name: 'Will', breed: 'Terrier', id: 1 },
        //   lastKey: undefined,
        //   count: 1,
        //   scannedCount: 2,
        //   timesScanned: 1 ]
        console.log(results[0]); // { name: 'Will', breed: 'Terrier', id: 1 }
        console.log(results.count); // 1
        console.log(Array.isArray(results)); // true
        console.log(results.scannedCount); // 2
    }
});
The example login function on the User model with Dynamoose
As you can see, the scan function takes one argument and this argument includes the condition. And eq means equal. and, or etc. you can use. 🎯
Setting up locally
This function is used to set the AWS.DynamoDB() instance to use the a local endpoint as opposed to the production instance of DynamoDB. By default the endpoint used will be http://localhost:8000. You can pass in a string for the endpoint parameter to change what endpoint will be used.
dynamoose.aws.ddb.local();
dynamoose.aws.ddb.local("http://localhost:9000");
Comments