
Using Amazon MQ with NestJS micro-services
Hi there! Let’s discuss how we can simply create a micro-service using NestJS and implement Amazon MQ to communicate with them. Rather than discuss about concepts etc. this article is focused on implementation of this method. Therefore, it has been simplified into several steps.
Step 01 - Creating Amazon MQ
In order to create an Amazon MQ, you had to have a aws account. You can simply navigate to the aws console and search for Amazon MQ
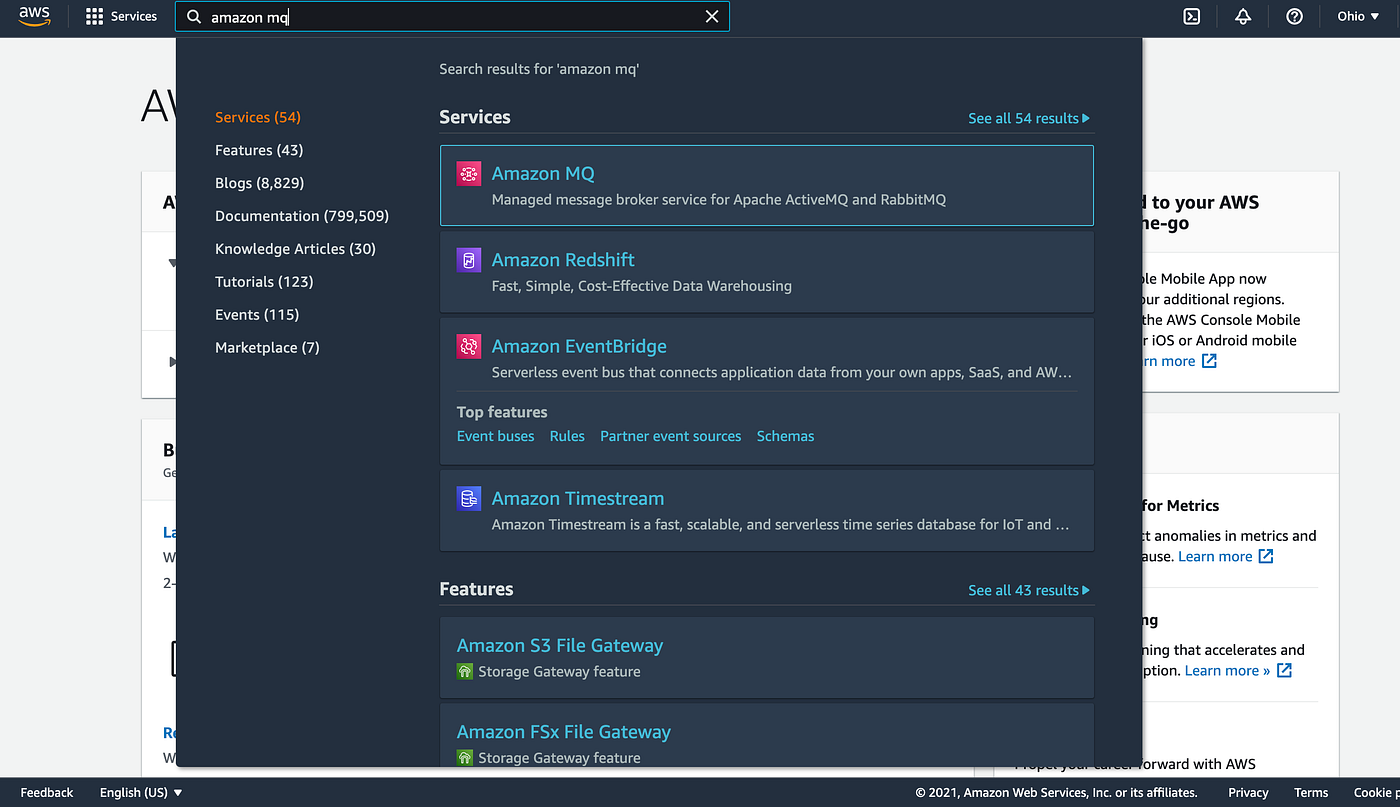
amazon mq
When you navigate inside that directory. you can click on get started. Once you do that you have to choose between Apache ActiveMQ and RabbitMQ. For this one we are sticking with RabbitMQ.
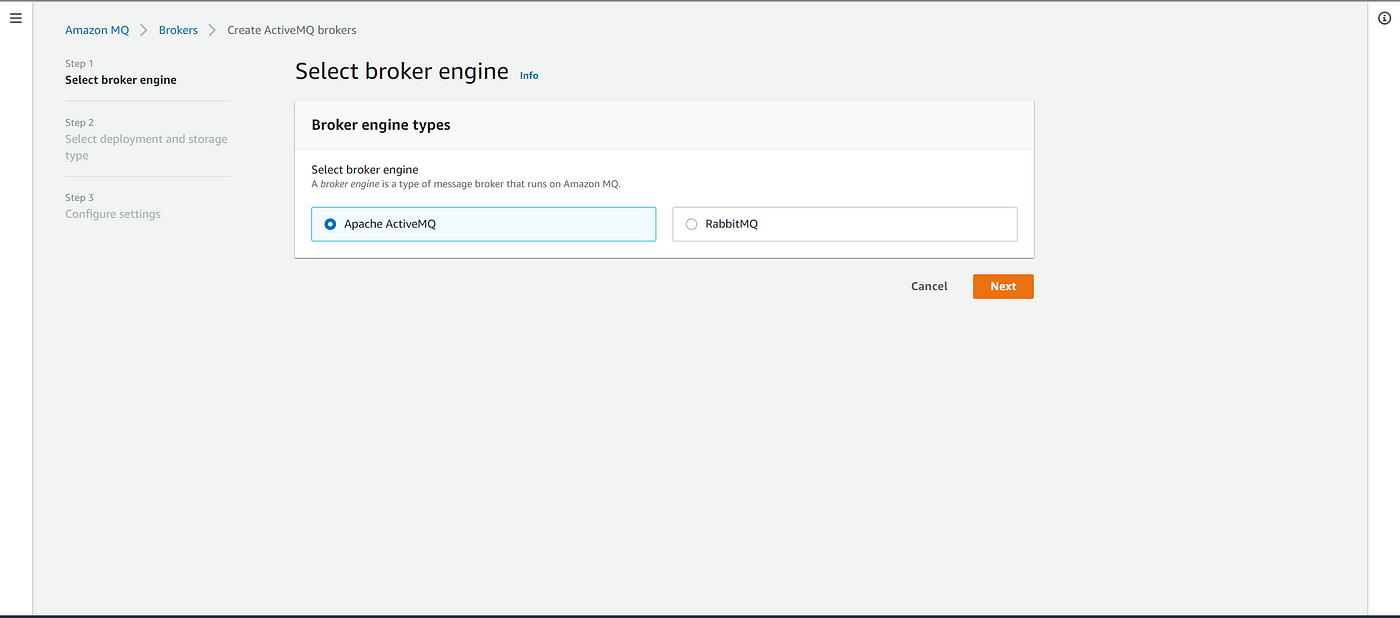
select broker type
Then you can select between single instance broker and cluster deployment. While cluster deployment considered to be the industry standard we are going to select single instance broker mainly because it is the facility provided without any additional charges in the free tier.

select deployment type
Then you have to implement several details in order to create the message broker inside Amazon MQ. First enter a name for the broker. Then change broker instance type to mq.t3.micro. After that implement a username and password to create a RabbitMQ user to access the messaging queue. You can keep the rest in default and click next.

authentication details
You can review the entered details in the very next page and if you are satisfied with the details you can go ahead and click on create broker. Once created you can see the endpoint for the MQ service under the topic of endpoint. You will need this endpoint alongside with implemented username, password and broker name to access service from NestJS.
Step 02 — Configuring NestJS application for micro-services
Next step is to create two NestJS applications to act as client and micro-service. To do that first you have to install the nest CLI in your machine. Check here to find more about that =https://docs.nestjs.com/cli/overview
To create the application we run below commands in command line.
nest new microservice-exampleOnce you run the command you have to select the package manager. I prefer yarn for this. Once the application is created you have to setup an .env file on the root directory with following keys,
RABBITMQ_USER=your user name

RABBITMQ_PASSWORD=your password

RABBITMQ_HOST=your host

RABBITMQ_QUEUE_NAME=your queue name
Implement the saved values from amazon MQ for these keys. Using RabbitMQ with microservices in NestJS is straightforward, thanks to the transporter built into the NestJS framework. We need to install some additional dependencies, though.
yarn add amqplib amqp-connection-manager
Then you have to configure the main.ts as a micro service,
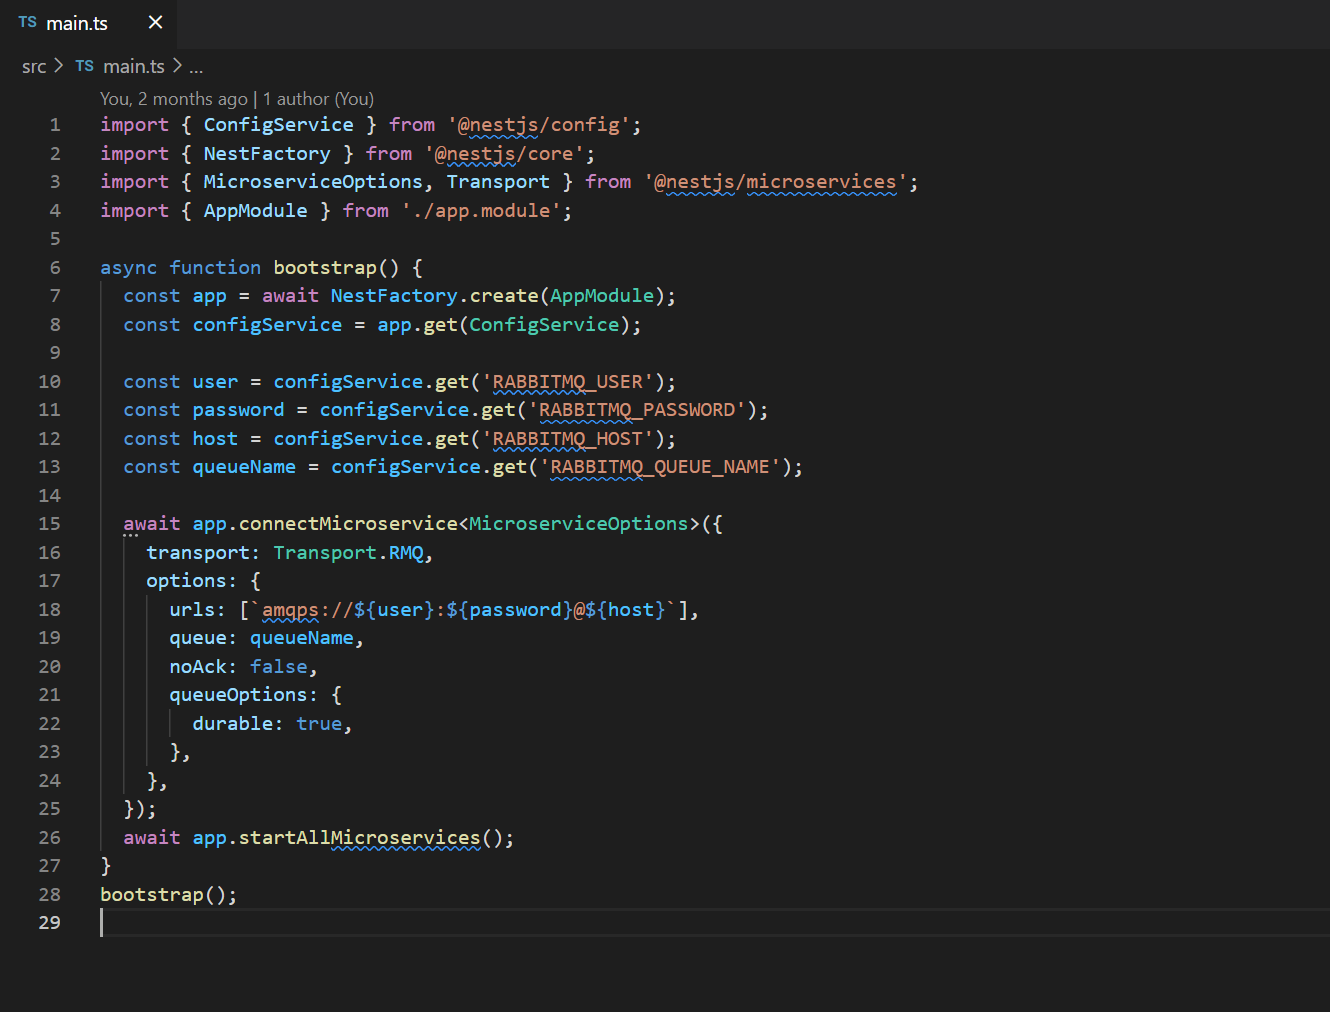
main.ts
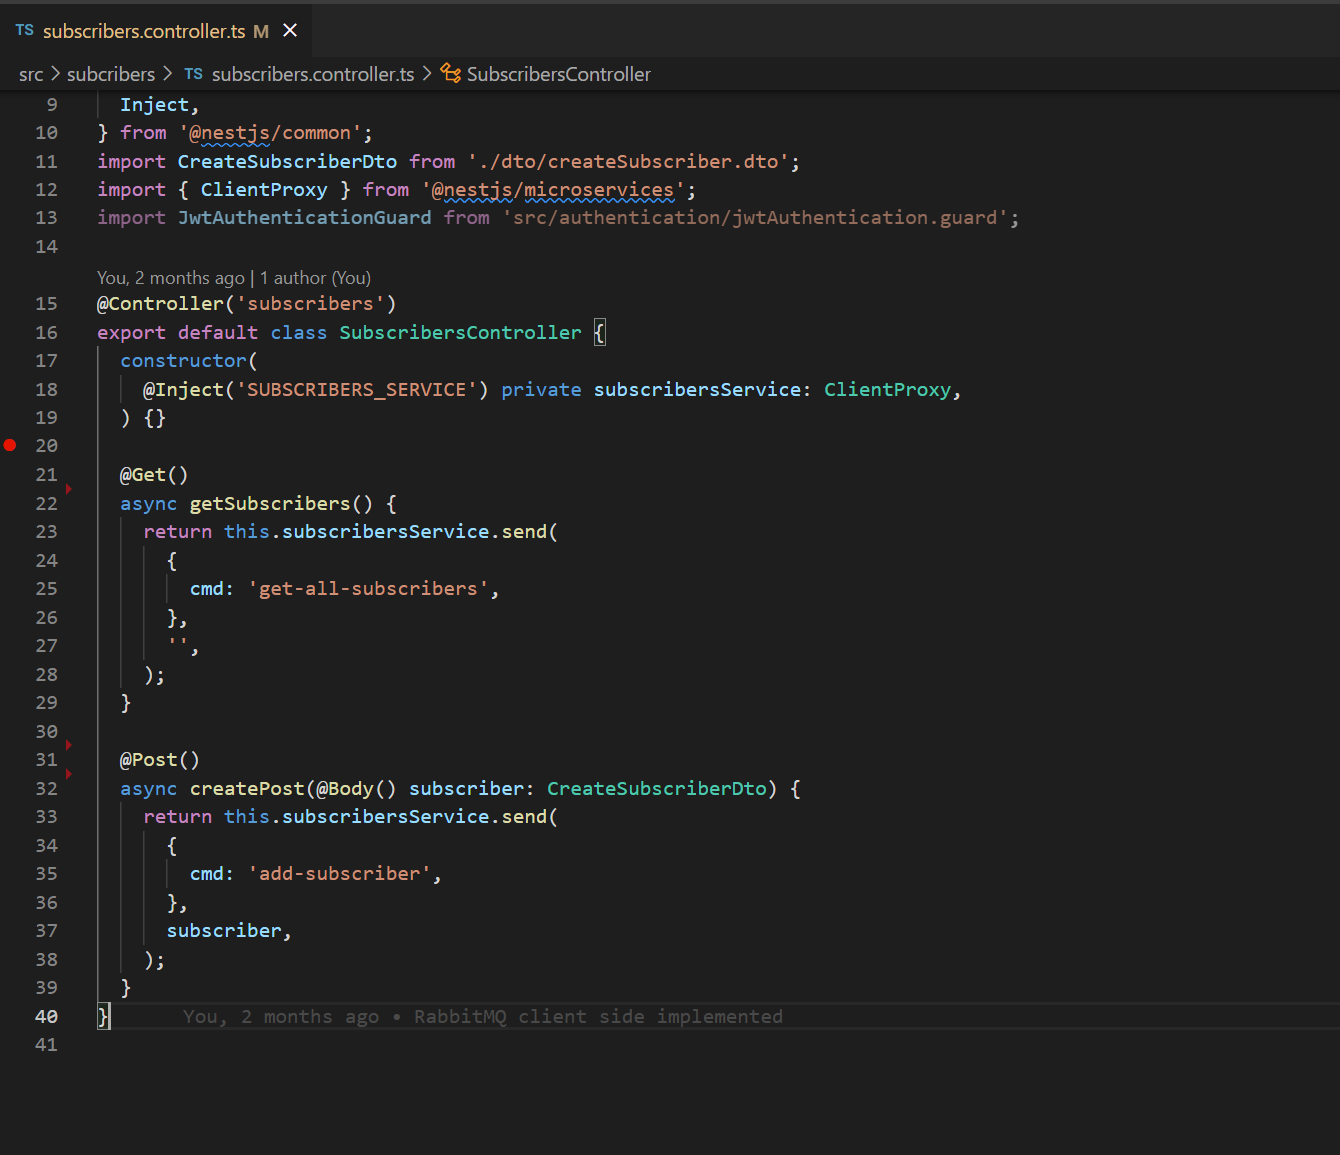
Also in controller layer, we have to define each method to message pattern as below,
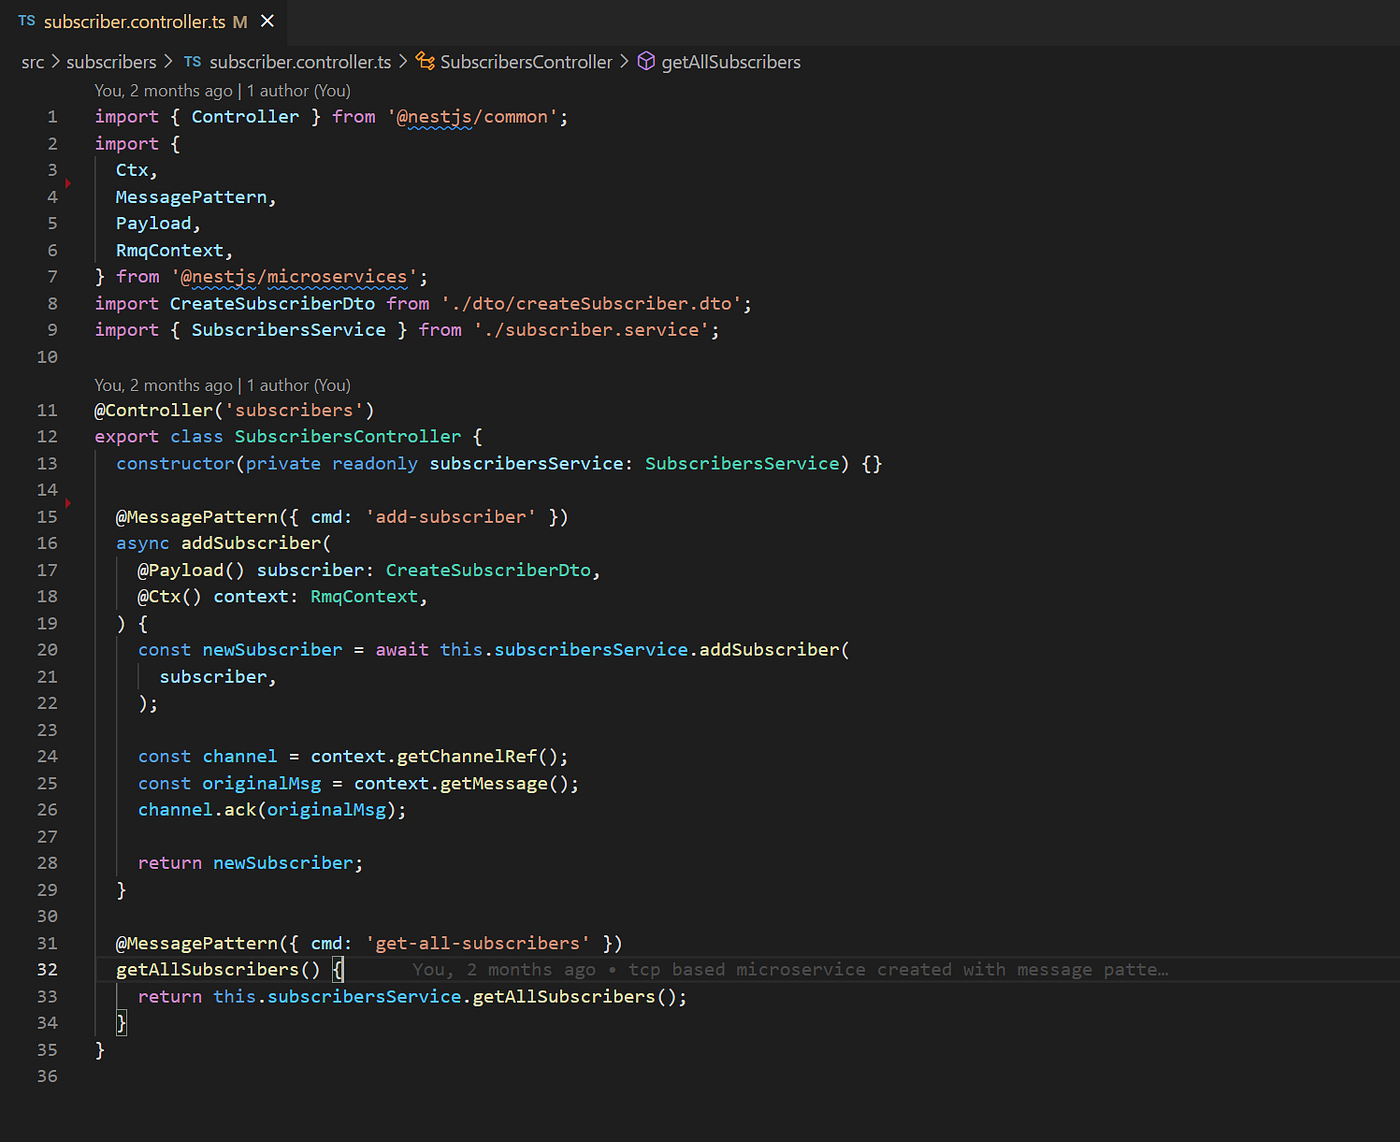
controller layer
Once you done that, you can create the client app to use micro-service we just created. To do that we have to create a NestJS application and create a module inside that. Also you have to include the key values pairs as before inside .env file. Those things are not going to cover in this article as the main focus is about connecting to a micro-service.
Once you created the module, you can configure it to connect with the micro-service using amzon MQ as below,
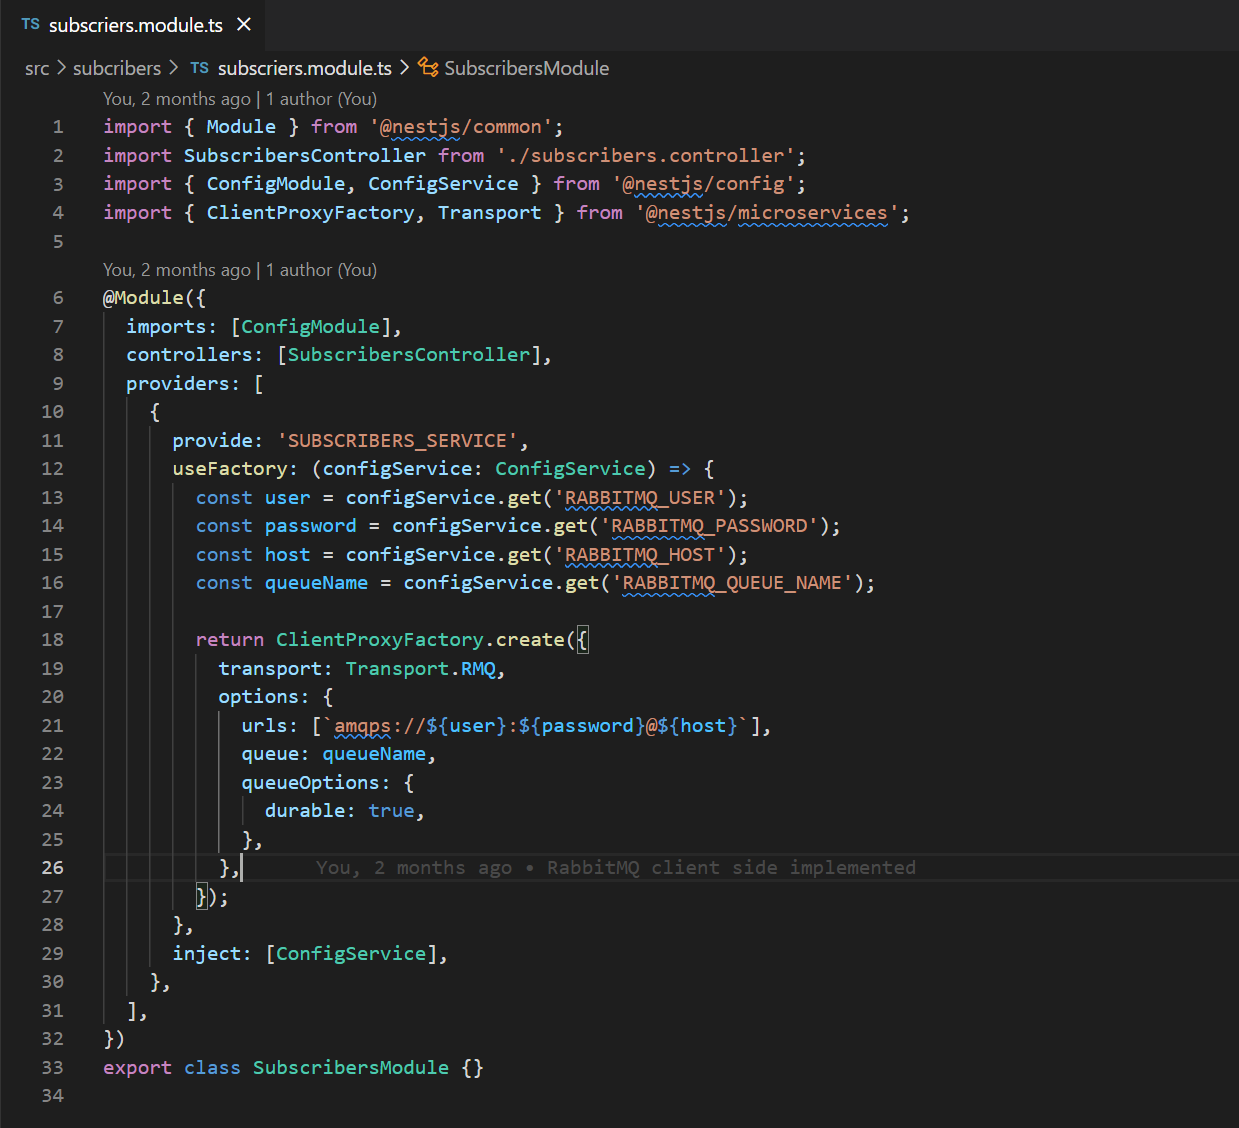
client module configurations
Once you done that you can use the micro-service inside your client controller layer as below,
client-controller layer
With these simple steps you can create a micro-service in NestJs and connect them using AmazonMQ. Cheers..
Comments