
CQRS Pattern & NestJS (Node.js)
When designing an application following traditional architecture oftentimes the same data model is used for both reading and writing operations. Even though it might work well on small applications or those which rely on simple logic, when we have a more complex environment we end up requiring more sophisticated solutions.
In this article, we are going to explore the CQRS design pattern fundamentals, its benefits and disadvantages. Also, we are going to dive into how we can implement such pattern by using the NestJS Framwork for Node.js.
obs: If you have not checked the NestJS Framework yet I would totally recommend it. Inspired by the Angular architecture it is a simple, efficient and scalable Node.js Framework.
CQRS Pattern
“In most cases, there are no reasons to make small and medium-sized applications more complex. However, sometimes it’s not enough and when our needs become more sophisticated we want to have scalable systems with straightforward data flow.”
NestJS on CQRS
When requiring data from the server, the application might perform multiple queries and use DTOs (data transfer objects) accordingly to the requested data. Also when data needs to be changed or added to a database, several operations might be performed using DTOs as well.
Mapping these objects and having a grasp of its different formats can become a real problem in bigger applications. When a writing operation is performed, you might also end up with complex models that implement multiple validations and business logic.
Too often there is a mismatch between the representation of data between read and write operations, also making it harder to control what data is exposed in each context. Hence, that approach might have negative impact on performance, complexity and security of applications.
The CQRS Pattern addresses separates reads and writes into separate models, using commands to update data, and queries to read data.
Commands should be oriented to tasks they should accomplish. Commands might be placed on queue for asynchronous processing.
Queries never modify the database. Queries return *DTOs *without any domain knowledge.
PROS
Segregation. By segregating concerns - the read (queries) and write (commands) operations - it helps having more flexible models, aids development speed and facilitates maintenance.
Scalability. It allows your queries and commands to scale independently, which may result in fewer lock contentions.
Optimized Schemas. The schemas for writing and reading operations are optimized for its purposes and also easier to understand and maintain.
Security. Makes it easier to make sure that only the right entities in the right context are able to have access to read and write operations on data.
CONS
Complexity. The mais problem of CQRS is that even though the fundamentals of CQRS are simple, its implementation can be complex and costly. Therefore, it should only be used when it makes sense; when scalability is an important issue of the application, when you are handling complex models and business logic, etc. Otherwise, instead of simplifying you are actually introducing unecessary great complexity to the application.
Consistency. By having different models for your queries and commands it might become harder to keep consistency between those, especially when handling complex data.
Implementing CQRS Pattern in NestJS
Ok, so now let’s dive into how we can implement this pattern in order to have a better understanding on how it works. We are going to do it by using NestJS Framework. NestJS provides us a pre-built CQRS Module, which is gonna make our life much easier in order to use this pattern with NestJS.
Firstly, let’s install NestJS’ CLI, create a new project with it and add Nest’s CQRS Module to our project.
npm install -g @nestjs/cli
nest new project-cqrs
cd project-cqrs
npm install @nestjs/cqrs --save
npm run start
For demonstration, we are going to implement a simple Users CRUD feature. We are going to create a User Controller in which we are going to use CQRS pattern. Let’s separate *users *as a feature, create a module for it, the controller itself and two folders: *commands *and queries. Then, we are going to create each one of the *queries *and *commands *we need.
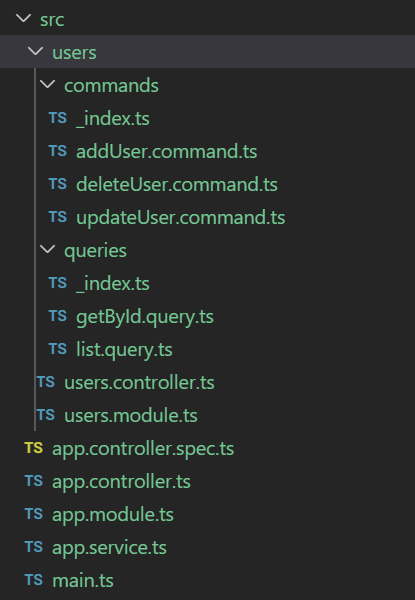
Bellow is how our project structure and files are going to be. We are going to dive into all of the *users *feature ones.
Queries
Let’s build our *ListUsersQuery *step by step as an example. First, we define a class as our Query, that is going to contain the information needed by its Handler. Since we are going to list users, it is important to know the requested page number and page size.
export class ListUsersQuery {
  constructor(
    public page: number = 1,
    public pageSize: number = 10
  ) { }
}
Next, we create our Handler, which is gonna be triggered when this Query is evoked in the QueryBus.
The QueryBus is a stream of queries. It delegates queries to its equivalent handlers when requested. Each *Query *must have its corresponding Handler. This association is achieved by using the @QueryHandler decorator.
@QueryHandler(ListUsersQuery)
export class ListHandler implements IQueryHandler<ListUsersQuery> {}
We’ve now created the *ListHandler, *which is going to handle the query *ListUsersQuery *that we had previously created. Later on we are going to see how this *Query *can be evoked by the QueryBus.
Now what we have got to do is actually have our logic inside our Handler. When the Query is evoked it is going to call the Handler’s execute method. There is were our Handler logic is going to reside.
@QueryHandler(ListUsersQuery)
export class ListHandler implements IQueryHandler<ListUsersQuery> {

  constructor(
    // Here we would inject what is necessary to retrieve our data
  ) { }

  public async execute(query: ListUsersQuery): Promise<User[]> {
    // Here we are going to have any necessary logic related
    // to that Query and return the requested information
    // such as a service method call
  }
}
So finally this is how our *ListUsersQuery *is gonna look like:
export class ListQuery {
  constructor(
    public page: number = 1,
    public pageSize: number = 10
  ) { }
}

@QueryHandler(ListUsersQuery)
export class ListHandler implements IQueryHandler<ListUsersQuery> {

  constructor(
    // Here we would inject what is necessary to retrieve our data
  ) { }

  public async execute(query: ListUsersQuery): Promise<User[]> {
    // Here we are going to have any necessary logic related
    // to that Query and return the request information
    // such as a service method call
  }
}
And below is how our other Query, the *GetUserById one, *would look like; now adding some example code accessing a *repository using TypeORM *to retrieve the data.
// All we need is the id of the user we want to retrieve the data
export class GetUserByIdQuery {
  constructor(
    public id: number
  ) { }
}

@QueryHandler(GetUserByIdQuery)
export class GetUserByIdHandler implements
  IQueryHandler<GetUserByIdQuery> {

  // We inject our TypeORM repository to fetch the user data
  constructor(
    @InjectRepository(User)
    private readonly _repository: Repository<User>
  ) { }

  public async execute(query: GetUserByIdQuery): Promise<User> {
    // We fetch user data and return it on the execute method
    return await this._repository.findOne(query.id);
  }
}
Commands
Let’s build our *AddUserCommand *step by step as an example. It is all very similar to how we created our Queries. First, we define a class as our Command, that is going to contain the information needed by its Handler. Here we will need the new user information to be added.
export class AddUserCommand {
  constructor(
    public name: string,
    public email: string,
    public birthdate: Date
  ) { }
}
Next, we create our Handler, which is gonna be triggered when this Command is evoked in the CommandBus.
The CommandBus is a stream of commands. It delegates commands to its equivalent handlers when requested. Each Command must have its corresponding Handler. This association is achieved by using the @CommandHandler decorator.
@CommandHandler(AddUserCommand)
export class AddUserHandler implements IQueryHandler<AddUserCommand> {}
We’ve now created the *AddUserHandler, *which is going to handle the command *AddUserCommand *that we had previously created. Later on we are going to see how this *Command *can be evoked by the CommandBus.
Now what we gotta do is actually have our logic inside our Handler. When the Command is evoked it is going to call the Handler’s execute method. There is were our Handler logic is going to reside.
@CommandHandler(AddUserCommand)
export class AddUserHandler implements IQueryHandler<AddUserCommand> {
    constructor(
      // Here we would inject what is necessary to persist our data
    ) { }

    public async execute(query: ListUsersQuery): Promise<User> {
      // Here we are going to have any necessary logic related
      // to that Command and do any change operations
    }
}
So finally this is how our *AddUserCommand *is gonna look like:
export class AddUserCommand {
  constructor(
    public name: string,
    public email: string,
    public birthdate: Date
  ) { }
}

@CommandHandler(AddUserCommand)
export class AddUserHandler implements IQueryHandler<AddUserCommand> {
    constructor(
      // Here we would inject what is necessary to persist our data
    ) { }

    public async execute(query: ListUsersQuery): Promise<User> {
      // Here we are going to have any necessary logic related
      // to that Command and do any change operations
    }
}
And below is how our other Commands, *UpdateUser *and *DeleteUser, *would look like, now adding some example code accessing a *repository using TypeORM *to make changes to the database.
UpdateUserCommand
export class UpdateUserCommand {
  constructor(
    public id: number,
    public name?: string,
    public email?: string,
    public birthdate?: Date
  ) { }
}

@CommandHandler(UpdateUserCommand)
export class UpdateUserHandler implements IQueryHandler<UpdateUserCommand>
{
    constructor(
      @InjectRepository(User)
      private readonly _repository: Repository<User>
    ) { }

    public async execute(request: UpdateUserCommand): Promise<User>
    {
      const user = await this._repository.findOne(request.id);

      if (!user)
        throw new NotFoundException('User does not exist');

      user.name = request.name || user.name;
      user.email = request.email || user.email;
      user.birthdate = request.birthdate|| user.birthdate;

      return await this._repository.save( user );
    }
}
DeleteUserCommand
export class DeleteUserCommand {
  constructor(
    public id: number
  ) { }
}

@CommandHandler(DeleteUserCommand)
export class DeleteUserHandler implements IQueryHandler<DeleteUserCommand>
{
    constructor(
      @InjectRepository(User)
      private readonly _repository: Repository<User>
    ) { }

    public async execute(request: DeleteUserCommand):
      Promise<DeleteResult>
    {
      return await this._repository.delete({
        'id': request.id
      });
    }
}
Controller
Now that we have our Queries and Commands built we need to get it all together and create our *UserController *for our User CRUD endpoints.
First of all, we create our *UserController *class, using the @Controller decorator and specifying our ‘user’ route prefix for our controller. Then, we provide it the QueryBus and the CommandBus on the constructor.
@Controller('user')
export class UserController {

  constructor(
    private readonly commandBus: CommandBus,
    private readonly queryBus: QueryBus
  ) { }

}
Now we are able to create our endpoints, which are going to invoke the *QueryBus *and the *CommandBus *accordingly.
@Controller('user')
export class UserController {

  constructor(
    private readonly commandBus: CommandBus,
    private readonly queryBus: QueryBus
  ) { }

  @Get()
  public async getAllOngs(
    @Query() request: ListUsersQuery,
    @Res() response
  ) {

    const users = await this.queryBus.execute(
      new ListUsersQuery(
        request.page,
        request.pageSize
      )
    );

    response.status(HttpStatus.OK).json(users);
  }

}
We have defined the @Get, @Post, @Put and @Delete decorators to specify the wanted HTTP request method. Also, we have used the @Query decorator to retrieve the Query Params from the request, the @Param decorator to retrieve the Route Params from the request and the @Body decorator to retrieve the Request Body.
Then, all we had to do was invoke the QueryBus or the CommandBus accordingly to the endpoint purpose calling its execute method, providing the desired Query or Command and passing the necessary information. With the operation result, we can then return a response with the result of the operation and any data that is needed. And we are done!
Module
Now, all that is left to do is register it all in the UserModule. First we create an *index file *for the *commands *and another one to the queries. That will make it easier for visualizing it and providing it in the module. The *index *files are going to look like this:
// commands > _index.ts
export const CommandHandlers = [
  AddUserHandler,
  UpdateUserHandler,
  DeleteUserHandler
];

// queries > _index.ts
export const QueryHandlers = [
  ListHandler,
  GetUserByIdHandler
];
Now we can create our UserModule, declare our *UserController *and provide our *queries *and commands. Then, we import it in our *AppModule *and we are ready to go!
@Module({
  imports: [
    CqrsModule,
    ...
    // Here might be included other Modules, such as
    // the TypeOrmModule
  ],
  controllers: [
    UserController
  ],
  providers: [
    ...QueryHandlers,
    ...CommandHandlers
  ]
})
export class UserModule { }
Event Sourcing and CQRS
Some implementations of CQRS use the Event Sourcing pattern. With this pattern, application state is stored as a sequence of events, in which each event represents a set of changes to the data. By using the stream of events, it avoids update conflicts and maximizes performance and scalability. However, Event Sourcing adds quite even more complexity to the application design, which already is overall complex with this pattern.
It is important to notice that applications based on the event sourcing pattern are only eventually cosistent, since there is some delay between the occuring event and the data store that is being updated. Also, constantly handling the events for specific entities or collections of entities can require significant processing time and resource usage.
Design Patterns such as CQRS when applied correctly can help us write and maintain quality code in our applications. It is a very useful and used pattern, which fundamentals are important to know. Also, as we have explored, NestJS makes it really easy to implement such pattern, allowing us to create scalable and efficient applications.
Hope it helps! 😉
References:
Command and Query Responsibility Segregation (CQRS) pattern - Cloud Design Patterns *Segregate operations that read data from operations that update data by using separate interfaces. This can maximize…*docs.microsoft.com Documentation | NestJS - A progressive Node.js web framework *The flow of the simplest CRUD applications can be described using the following steps: Controllers layer handle HTTP…*docs.nestjs.co
Comments