
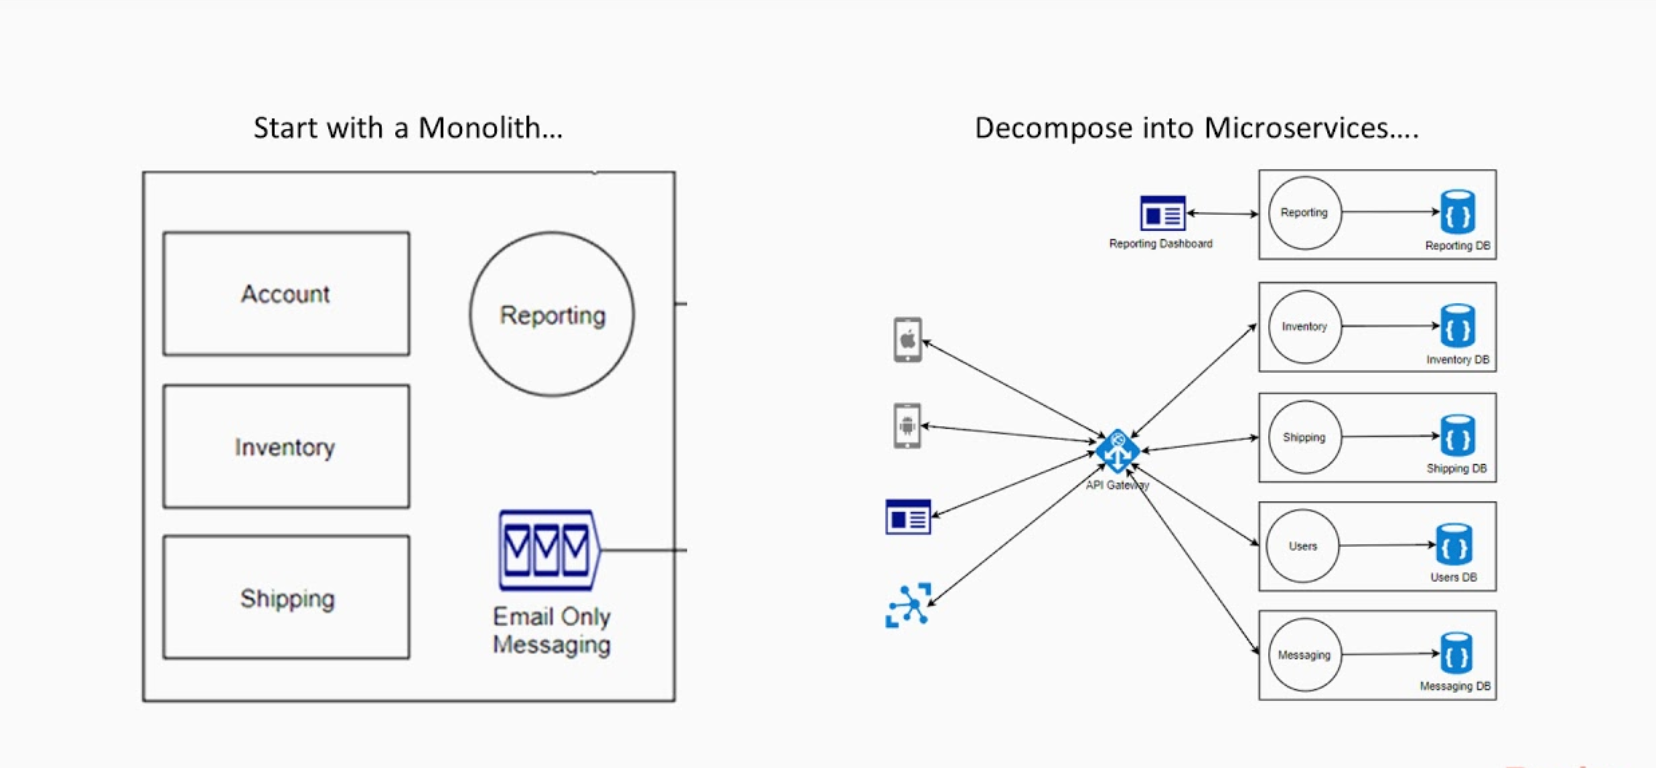
A microservice is a single self-contained unit which, together with many others, makes up a large application. By splitting your app into small units every part of it is independently deployable and scalable, can be written by different teams and in different programming languages and can be tested individually.
A microservice architecture means that your app is made up of lots of smaller, independent applications capable of running in their own memory space and scaling independently from each other across potentially many separate machines
In this blogs, we will Just setup docker-compose for running different containers in our application and Host application front end also on the same container which can talk to the API container.
I will not talk much about Docker, docker file and docker-compose. you can find good resource around to learn more about this.
A little bit about docker
Terminology
-
Container — a running instance that encapsulates required software. Containers are always created from images. A container can expose ports and volumes to interact with other containers or/and the outer world. Containers can be easily killed / removed and re-created again in a very short time. Containers don’t keep state.
-
Image — the basic element for every container. When you create an image, every step is cached and can be reused (Copy On Write model). Depending on the image, it can take some time to build. Containers, on the other hand, can be started from images right away.
-
Port — a TCP/UDP port in its original meaning. To keep things simple, let’s assume that ports can be exposed to the outer world (accessible from the host OS) or connected to other containers — i.e., accessible only from those containers and invisible to the outer world.
-
Volume — can be described as a shared folder. Volumes are initialized when a container is created. Volumes are designed to persist data, independent of the container’s lifecycle. Registry — the server that stores Docker images. It can be compared to Github — you can pull an image from the registry to deploy it locally, and push locally built images to the registry.
-
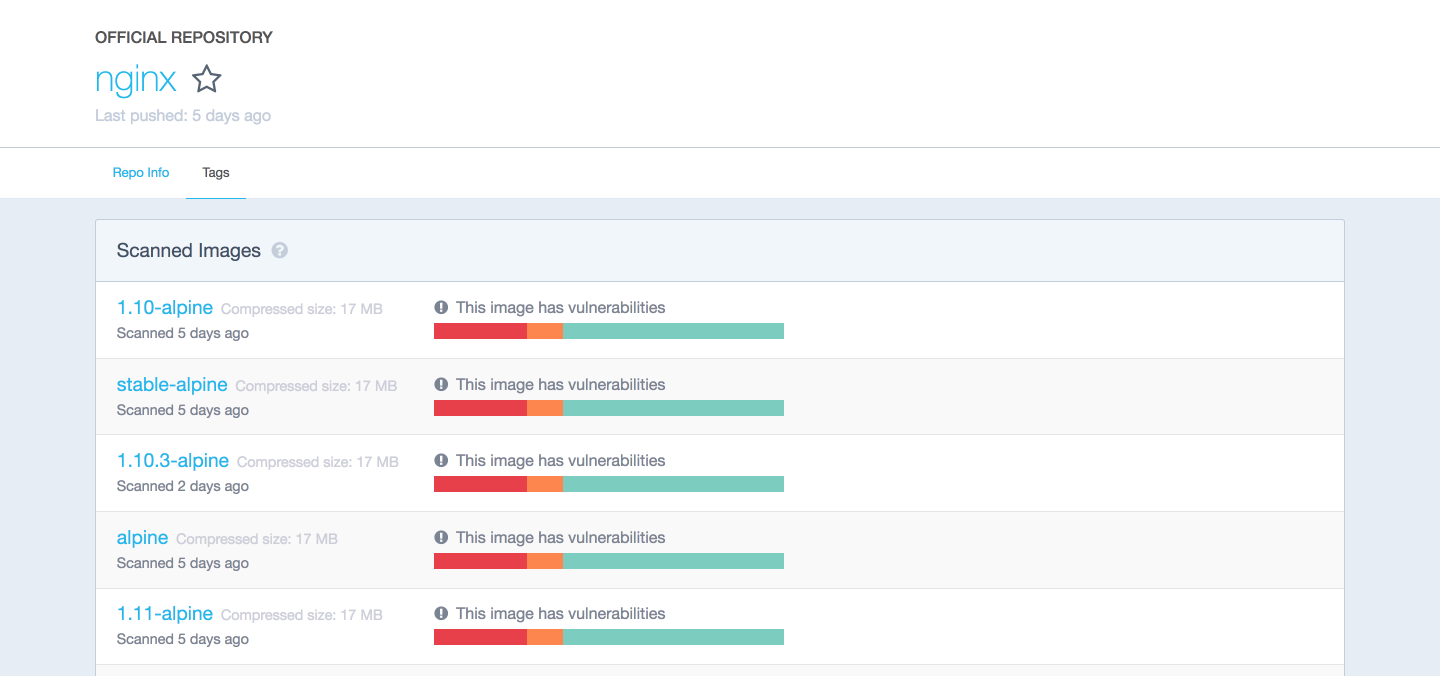
Docker Hub — a registry with web interface provided by Docker Inc. It stores a lot of Docker images with different software. Docker Hub is a source of the “official” Docker images made by the Docker team or in cooperation with the original software manufacturer (it doesn’t necessary mean that these “original” images are from official software manufacturers). Official images list their potential vulnerabilities. This information is available to any logged-in user. There are both free and paid accounts available. You can have one private image per account and an infinite amount of public images for free. Also there is a Docker Store — a service very similar to Docker Hub. It’s a marketplace with ratings, reviews, etc. My personal opinion is that it’s marketing stuff. I’m totally happy with Docker Hub.
Example 1: hello world
It’s time to run your first container:
docker run ubuntu /bin/echo 'Hello world'Console output:
Unable to find image 'ubuntu:latest' locally
latest: Pulling from library/ubuntu
6b98dfc16071: Pull complete
4001a1209541: Pull complete
6319fc68c576: Pull complete
b24603670dc3: Pull complete
97f170c87c6f: Pull complete
Digest:sha256:5f4bdc3467537cbbe563e80db2c3ec95d548a9145d64453b06939c4592d67b6d
Status: Downloaded newer image for ubuntu:latest
Hello world-
docker run is a command to run a container.
-
ubuntu is the image you run. For example, the Ubuntu operating system image. When you specify an image, Docker looks first for the image on your Docker host. If the image does not exist locally, then the image is pulled from the public image registry — Docker Hub.
-
/bin/echo ‘Hello world’ is the command that will run inside a new container. This container simply prints “Hello world” and stops the execution.
Let’s try to create an interactive shell inside a Docker container:
docker run -i -t --rm ubuntu /bin/bash-
-t flag assigns a pseudo-tty or terminal inside the new container.
-
-i flag allows you to make an interactive connection by grabbing the standard input (STDIN) of the container.
-
— rm flag automatically removes the container when the process exits. By default, containers are not deleted. This container exists until we keep the shell session and terminates when we exit the session (like an SSH session with a remote server).
If you want to keep the container running after the end of the session, you need to daemonize it:
docker run --name daemon -d ubuntu /bin/sh -c "while true; do echo hello world; sleep 1; done"-
— name daemon assigns daemon name to a new container. If you don’t specify a name explicitly, Docker will generate and assign it automatically.
-
-d flag runs the container in the background (i.e., daemonizes it).
Let’s see what containers we have at the moment:
docker ps -aConsole output:
CONTAINER ID  IMAGE   COMMAND                 CREATED             STATUS                         PORTS  NAMES
1fc8cee64ec2  ubuntu  "/bin/sh -c 'while..."  32 seconds ago      Up 30 seconds                         daemon
c006f1a02edf ubuntu "/bin/echo 'Hello ..." About a minute ago Exited (0) About a minute ago gifted_nobel-
docker ps is a command to list containers.
-
-a shows all containers (without -a flag ps will show only running containers).
The ps shows us that we have two containers:
- gifted_nobel (the name for this container was generated automatically — it will be different on your machine). It’s the first container we created, the one that printed ‘Hello world’ once. * daemon — the third container we created, which runs as a daemon.
Note: there is no second container (the one with interactive shell) because we set the — rm option. As a result, this container is automatically deleted right after execution.
Let’s check the logs and see what the daemon container is doing right now:
docker logs -f daemonConsole output:
...
hello world
hello world
hello world-
docker logs fetch the logs of a container.
-
-f flag to follow the log output (works actually like tail -f).
Now let’s stop the daemon container:
docker stop daemonMake sure the container has stopped.
docker ps -aConsole output:
CONTAINER ID  IMAGE   COMMAND                 CREATED        STATUS                      PORTS  NAMES
1fc8cee64ec2  ubuntu  "/bin/sh -c 'while..."  5 minutes ago  Exited (137) 5 seconds ago         daemon
c006f1a02edf  ubuntu  "/bin/echo 'Hello ..."  6 minutes ago  Exited (0) 6 minutes ago           gifted_nobel
The container is stopped. We can start it again:
docker start daemonLet’s ensure that it’s running:
docker ps -aConsole output:
CONTAINER ID  IMAGE   COMMAND                 CREATED        STATUS                    PORTS  NAMES
1fc8cee64ec2  ubuntu  "/bin/sh -c 'while..."  5 minutes ago  Up 3 seconds                     daemon
c006f1a02edf  ubuntu  "/bin/echo 'Hello ..."  6 minutes ago  Exited (0) 7 minutes ago         gifted_nobel
Now, stop it again and remove all the containers manually:
docker stop daemon
docker rm <your first container name>
docker rm daemon
To remove all containers, we can use the following command:
docker rm -f $(docker ps -aq)-
docker rm is the command to remove the container.
-
-f flag (for rm) stops the container if it’s running (i.e., force deletion).* -q flag (for ps) is to print only container IDs.
Lets Spin Containers for Node application
Containers we will build
mysql
redis
api
notification
MySQL will be built from its image directly same with redis. We have to build Node js apps using docker file so we can deploy node js code in containers.
FROM node:carbon

# Create app directory
WORKDIR /usr/src/app

# Bundle app source
COPY ./package.json .

# npm install
RUN apt-get update && npm install

# expose  api port and debug port
EXPOSE 3000 9229

CMD [ "npm", "run", "start" ]
Node js containers can be built by running docker-compose up which will spin up all containers defined in the compose.yml file
#  Run `docker-compose build` to build the images
#  Run `docker-compose up` to run the containers
#  Run `docker-compose down` to remove the containers
version: '3.5'
services:
  mysql:
    container_name: service_mysql
    image: mysql:5.7
    volumes:
      - ~/datadir/mysql:/var/lib/mysql
    ports:
      - 3306:3306
      - 33060:33060
    environment:
      MYSQL_ROOT_PASSWORD: root
    networks:
      - service_network
  redis:
    container_name: service_redis
    image: redis:4.0
    volumes:
      - ~/datadir/redis:/var/lib/redis
    ports:
      - 6379:6379
    networks:
      - service_network
  api:
    container_name: service_api
    build: ./apiapp/
    image: service_api
    volumes:
      - ./apiapp/:/usr/src/app
      - /usr/src/app/node_modules
    ports:
      - 3000:3000
      - 9229:9229
    depends_on:
      - mysql
      - redis
      - notification
    networks:
      - service_network
  app2:
    build: ./notification/
    image: service_notification
    container_name: service_notify
    environment:
      - NODE_ENV=local
    volumes:
      - ./notification/:/usr/src/app
      - /usr/src/app/node_modules
    ports:
      - 4000:4000 # Notification api port
      - 9223:9223 # Node debugg port
      - 8099:8099 # GRPC port
    depends_on:
      - mysql
    networks:
      - service_network
networks:
  service_network:
    driver: bridge
    name: service_network
In this docker-compose file, we have 4 different containers running. Now how these containers will talk to each other so that the API app can connect to the Mysql database.
Lets first understand Docker Compose Commands
. There’s just a handful of Docker commands you’ll need to type into the terminal to get these magical files to do their thing. And after I’ve described them, I’ve provided another handy graphic that illustrates the three different phases a Docker Compose environment can exist in.
-
docker-compose ps — lists all the services in a network. This is especially helpful when troubleshooting a service as it will give you the container ID and you can then run docker -it exec
bash to enter the container and debug as needed. -
docker-compose build — generates any needed images from custom Dockerfiles. It will not pull images from the Docker hub, only generate custom images.
-
docker-compose up — brings up the network for the services to run in
-
docker-compose stop — stops the network and saves the state of all the services
-
docker-compose start — restarts the services and brings them back up with the state they had when they were stopped
-
docker-compose down — burns the entire Docker network with fire. The network and all the services contained within are totally destroyed.
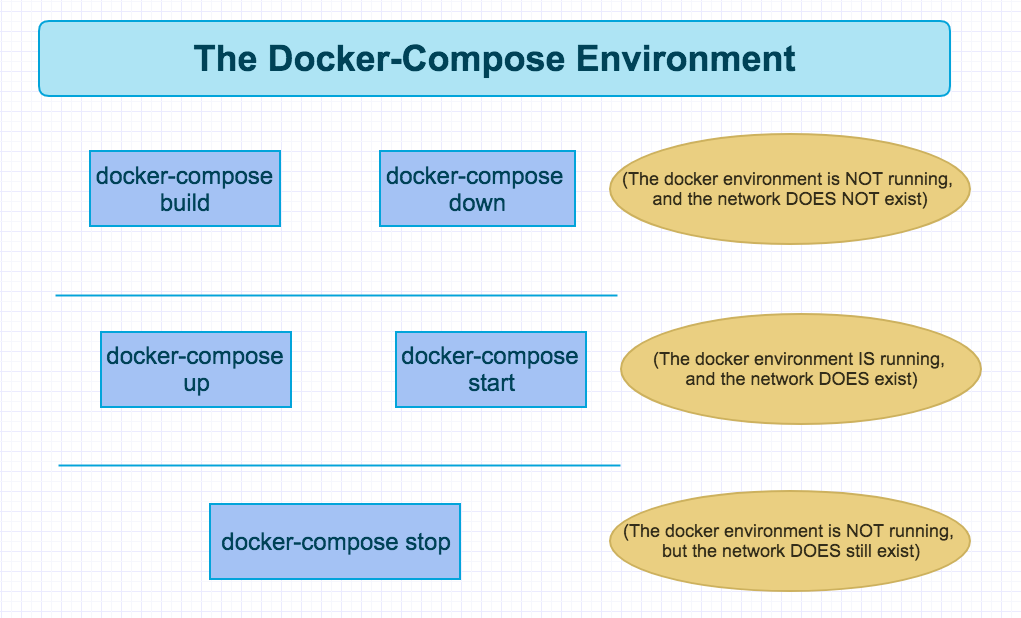
Here are the various states the Docker Compose environment exists in, depending on what commands you’ve run.
docker-compose build and docker-compose down mean the Docker environment is not running, and the network does not exist.
docker-compose up and docker-compose start means the Docker environment *is *running, and the network does exist.
docker-compose stop means the Docker environment *is not *running, but the network still *does *exist.
That’s it. All the commands you’ll need with your docker-compose.yml to build and run all your connected microservices.
Execution Time
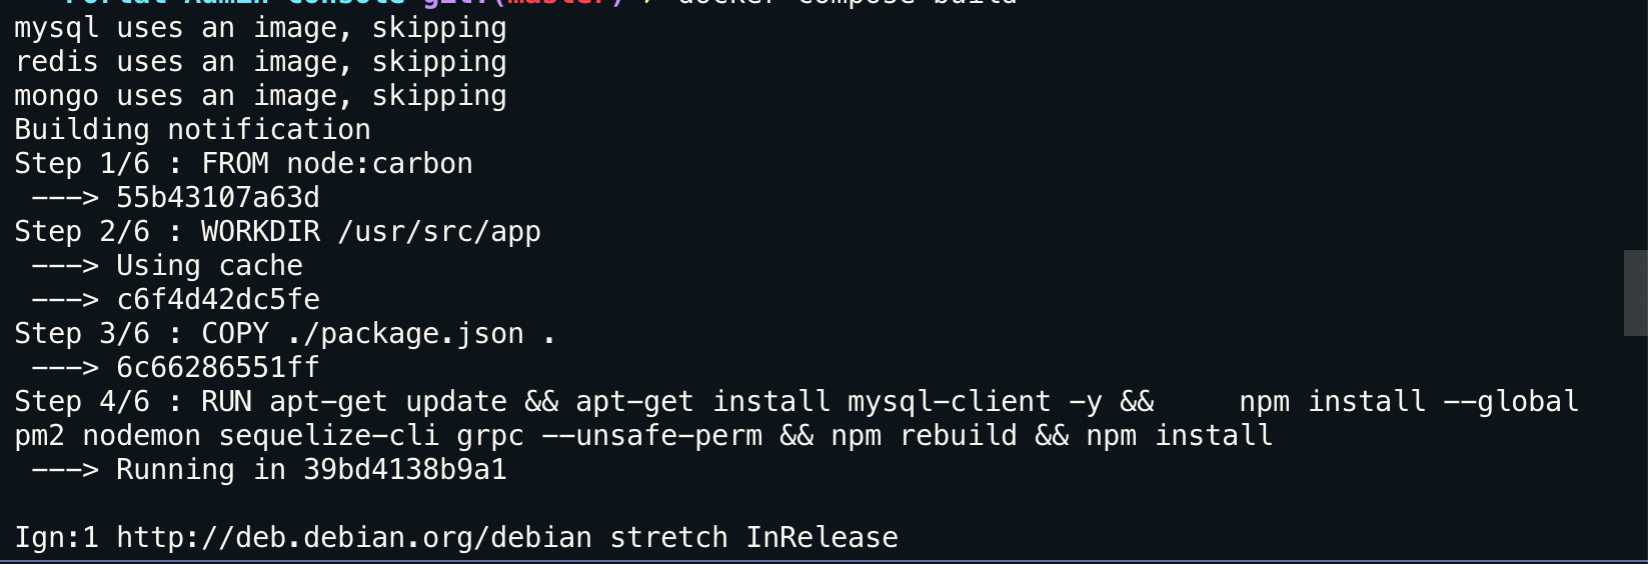
Now we will run docker-compose build command to build all containers it will fetch Mysql, Redis image from docker-hub and build node image with running commands from Dockerfile like copying the code in a container and running npm install
List of the container after docker-compose up
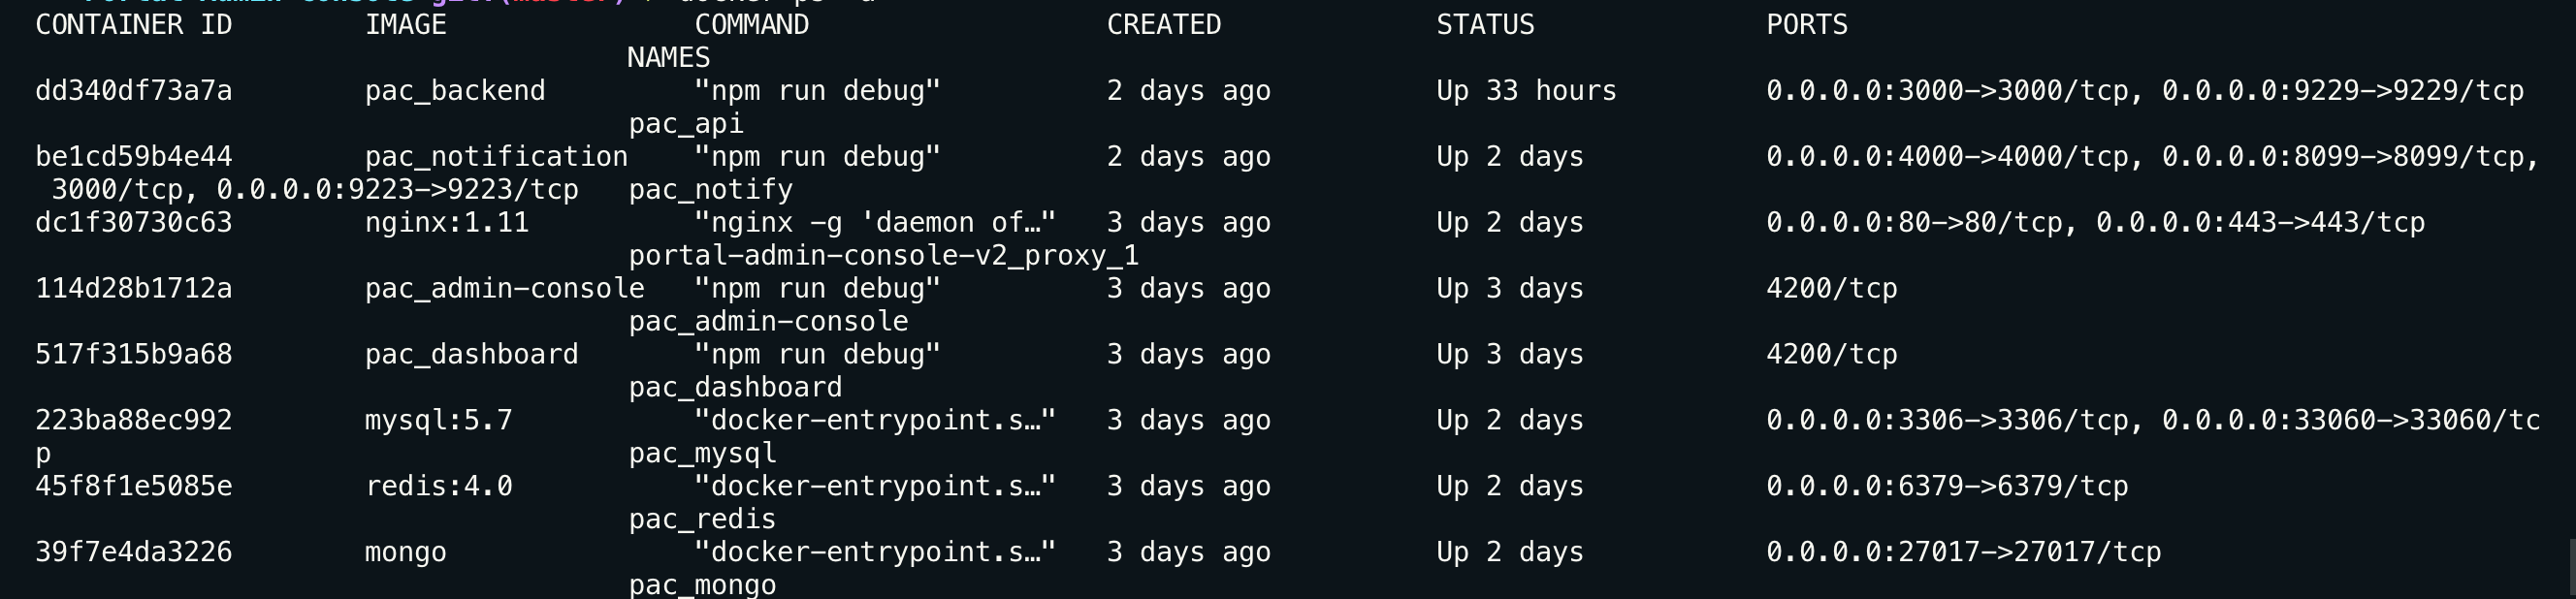
Now we have all container up and running and Node js server up and running from API application. Now How API app is connecting to mongo or Mysql or Redis?
Container talks to each other with the name !!

const mysql = require('mysql2/promise');
const config =  {
  user: 'root',
  password: 'root',
  database: 'testdb',
  host: 'mysql',
  connectTimeout: 80000,
};
mysql.createConnection(config)
  .then((connection) => {
    console.log(`connection established to local ${config.database} database`);
    global.MYconnection = connection;
  })
  .catch((e) => {
    console.log(e);
    eventEmitter.emit('connectionFailed', 'Destination');
  });
Now in Node JS code to connect to MySQL host will be MySQL only not localhost, Node running on the container will connect with MySQL with container names. same for Redis is applied to connect with Redis you will be using Redis as host. considering they are in default or same network.
Conclusion
Docker can be used on all types of projects, regardless of size and complexity. In the beginning, you can start with compose and Swarm. When the project grows, you can migrate to cloud services like Amazon Container Services or Kubernetes
Comments