
Building Micro-services Using NestJS and Rabbit MQ (Native Module) 🔭
Let us have a Nest JS microservice driven by RabbitMQ broker RabbitMQ is open-source message-broker software that originally implemented the Advanced Message Queuing Protocol and has since been extended with a plug-in architecture to support Streaming Text Oriented Messaging Protocol, Message Queuing Telemetry Transport, and other protocols. In this article, we will be discussing developing a Nest JS microservice using RabbitMQ as a message broker.
Let us have a look at message brokers in Nest JS.
Message Brokers
When using asynchronous communication for Microservices, it is common to use a message broker. A broker ensures communication between different microservices is reliable and stable, that the messages are managed and monitored within the system and that messages don’t get lost. A message broker is an intermediary computer program module that translates a message from the formal messaging protocol of the sender to the formal messaging protocol of the receiver.
In the Nest JS world, these message brokers are called transporters, which are responsible for transmitting messages between different microservice instances. Most transporters natively support both request-response and event-based message styles. Nest abstracts the implementation details of each transporter behind a canonical interface for both request-response and event-based messaging.
Nest JS provides built-in support for the following messaging systems as transporters
- TCP
- Redis
- MQTT
- NATS
- RabbitMQ
- gRPC
It’s time to code. We are going to develop two applications microservice-client and microservice-app which will be implementing communication between them over RabbitMQ.
Let’s Start
First clone the codebase from the Github repository. tkssharma/blogs *A simple microservice developed in Nest JS. Contribute to tkssharma/blogs by creating an
If you are new to microservice and Nest JS, you can get the implementation details of this code from nestjs Documentation As I mentioned before you will have two applications in the cloned repository — microservice-app(consumer) and microservice-client(producer). The responsibility of microservice-app is to print “Hello World” in the terminal in response to an event sent from the microservice-client.
Install the dependencies in both applications by running npm install and then npm start microservice-app and microservice-client respectively. Now open your browser and navigate to http://localhost:3000/, you will see “Hello World” printed in microservice-app terminal like below:

So the applications are perfectly working over TCP transporter. Now we are going to let these applications make communication over the RabbitMQ instance we have created.
To start building RabbitMQ-based microservices, first install the required packages in both applications
npm i --save amqplib amqp-connection-managerThen open main.ts of microservices-app.
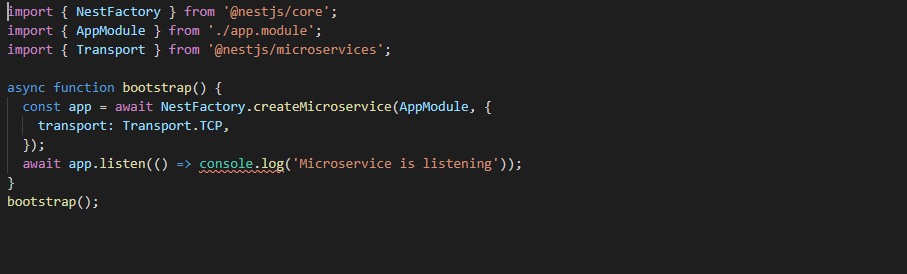
You can see createMicroservice() uses TCP as the transporter. Replace the code with the below-given code:
    import { NestFactory } from '@nestjs/core';
    import { AppModule } from './app.module';
    import { Transport } from '@nestjs/microservices';

    async function bootstrap() {
       const app = await NestFactory.createMicroservice(AppModule, {
          transport: Transport.RMQ,
          options: {
               urls: ['amqp://guest:guest@localhost:5672/hello'],
               queue: 'user-messages',
               queueOptions: {
                  durable: false
                 },
                },
        });

      await app.listen(() => console.log('Microservice is listening'));
     }
    bootstrap();
Here we have replaced the old TCP transporter as RabbitMQ(Transport.RMQ). The RabbitMQ transporter exposes the properties urls,queue and queueOptions. Based on the instance we created the url is amqp://guest:guest@localhost:5672/hello where guest is same username and password, hello is the virtual host and the instance runs in 5672 port.
Now open app.module.ts file from the microservices-client directory and relace the code like below
    import { Module } from '@nestjs/common';
    import { AppController } from './app.controller';
    import { AppService } from './app.service';
    import { Transport, ClientsModule } from '@nestjs/microservices';

    @Module({
     imports: [
      ClientsModule.register([
      {
        name: 'HELLO_SERVICE', transport: Transport.RMQ,
        options: {
          urls: ['amqp://guest:guest@localhost:5672/hello'],
          queue: 'user-messages',
          queueOptions: {
            durable: false
                },
          },
       },
     ]),
    ],
    controllers: [AppController],
    providers: [AppService], })
    export class AppModule {
    }
We imported ClientsModule, which exposes the static register() method. This method takes an argument which is an array of objects representing microservices. Each such object has a name property as well as a microservice-specific options object. Here the name given for our microservice is HELLO_SERVICE. The transporter options were replaced with RabbitMQ specific params like done before.
So the development part is completed.
Run npm start in both microservice-app and microservice-client. Then go to http://localhost:3000/ and refresh. You can see “Hello World” printed in the microservice-app command line. That means our applications exchanged messages over the RabbitMQ instance we created.
Now go the RabbitMQ management UI’s Overview tab to see the overview of the connections and messages passed. It may be something like the picture given below.

Here it states, 2 active connections, 2 channels, 14 exchanges, and 1 queue. Two connections are “microservice-app” and “microservice-client” respectively. And user-messages is the queue that we created before. Exchanges are the number of messages passed over the queue. You can click on these buttons to have a detailed view.
Here microservice-app is the consumer. So what will happen if the consumer(microservice-app) is not yet functioning and the producer(microservice-client) sends a message? Let’s check.
First, we need to stop the consumer(microservice-app) and then refresh the page from the browser. Then go to the overview tab.
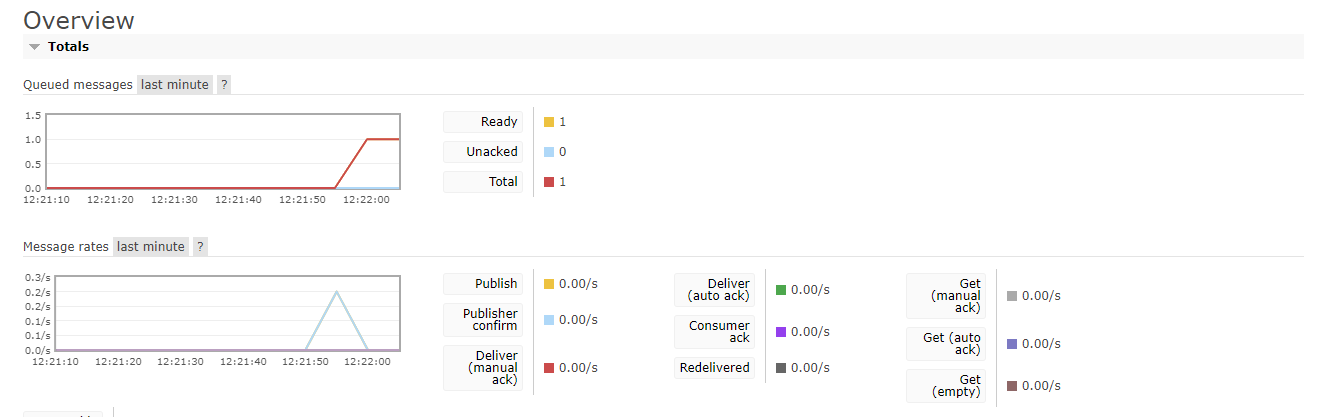
So the picture shows Ready count 1, that the message is there in the queue and waiting for delivery. Now start the consumer again. The message will be consumed by the consumer at the moment when it starts functioning.

Conclusion
Hope you have enjoyed the article. This is just a simple example, you may have more fun with Nest JS & RabbitMQ while dealing with advanced applications.
Comments