
Postman is a good tool which we mostly use to quickly test APIs to see the result returned by them, but it’s actually way more powerful than that. Till Now you have been doing testing using postman for APIs but you can much more than that like testing APIs using Newman CLI interface put this in your CI/CD process and most importantly you can also get Coverage from it
-
using numan you can run CLI on postman collection and test all APIs
-
With some hack, you can also get coverage of Code being run through APIs using newman cli
Table of Contents
-
Installation and Setup
-
Postman Collections
-
Let’s Write the First Test
-
Running collection through newman cli
-
Code coverage using collection
To mention a few of the features it comes with:-
Postman is a simple tool to understand which can be easily used for testing APIs REST APIs like all different methods of HTTP. You can check if the response is coming as expected and other things like status code, data from APIs.
-
You can simply test any API and see the response immediately.
-
You can create a collection of API endpoints and call them whenever you want to see the responses.
-
You can share these collections when you are logged in with team members.
-
You can use Postman’s CLI client, Newman, to write Postman tests with JavaScript.
-
You can write tests in JavaScript to test the response that comes when a Postman request is made.
-
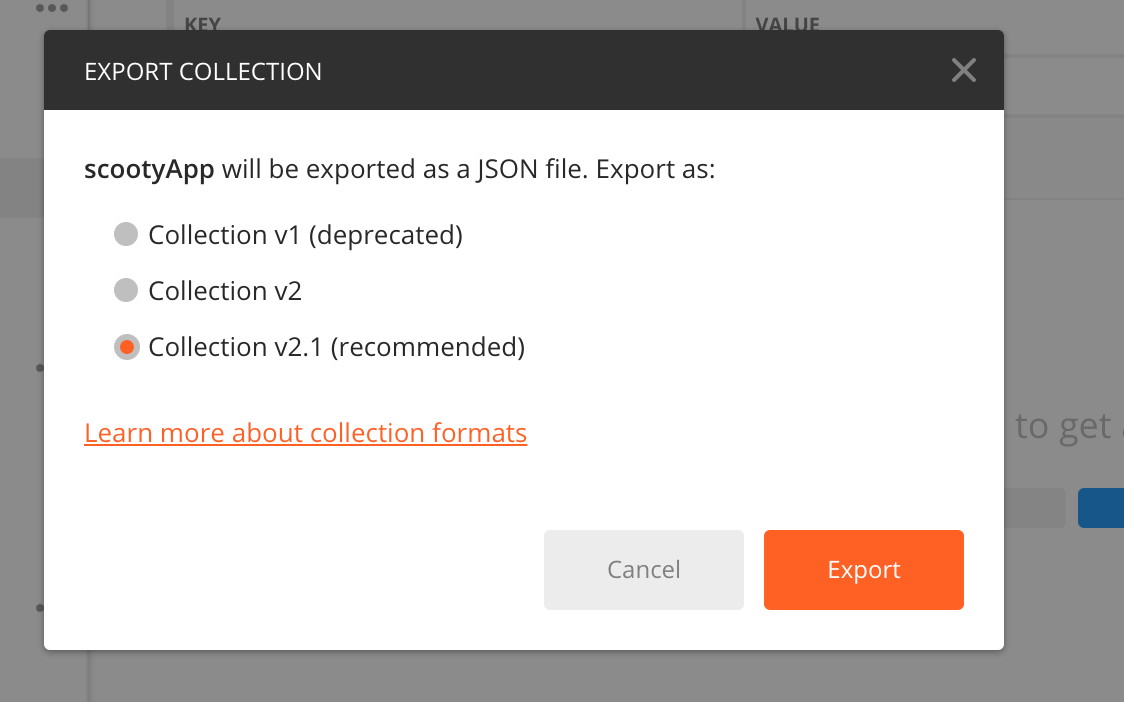
Finally, once you have all these endpoints created, you can export a JSON file, both for the endpoint tests and the environment variables, which again can be used by Postman as a source of for the tests.
We are going to look at all these features, some are intuitive, some not so much unless you’ve been using Postman for a while.
Since Postman is a tool, we can test APIs written in any language, we’ll do our tests with the open Github API.
Installation and Setup
If you have Postman already installed, you can skip to the next section.
If not, make sure you have Google Chrome installed, then head over to the Chrome Store and search for PostmanInstall it by clicking the Add to Chrome button, then it will either turn to Launch App or take you to the Google Chrome Apps page. You can open it with either options.
NOTE: Google will be phasing out Chrome apps on the Chrome Web Store by 2018. So it’s encouraged to install the native Postman for your platform. Visit the Postman site and get your platform download.
You can then look it up in your installed apps and open it.
You can choose to Sign Up if you want, this is important especially for saving your API collections and accessing them anytime on any machine, but for this article, we can skip this. There’s a button for that towards the bottom when you first launch the.
Postman Collections
There’s a Collections tab on the top left of Postman, with an example POSTMAN Echo collection. You can open and inspect it.
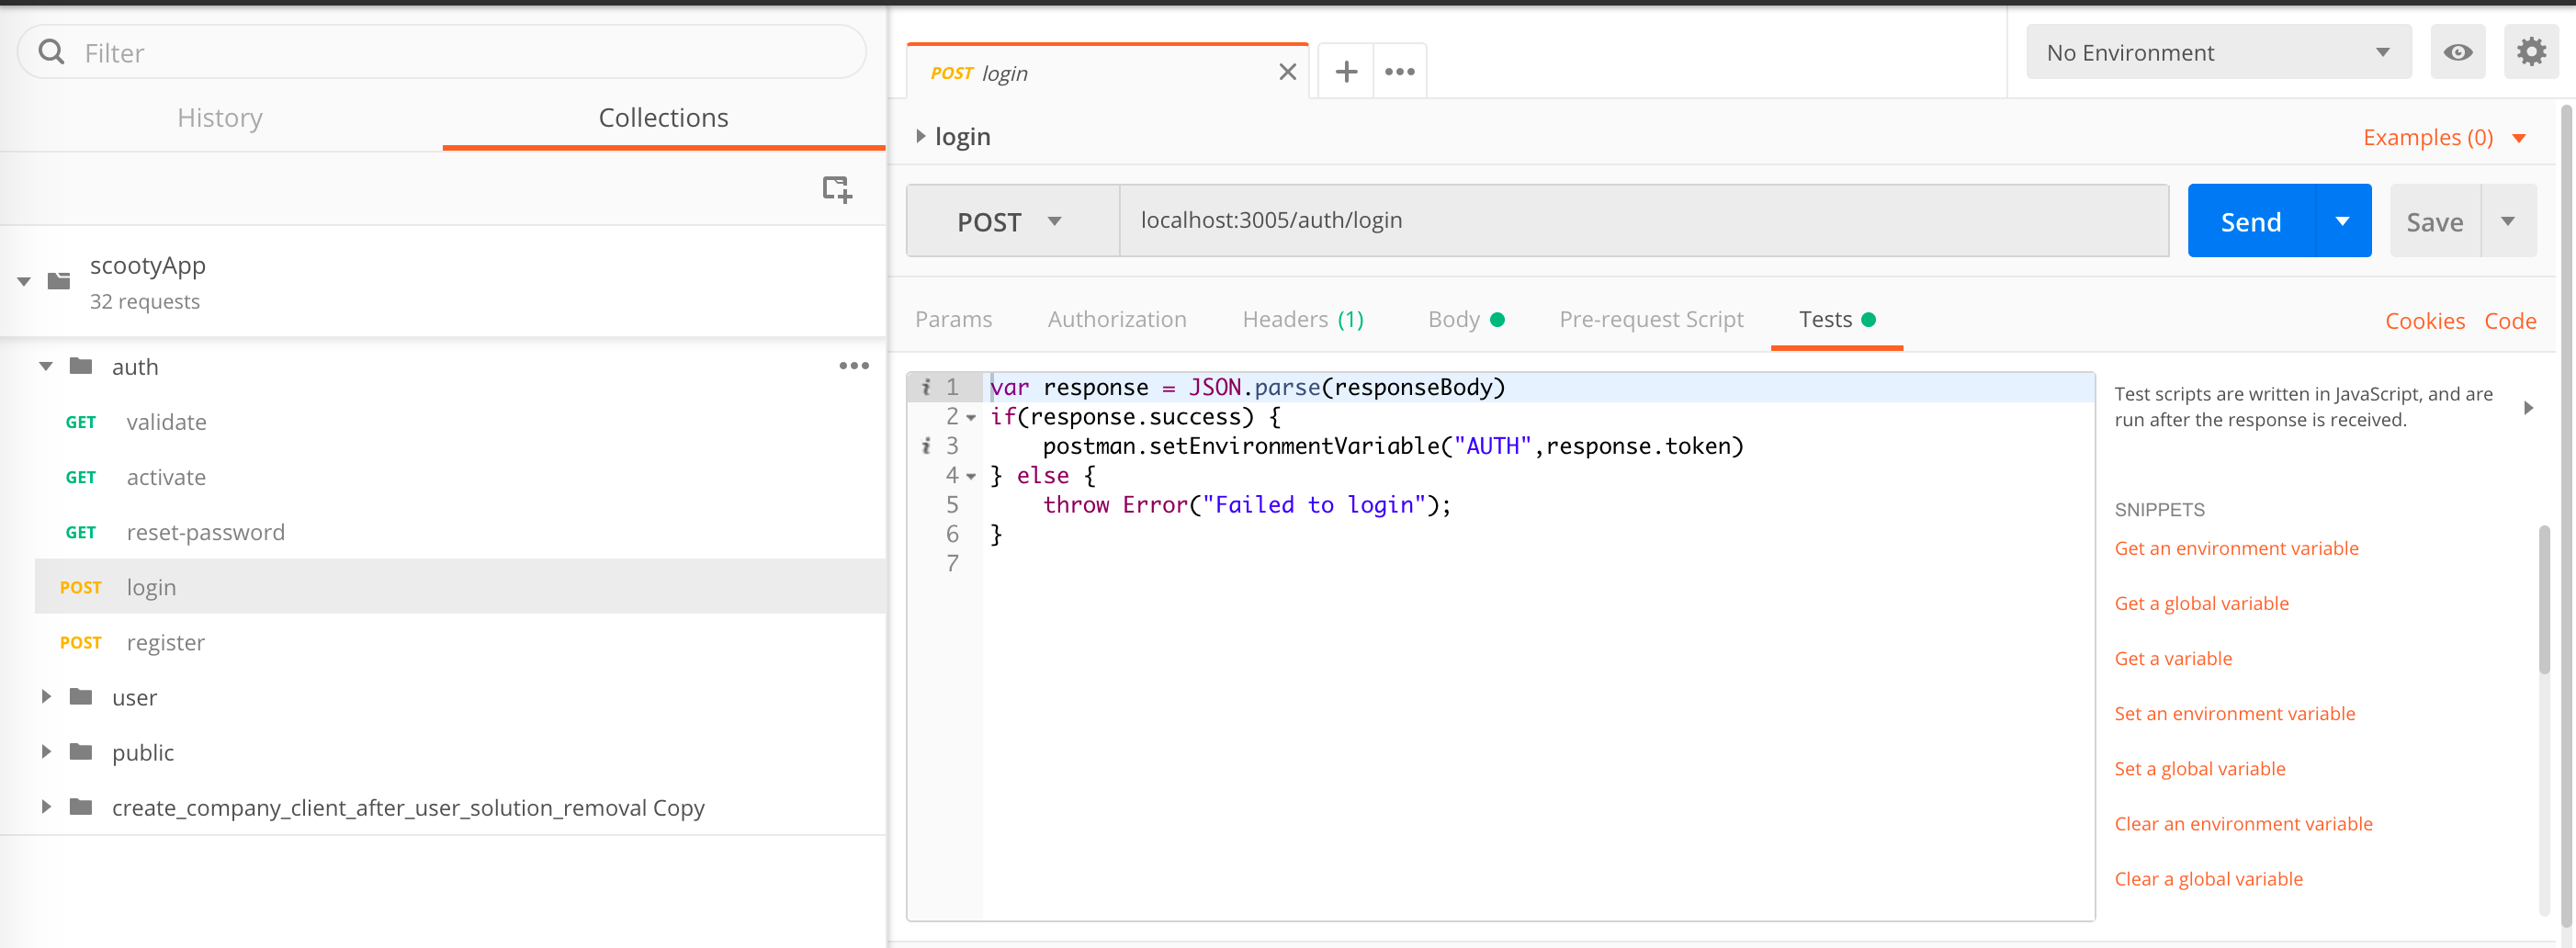
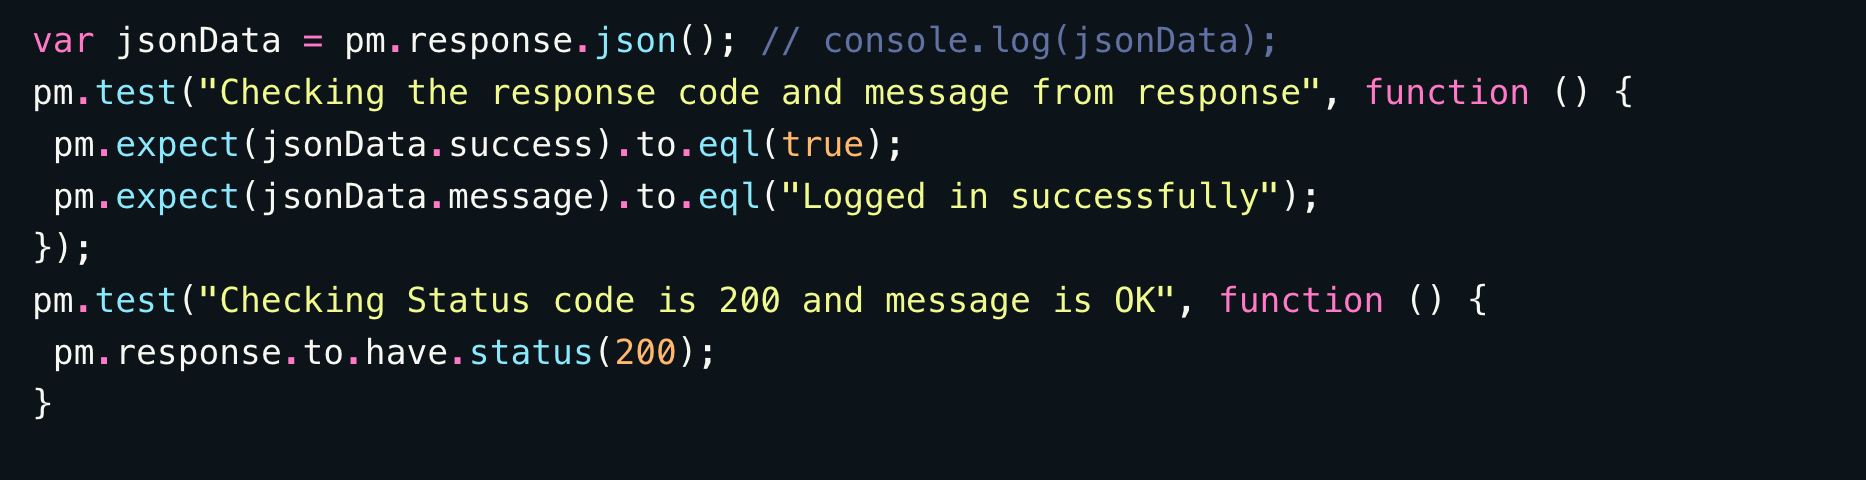
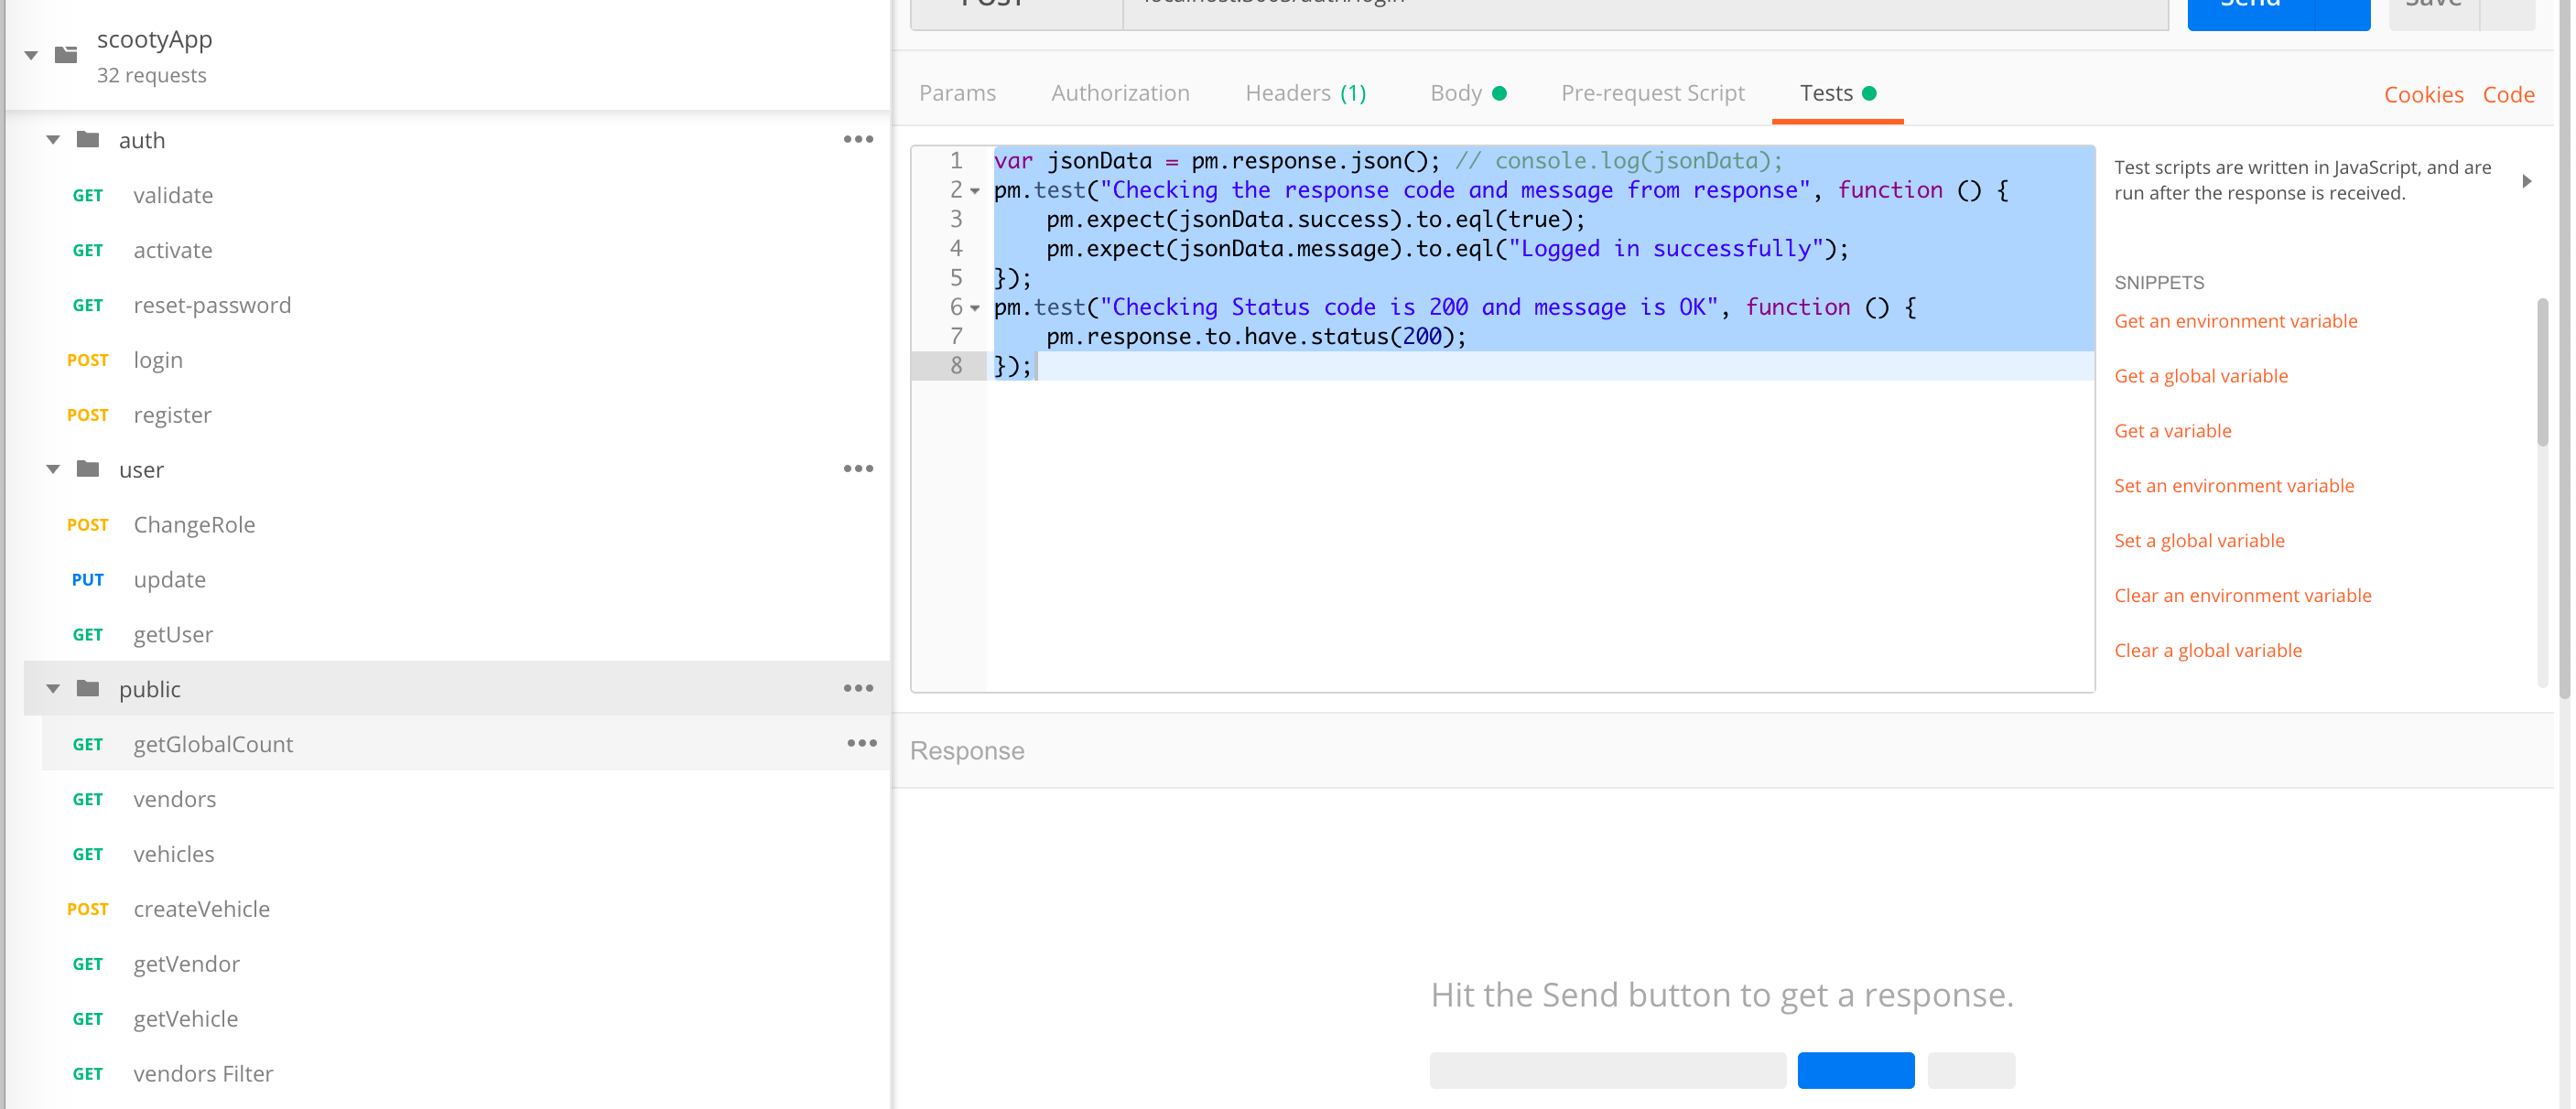
From the above screenshot, I’ve selected one of the API requests from the collection, and navigated to its test tab.We can write this kind of test in the test tab which is just checking response code and success attributes in the request.
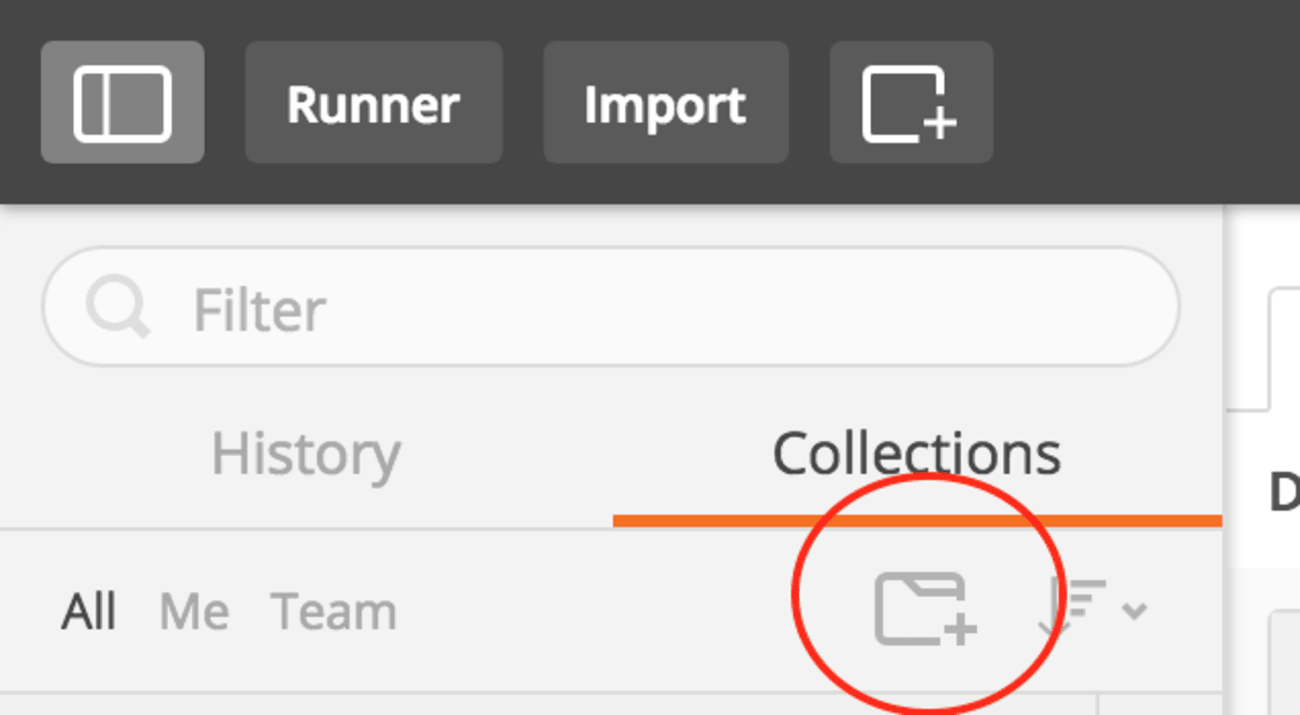
So let’s start by making our own collection, and call it Github API. Click on the Add Collection button on the top left of Postman. This is a collection of all different kind of APIs under scooty app. You can also build your own collection for the testing of Node JS App.
You will be prompted to give details about the collection, I’ve added a name Github API and given it a description.
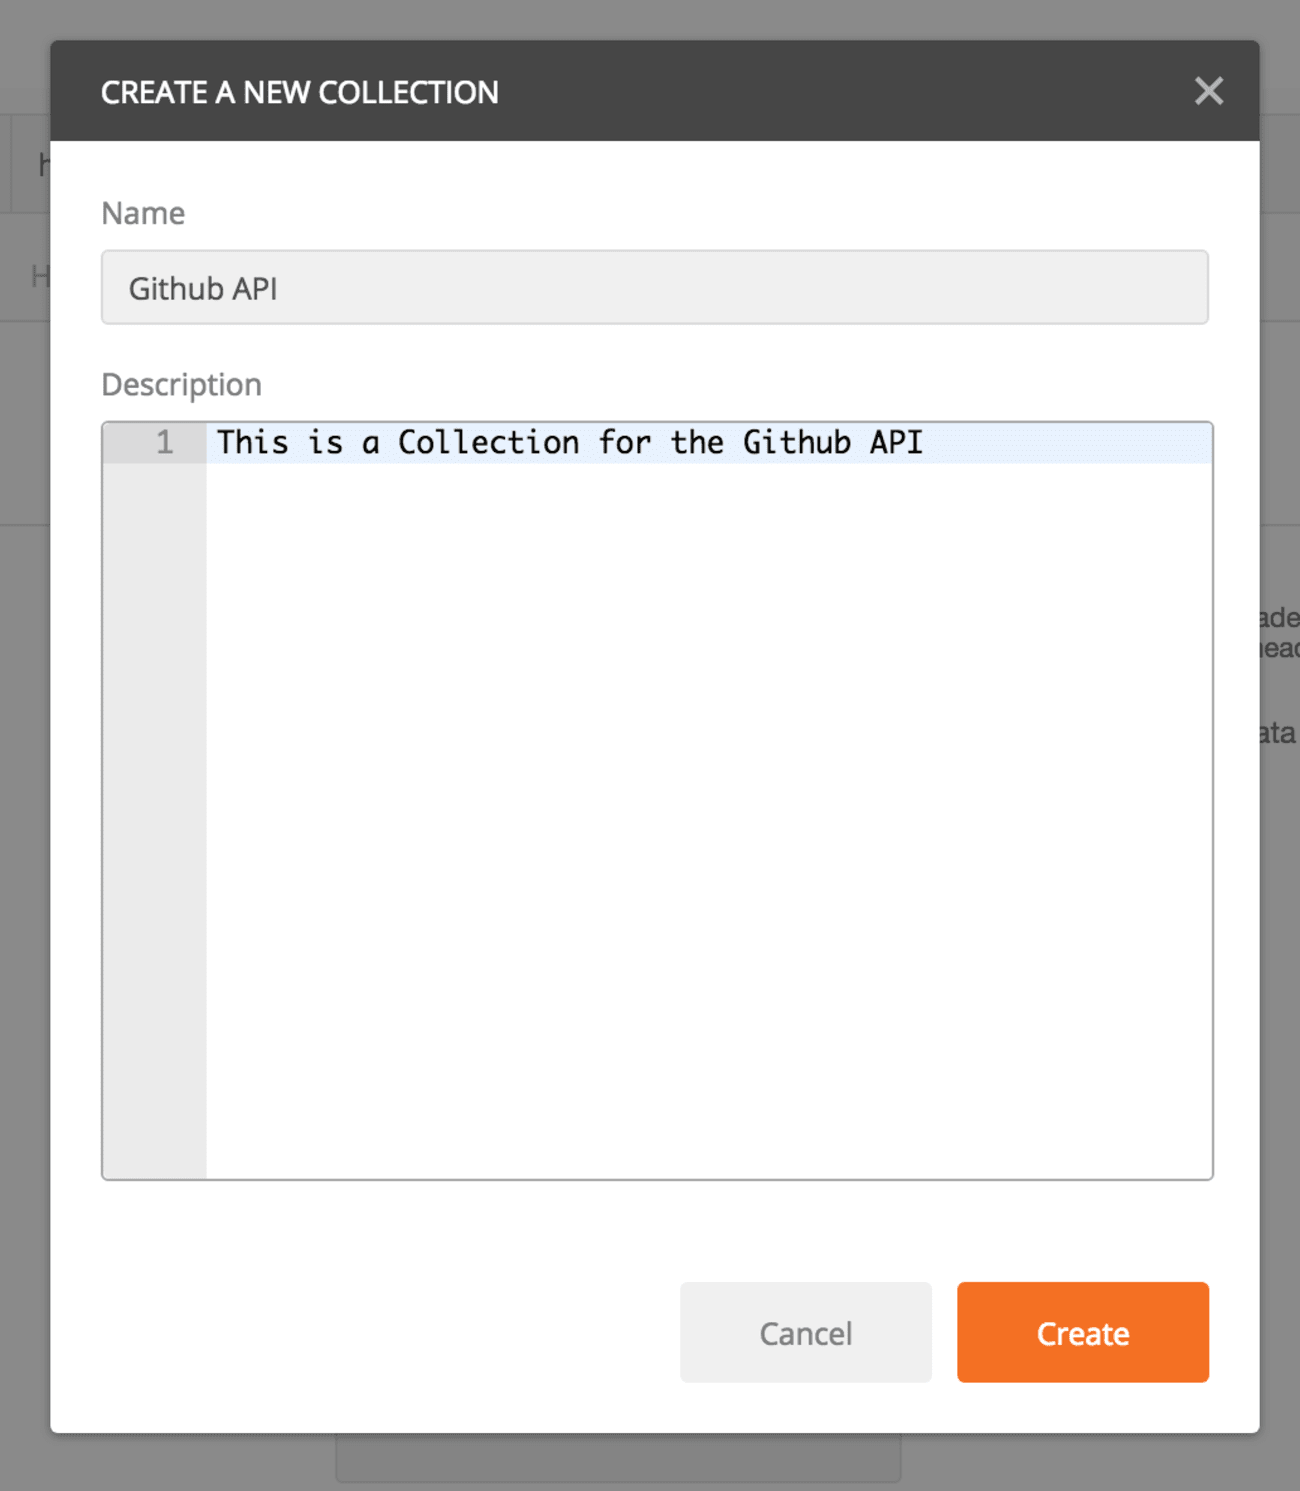
Clicking on Create should add the collection to the left pane, above, or below the example POSTMAN Echo collection.
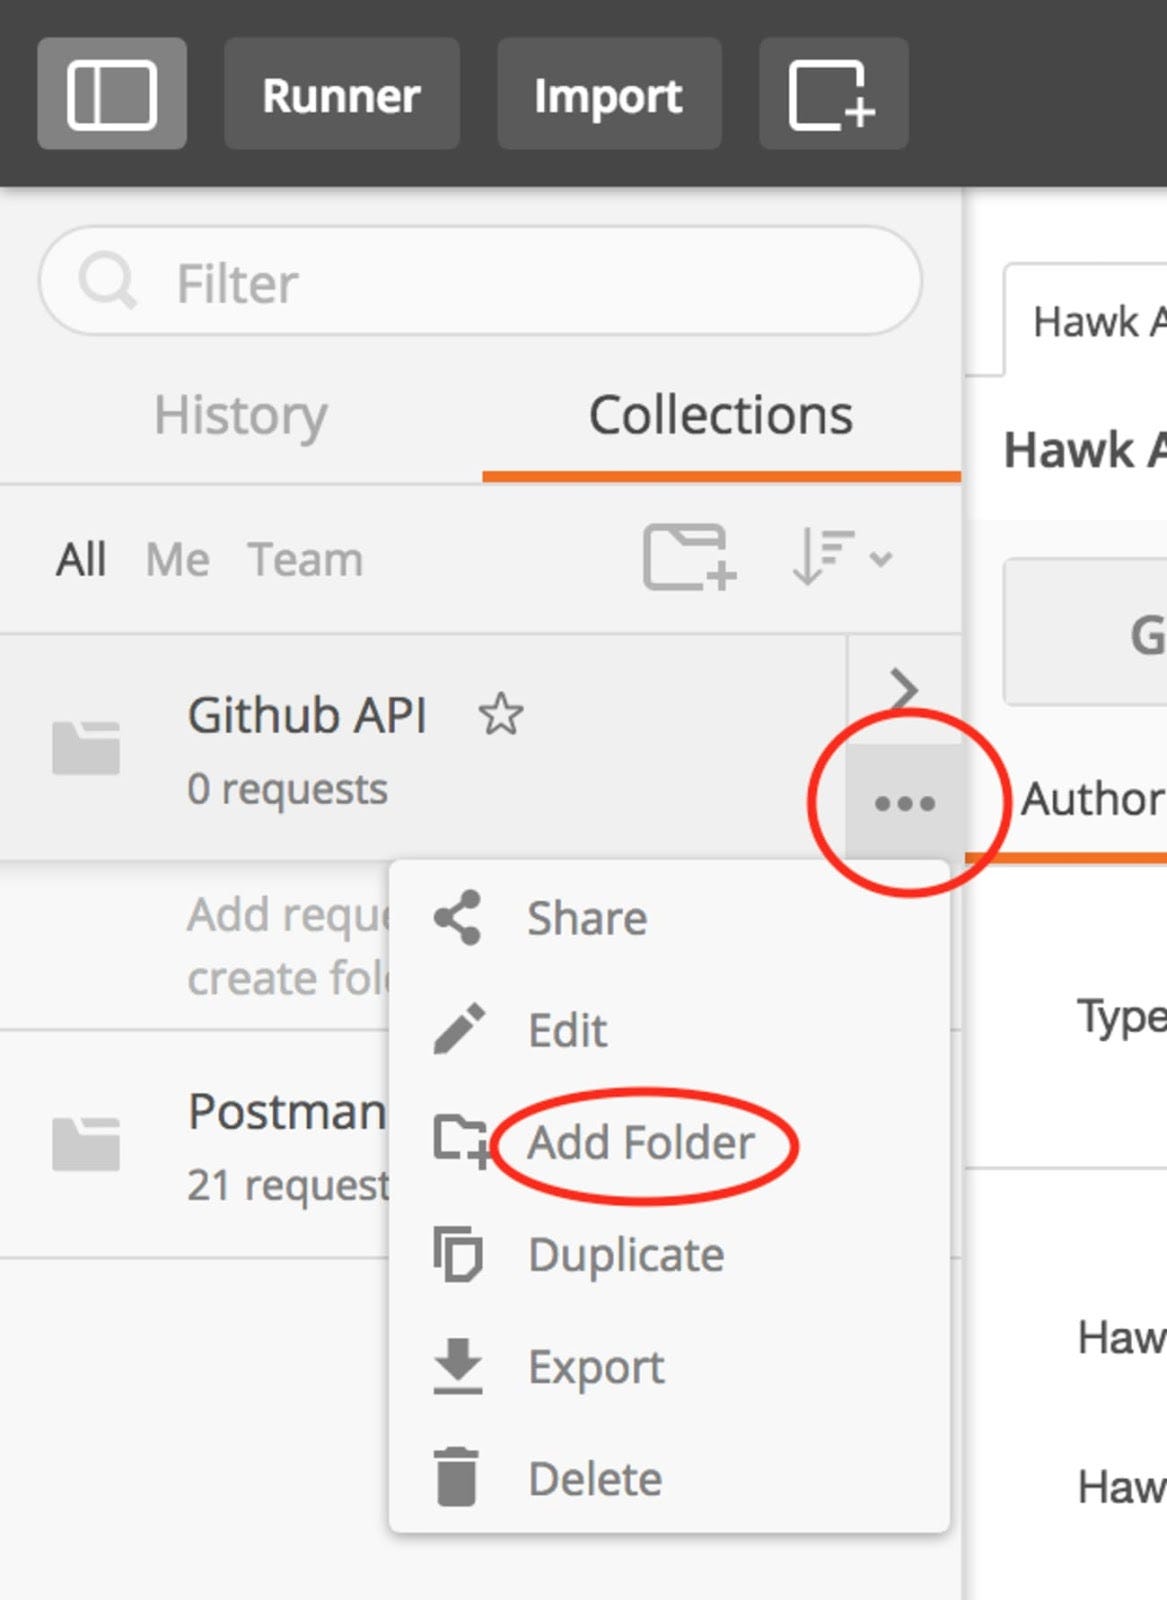
We’ll then add a folder to the collection. Folders are a great way of separating different parts of your API workflow.
Let’s Write the First Test with Node App
You can write any simple node js app https://github.com/tkssharma/workshop-Node-JS where I have created REST APIs and testing them using postman manually but how can I automate it and with just one click I want to test all APIs. Write all APIs and once done export that collection to json file with environments files.
Environment Variables
Most of the time while writing tests, we usually do not want to go around editing values that we either send a query or post parameters. That way, for instance, if we have ten requests which all send the username scotch-io, we need to create a variable for this so that we can change it once.
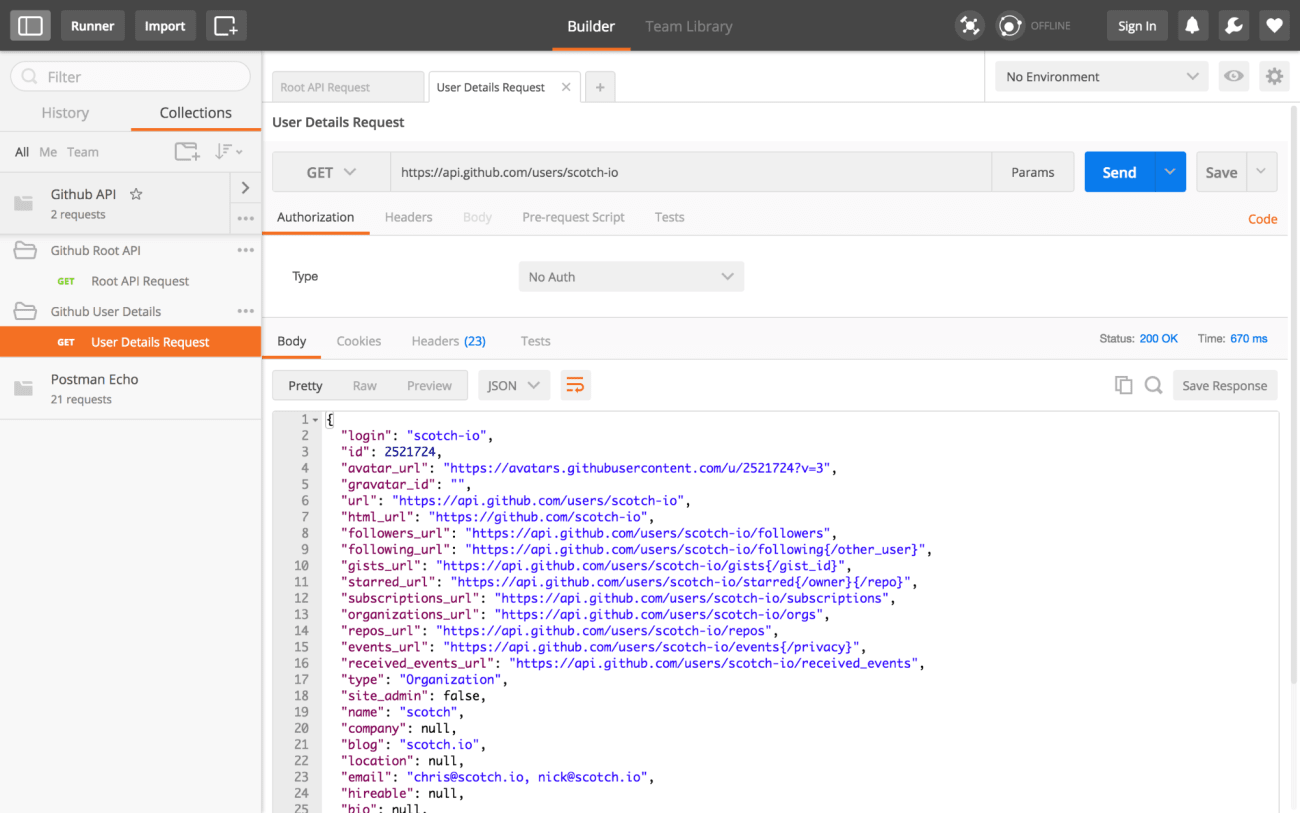
Let’s create another request called User Details Request, which will make a request with a username. Following the same procedure, we did for the Root API Request, create a folder called Github User Details, and add the request inside it. Make the GET request to https://api.github.com/users/scotch-io
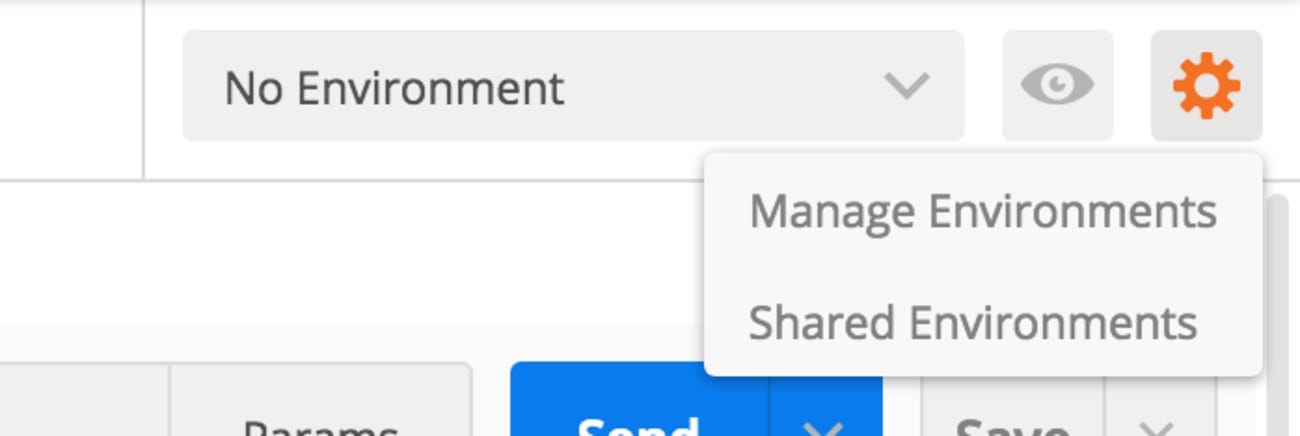
Now, we want to take make both https://api.github.com/users/ and scotch-io environment variables. To do this click on the top right gear icon, then select Manage Environments
A pop up will be displayed. Below it, under the Manage Environments tab click on Add.
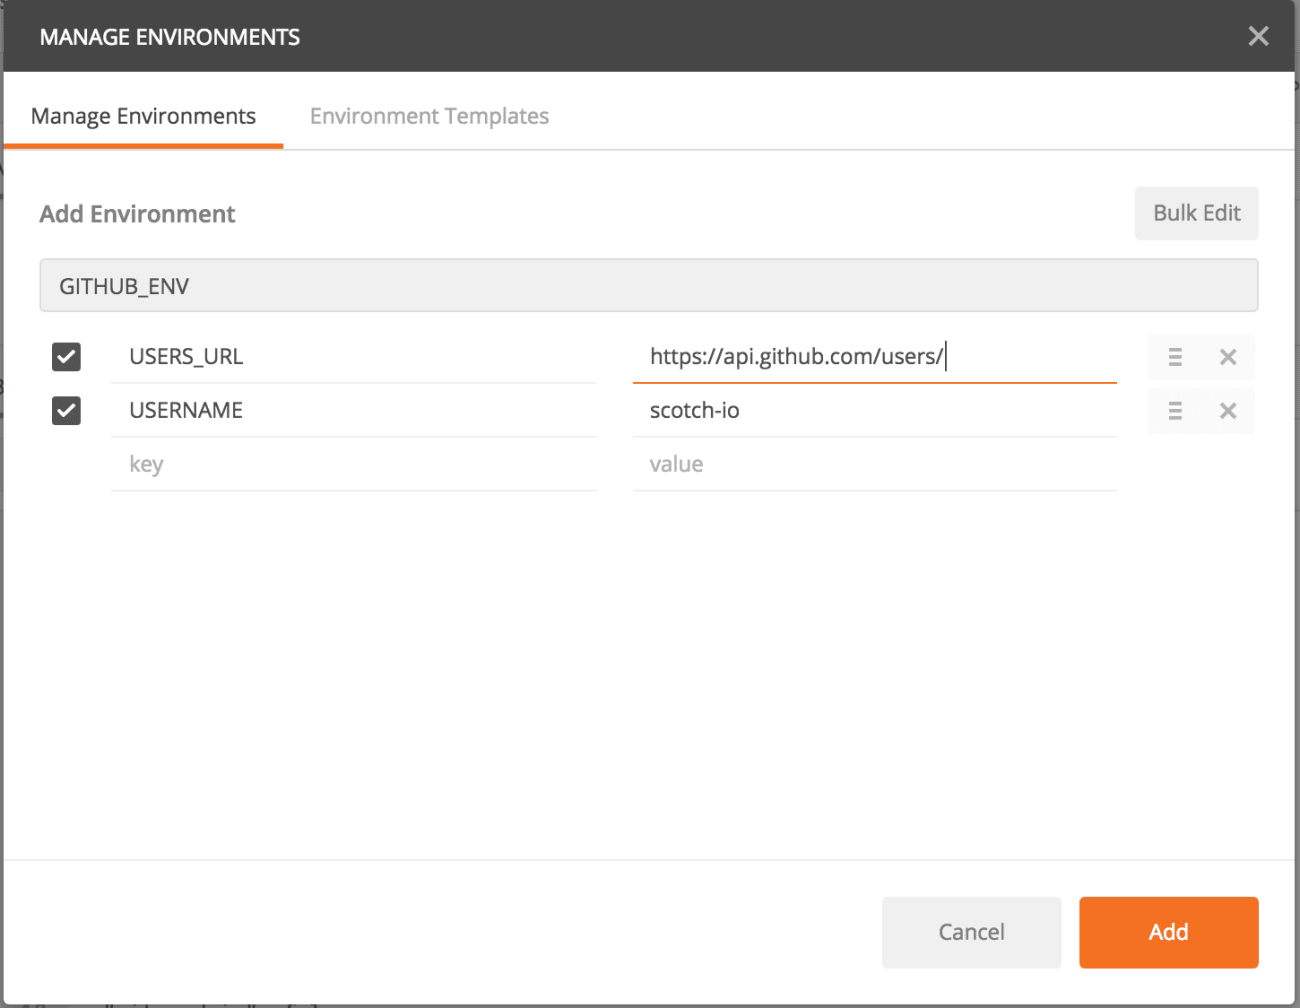
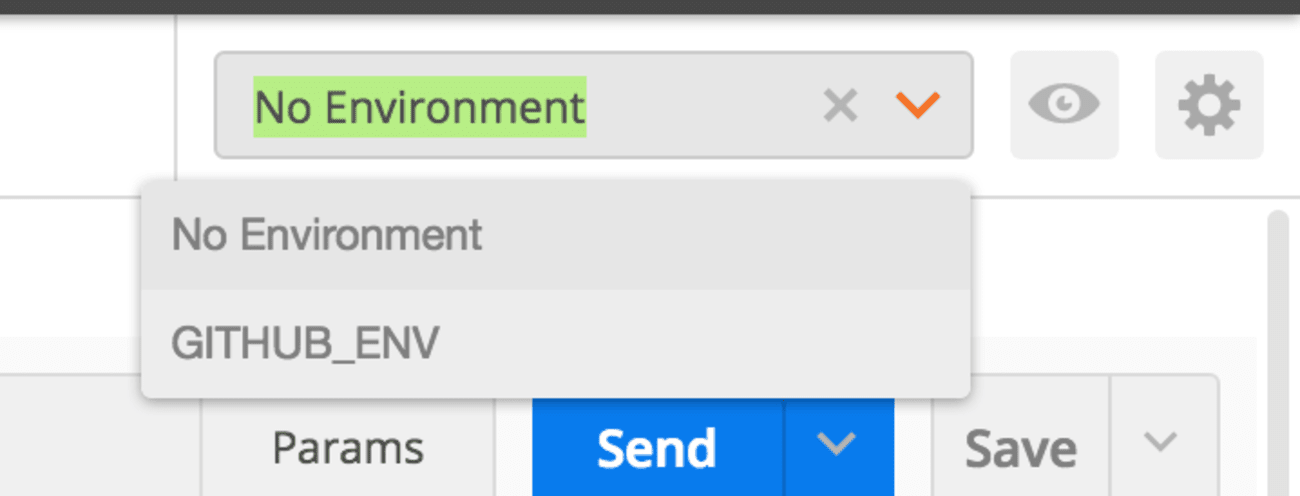
Give your environment a name. I gave it the name GITHUB_ENV and set up the environment variables you want as key-value pairs. In this case, we have USERS_URLand USERNAME.
Once you are done, click on the Add button and close the dialog. Next, select the environment you just created from the top right drop down.
Once selected, you can confirm the values by clicking on the eye-like icon, just before the settings/gear icon.
Testing with Newman
To run Newman, make sure you have Node.js installed. You can download and install Node.js on Linux, Windows, and Mac OSX.
After you install Node.js, Newman is just a command away. Install Newman from npm globally on your system, which allows you to run it from anywhere.
$ npm install -g newmanThe easiest way to run Newman is to run it with a collection. You can run any collection file from your file system.
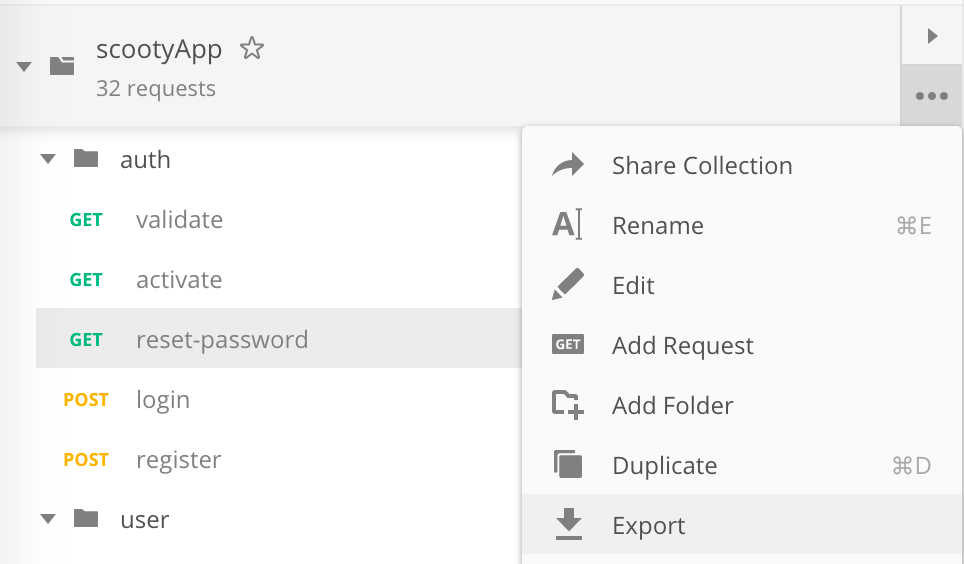
To learn how to export collections to share as a file, see the collection documentation.
$ newman run mycollection.jsonYou can also pass a collection as a URL. For more information, see the documentation for collections to learn how to share a file as a URL.
Your collection probably uses environment variables. To provide an accompanying set of environment variables, export the template from Postman and run them with the -e flag.
$ newman run https://www.getpostman.com/collections/cb208e7e64056f5294e5 -e dev_environment.jsonNewman provides a rich set of options to customize a run. You can retrieve a list of options by running it with the -h flag.
For the complete list of options, refer the Command Line Options section below.
 collection execution
$ newman run -hWe have already exported collection JSON file from postman now we can run that using newman by passing collection and environment file.
You can run Postman collection from CLI or using Node JS Code.
Using Newman as a Library
Newman can be easily used within your JavaScript projects as a Node.js module. The entire set of Newman CLI functionality is available for programmatic use as well. The following example runs a collection by reading a JSON collection file stored on disk.
    const newman = require('newman'); // require newman in your project
    // call newman.run to pass `options` object and wait for callback
    newman.run({
    collection: require('./sample-collection.json'),
    reporters: 'cli'
    }, function (err) {
    if (err) { throw err; }
    console.log('collection run complete!');
    });
You can run the whole collection file and get success & failure count while running it from node js code after import newman module
const newman = require('../../node_modules/newman');
const treeify = require('treeify');
const { app } = require('../../app/server');
const collection = require('../collections/collection.json');
const environment = require('../collections/environment.json');

const port = 3333;
environment.values[0].value = `http://localhost:${port}/api/v1`;

const server = app.listen(
  port,
  () => {
    console.log(`Test server listing at port ${port}`);
  },
);

newman.run({
  collection,
  environment,
  color: true,
  reporters: ['cli']
}).on('start', (err, args) => {
}).on('done', (err, summary) => {
  server.close(() => console.log('Test server Terminated'));
  if (err || summary.run.failures.length) {
    const failureCount = summary.run.failures.length;
    summary.run.failures.forEach((element, index) => {
      const header = `${'='.repeat(32)}[ Error-${index + 1} ]${'='.repeat(32)}`;
      console.error(header);
      console.error('Tag      :', element.parent.name);
      console.error('Source   :', element.source.name);
      console.error('Type     :', element.error.name);
      console.error('Test     :', element.error.test);
      console.error('Error    :', element.error.message);
      if (index === failureCount - 1) console.error('~'.repeat(header.length));
    });
    console.error(treeify.asTree(summary.run.stats, true));
    process.exit(1);
  } else {
    console.log('🍺🍺 🍺🍺 🍺🍺 🍺🍺 🍺🍺');
    process.exit(0);
  }
});
From the code above you can get the custom report for success & failure count of your API assertions. Write as much as you can to validate the API response. After running this we will get a detailed report of passed and failure.
Code Coverage using newman Execution
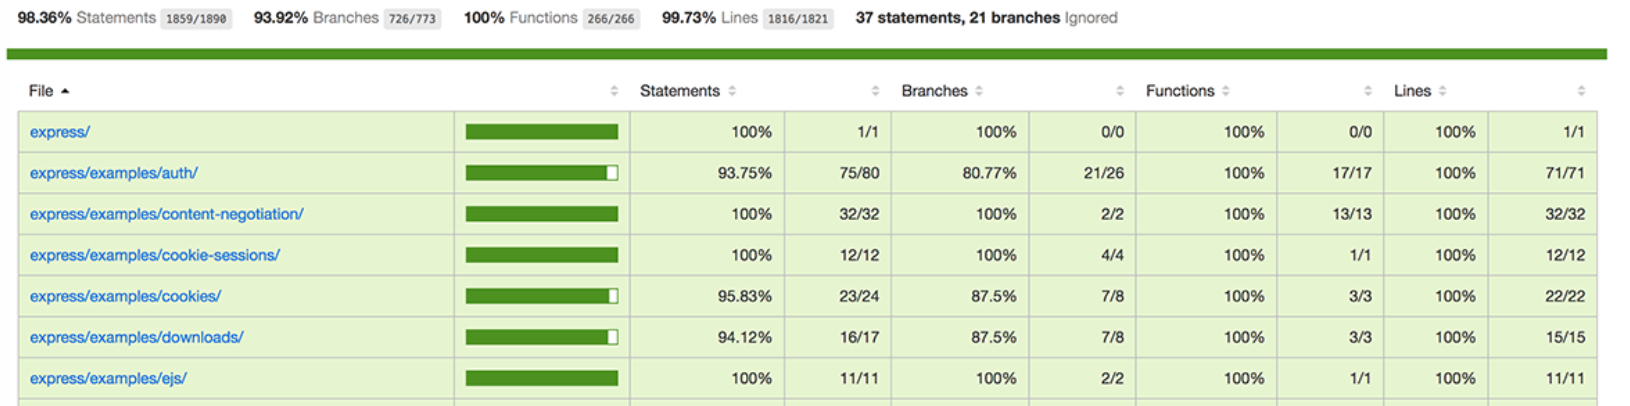

This will help us to get coverage from API automation triggered using newman cli tool. summery look like this.
Coverage
- Statements : 82.94% ( 3725/4491 )
- Branches : 69.8% ( 1350/1934 )
- Functions : 80.18% ( 1331/1660 )
- Lines : 83.17% ( 3657/4397 )
Conclusion
Postman is powerful tool for doing API automation and you should use it if you have lots of REST apis in your application and code is being chnaged in active development.
Comments