
Build Serverless application with AWS Amplify, AWS API Gateway, AWS Lambda and Cognito Auth
Serverless
Serverless is a cloud-native development model that allows developers to build and run applications without having to manage servers. There are still servers in serverless, but they are abstracted away from app development. A cloud provider(e.g AWS) handles the routine work of provisioning, maintaining, and scaling the server infrastructure. Developers can simply package their code in containers for deployment. So, Serverless simply means Just put your backend code on cloud and run it, without worrying about infrastructure.
AWS Lambda
AWS Lambda is a serverless computing service provided by Amazon Web Services (AWS). Users of AWS Lambda create functions, self-contained applications written in one of the supported languages and runtimes, and upload them to AWS Lambda, which executes those functions in an efficient and flexible manner. The Lambda functions can perform any kind of computing task, from serving web pages and processing streams of data to calling APIs and integrating with other AWS services.
Each Lambda function runs in its own container. When a function is created, Lambda packages it into a new container and then executes that container on a multi-tenant cluster of machines managed by AWS. Before the functions start running, each function’s container is allocated its necessary RAM and CPU capacity. Once the functions finish running, the RAM allocated at the beginning is multiplied by the amount of time the function spent running. The customers then get charged based on the allocated memory and the amount of run time the function took to complete.
The entire infrastructure layer of AWS Lambda is managed by AWS. Customers don’t get much visibility into how the system operates, but they also don’t need to worry about updating the underlying machines, avoiding network contention, and so on — AWS takes care of this itself. And since the service is fully managed, using AWS Lambda can save you time on operational tasks. When there is no infrastructure to maintain, you can spend more time working on the application code — even though this also means you give up the flexibility of operating your own infrastructure.
Congnito Auth
Amazon Cognito provides authentication, authorization, and user management for the web and mobile applications. AWS Cognito works with external identity providers that support SAML or OpenID Connect, social identity providers (such as Facebook, Twitter, Google). Basically, it enables simple, secure user authentication, authorization and user management for web and mobile apps. With Cognito, a user can sign in with a username and password through Amazon, or through a third party like Facebook, Google or Twitter.
AWS Amplify
AWS Amplify is a framework provided by AWS to develop applications, with AWS cloud services(e.g AWS Lambda, AWS API Gateway, AWS Cognito). Amplify makes the process of stitching cloud services with our frontend application hassle free. It’s primary objective is to create and handle the backend of a web or mobile deployment using AWS services. Amplify makes the process of stitching cloud services with our frontend application hassle free. With Amplify, developers get the flexibility to leverage AWS services to customize their frontend applications and improve their functionality. It can identify as
backend as a service (BaaS) implementation
for frontend developers. It supports a variety of development languages, including Angular, React, JavaScript, Next.js for web deployments, and Flutter, React Native, iOS, Android, etc., for mobile deployments. Amplify javascript library is available as an npm package(aws-amplify). The aws-amplify client library uses a config file to connect AWS services.
You can think of AWS Amplify as a JavaScript library that lets you build and deploy serverless applications in the cloud. It is a full-stack application platform that is a combination of both client-side and server-side code. In a nutshell, AWS Amplify consists of three major components, 1) Libraries, 2) UI, 3) CLI Toolchain. All these components work collaboratively to manage the application development lifecycle. The Library component lets you add, integrate, and interact with the AWS cloud services. The library also makes it easy to add secure authentication, file storage, data storage, serverless APIs, analytics, push notifications, AR/VR, and multiple other features to your apps. The UI contains pre-built UI components that are designed around cloud workflows in your application, including the authentication higher-order component. The CLI Toolchain helps in scaling your application. If you ever need to add more cloud services and features, the easy-to-use CLI commands can efficiently make changes to your AWS-managed backends.
AWS Amplify is a framework provided by AWS to develop applications, with AWS cloud services(e.g AWS Lambda, AWS API Gateway, AWS Cognito). Amplify makes the process of stitching cloud services with our frontend application hassle free. Amplify provides different libraries for different frond-end apps(iOS, Android, Web, React Native). Amplify javascript library is available as an npm package(aws-amplify). The aws-amplify client library uses a config file to connect AWS services. The services which amplify provides include Database, API, Lambda/serverless, Authentication, Hosting, Storage, Analytics.
Scenario
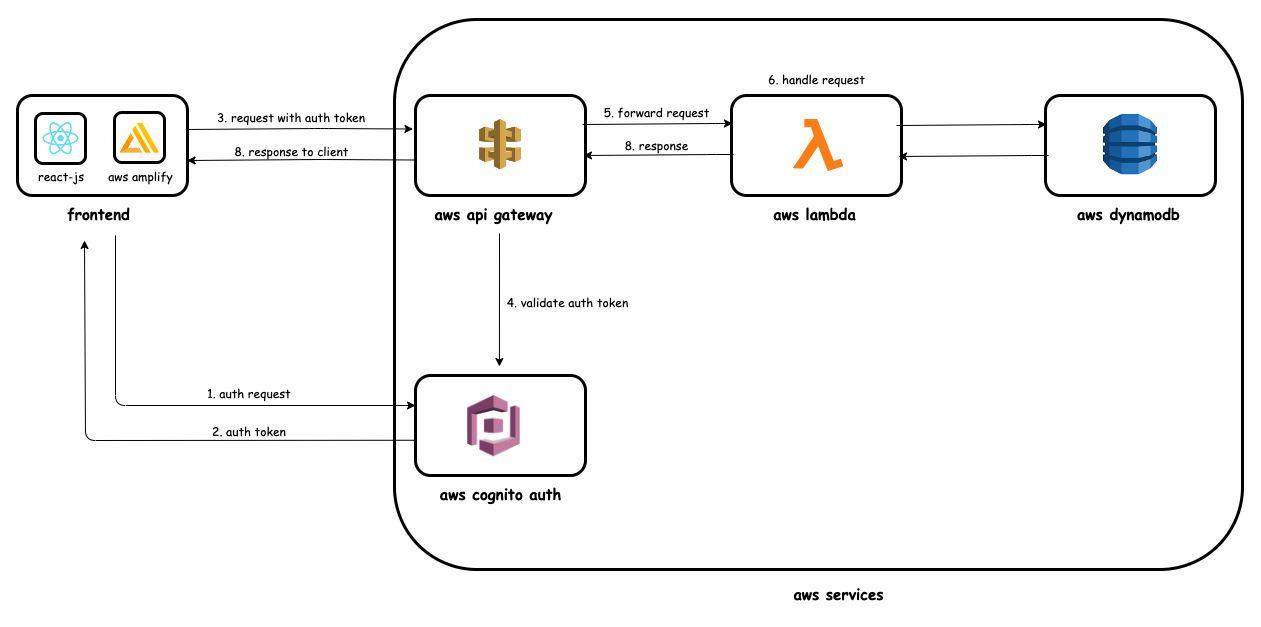
In this senario I’m developing full stack Serverlesss application. The Serverless backend contains simple REST API. The Serverless backend functions developed with AWS Lambda function. The authentication handles with AWS Cognito auth framework. AWS API Gateway used as the API Gateway of the system. The web frontend of the application build with React. The frontend and different AWS services(Lambda, Auth, API Gateway etc) are orchestrated from the client side(e.g cli) via the AWS Amplify framework. Following figure shows the architecture of the system(please note that, in this post I’m not gonna discuss about AWS DynamoDB database integration).
- AWS Lambda
- AWS Dynamo DB
- REST APIs
- AWS Amplify React Stack
- API Gateway
- AWS Cognito
- AWS Lambda
Following are the main steps that I have followed to develop this application. All the source codes which related to this post available in the gitlab. Please clone the repo and continue the post.
1. Install Amplify
# install amplify cli
npm install -g @aws-amplify/cli
Make sure you have node and npm installed in the machine. In order to use Amplify, first I need to create an AWS Account. Then need to install and Amplify CLI command line tool. I can create & deploy various AWS services through the Amplify CLI.
2. Configure Amplify
# configure amplify
amplify configure
To set up the Amplify CLI on local machine, I have to configure it to connect to my AWS account. Following is the way to do that. It will ask you to sign into the AWS console. Once signed in Amplify will ask you to create an IAM user. IAM enables you to create profiles that can manage users and user permissions in AWS. You can refer the original guideline on installing and configuring Amplify CLI, from here.
2. Create React App Frontend
# create amplify react app
npx create-react-app rahasak-app

# directory listing
cd rahasak-app
❯❯ ls -al
total 2328
drwxr-xr-x   10 eranga  staff      320 Jul 12 22:00 .
drwxr-xr-x    8 eranga  staff      256 Jul 12 21:59 ..
drwxr-xr-x   12 eranga  staff      384 Jul 12 22:02 .git
-rw-r--r--    1 eranga  staff      310 Jul 12 22:00 .gitignore
-rw-r--r--    1 eranga  staff     3359 Jul 12 22:00 README.md
drwxr-xr-x  802 eranga  staff    25664 Jul 12 22:00 node_modules
-rw-r--r--    1 eranga  staff  1177672 Jul 12 22:00 package-lock.json
-rw-r--r--    1 eranga  staff      814 Jul 12 22:00 package.json
drwxr-xr-x    8 eranga  staff      256 Jul 12 22:00 public
drwxr-xr-x   10 eranga  staff      320 Jul 12 22:00 src
In this scenario I’m developing the front end web using React. Following is the way to create React frontend app using npx create-react-app command. Please note that, I have not added any Amplify config to the app yet.
3. Install Amplify Frontend Libraries
# aws-amplify - main library that used to interact with the with the backend
# aws-amplify/ui-react - library that provides pre-built UI components for React
npm install aws-amplify @aws-amplify/ui-react
Then I can Install Amplify frontend libraries in the React app as npm packages. In here I’m installing two npm packages 1) aws-amplify(main library that used to interact with the with the backend), 2) aws-amplify/ui-react(library that provides pre-built UI components for React).
4. Initialize Amplify App
# initialize amplify app
❯❯ amplify init
Note: It is recommended to run this command from the root of your app directory
? Enter a name for the project rahasakapp
The following configuration will be applied:

Project information
| Name: rahasakapp
| Environment: dev
| Default editor: Visual Studio Code
| App type: javascript
| Javascript framework: react
| Source Directory Path: src
| Distribution Directory Path: build
| Build Command: npm run-script build
| Start Command: npm run-script start

? Initialize the project with the above configuration? Yes
Using default provider  awscloudformation
? Select the authentication method you want to use: AWS profile

For more information on AWS Profiles, see:
https://docs.aws.amazon.com/cli/latest/userguide/cli-configure-profiles.html

? Please choose the profile you want to use default
Adding backend environment dev to AWS Amplify app: d3i5l0gd37jxi6
⠧ Initializing project in the cloud...

CREATE_IN_PROGRESS amplify-rahasakapp-dev-221457 AWS::CloudFormation::Stack Tue Jul 12 2022 22:14:58 GMT-0400 (Eastern Daylight Time) User Initiated
⠧ Initializing project in the cloud...

CREATE_IN_PROGRESS AuthRole         AWS::IAM::Role  Tue Jul 12 2022 22:15:05 GMT-0400 (Eastern Daylight Time)
CREATE_IN_PROGRESS UnauthRole       AWS::IAM::Role  Tue Jul 12 2022 22:15:06 GMT-0400 (Eastern Daylight Time)
CREATE_IN_PROGRESS DeploymentBucket AWS::S3::Bucket Tue Jul 12 2022 22:15:06 GMT-0400 (Eastern Daylight Time)
CREATE_IN_PROGRESS AuthRole         AWS::IAM::Role  Tue Jul 12 2022 22:15:07 GMT-0400 (Eastern Daylight Time) Resource creation Initiated
CREATE_IN_PROGRESS UnauthRole       AWS::IAM::Role  Tue Jul 12 2022 22:15:07 GMT-0400 (Eastern Daylight Time) Resource creation Initiated
CREATE_IN_PROGRESS DeploymentBucket AWS::S3::Bucket Tue Jul 12 2022 22:15:08 GMT-0400 (Eastern Daylight Time) Resource creation Initiated
⠇ Initializing project in the cloud...

CREATE_COMPLETE UnauthRole AWS::IAM::Role Tue Jul 12 2022 22:15:24 GMT-0400 (Eastern Daylight Time)
CREATE_COMPLETE AuthRole   AWS::IAM::Role Tue Jul 12 2022 22:15:24 GMT-0400 (Eastern Daylight Time)
⠏ Initializing project in the cloud...

CREATE_COMPLETE DeploymentBucket              AWS::S3::Bucket            Tue Jul 12 2022 22:15:29 GMT-0400 (Eastern Daylight Time)
CREATE_COMPLETE amplify-rahasakapp-dev-221457 AWS::CloudFormation::Stack Tue Jul 12 2022 22:15:31 GMT-0400 (Eastern Daylight Time)
✔ Successfully created initial AWS cloud resources for deployments.
✔ Help improve Amplify CLI by sharing non sensitive configurations on failures (y/N) · no
✔ Initialized provider successfully.
✅ Initialized your environment successfully.

Your project has been successfully initialized and connected to the cloud!

Some next steps:
"amplify status" will show you what you've added already and if it's locally configured or deployed
"amplify add <category>" will allow you to add features like user login or a backend API
"amplify push" will build all your local backend resources and provision it in the cloud
"amplify console" to open the Amplify Console and view your project status
"amplify publish" will build all your local backend and frontend resources (if you have hosting category added) and provision it in the cloud
After creating the frontend React App and installing Amplify frontend libraries, I can integrate the backend(e.g AWS Lambda serverless functions) functions with Amplify. For that I need to initialize Amplify app. Following is the way to do that. It will ask several questions about the app.
Once new Amplify project is initialized following things will happen behind the scene.
- A directory named
amplifythat contains the backend definition of the app is created. This is where we will add REST API and Authentication services. When adding different services, the amplify folder will get updated with code templates that will help us integrate the frontend with backend API. - A file named
aws-exports.jsis created in thesrcdirectory, this file holds all the configuration for the services that we create with Amplify. This is how the client React app will be getting the necessary information about the backend on AWS Amplify. - The
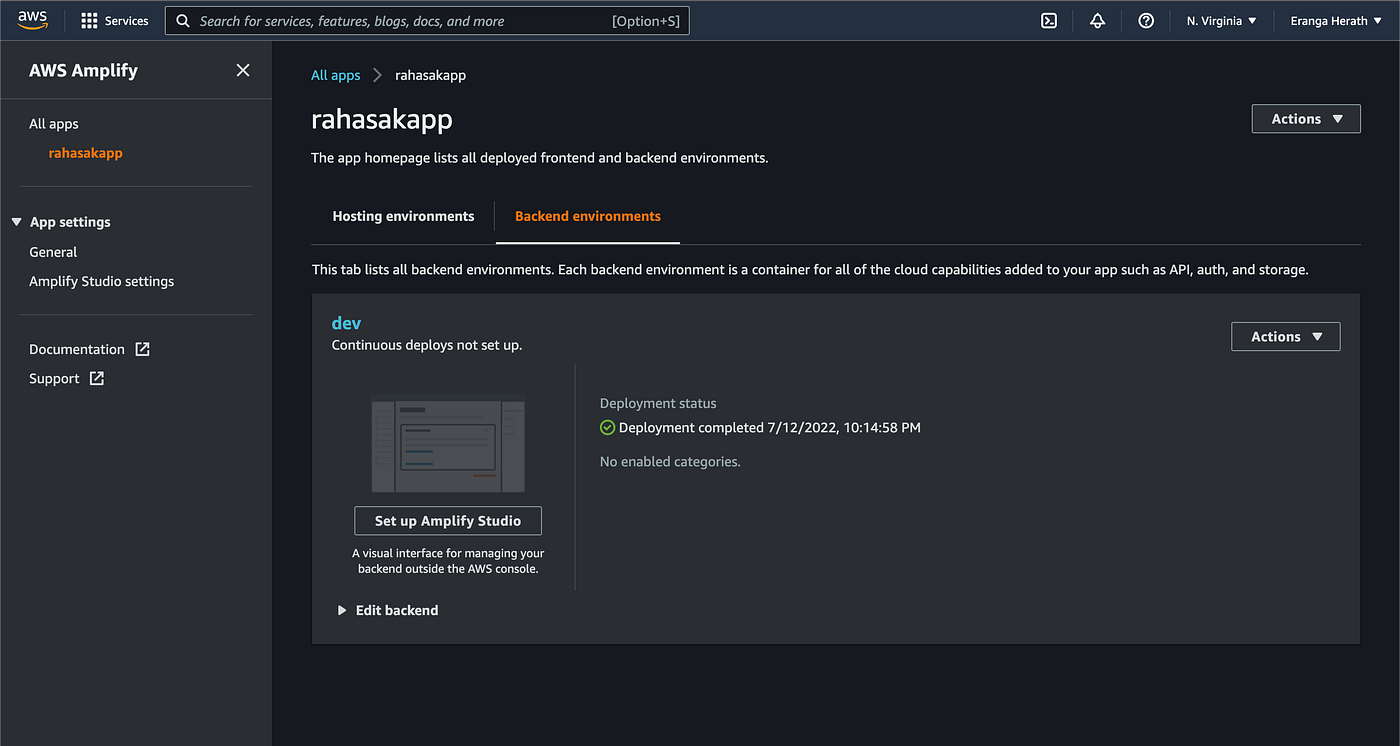
.gitignorewill also be updated as new features are added that needn’t be in the repository. - A cloud project is created(with the given name
rahasakapp) in AWS Amplify Console for this project.
5. Setup Cognito Auth
After initializing the Amplify app, we can add backend services one by one. AWS Cognito Auth is the first backend service I’m gonna add to the app. Following is the way to add Cognito Auth service to the app. It will ask several questions.
This command will add amplify auth backend service in the amplify/backend/auth/ directory and define the auth backend service configuration in the amplify/backend/backend-config.json.
6. Deploy Auth Service
After initializing the authentication service, I need to deploy it. Following is the way to do that. Before deploying I can check the current status of the amplify app via amplify status command. It will shows one service(auth service) and its status.
7. Enabled Auth Frontend Web
Now I can enable Sign In, Sign Up functions into the React frontend application. The Amplify framework provides inbuilt, customizable UI components that are easy to integrate, which helps streamline the process. Add following content to the App.js file.
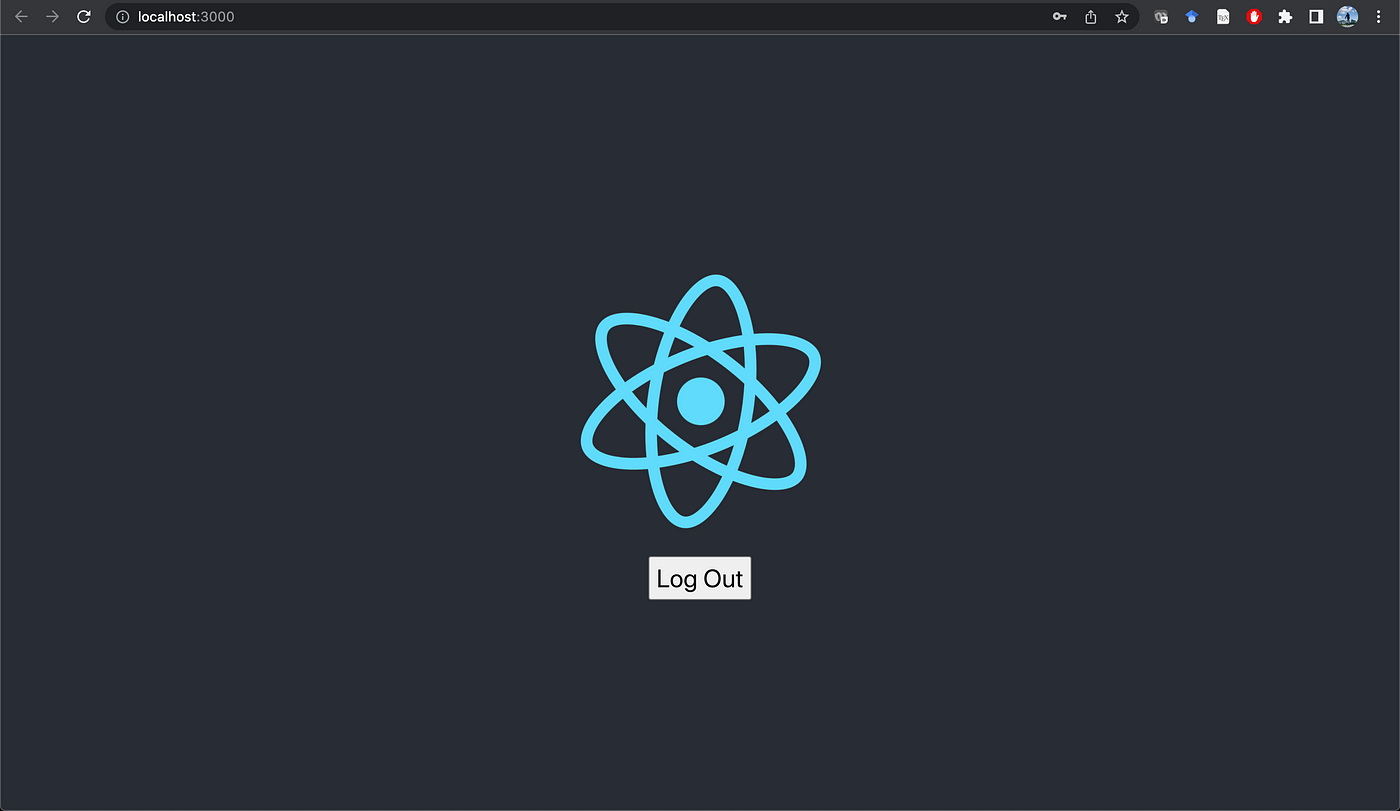
Now I can start the React application with npm start. It will load the Sign In and Sign Up screens as below. On Sign Up, it will create a user account with given username and credentials in AWS Cognito auth service. On successful Sign In, app will navigate to home screen.


8. Add REST API
Next I’m gonna add REST API service into the app. In this scenario the REST API only contains simple endpoint /documents. The REST API integrated with authentication, which means only authenticated users will be able to access the API. It uses JWT token-based authentication. The REST API functions implemented with AWS Lambda function. Following is the way to create Lambda function for the REST API. It will ask several questions, I have selected NodeJS runtime and Hello World template. This command will adds new Lambda function inside the amplify/backend/function/ directory and defines the Lambda function backend configuration in the amplify/backend/backend-config.json file.
Once created the Lambda function, I can create a new Amplify API service and link the Lambda function to that API as below. It will ask several questions, I have given the API type as REST and selected previously created Lambda function for the API. I have restricted API access only for Authenticated and Guest users. This command will adds new API inside the amplify/backend/api/ directory and defines the API function configuration in the amplify/backend/backend-config.json file.
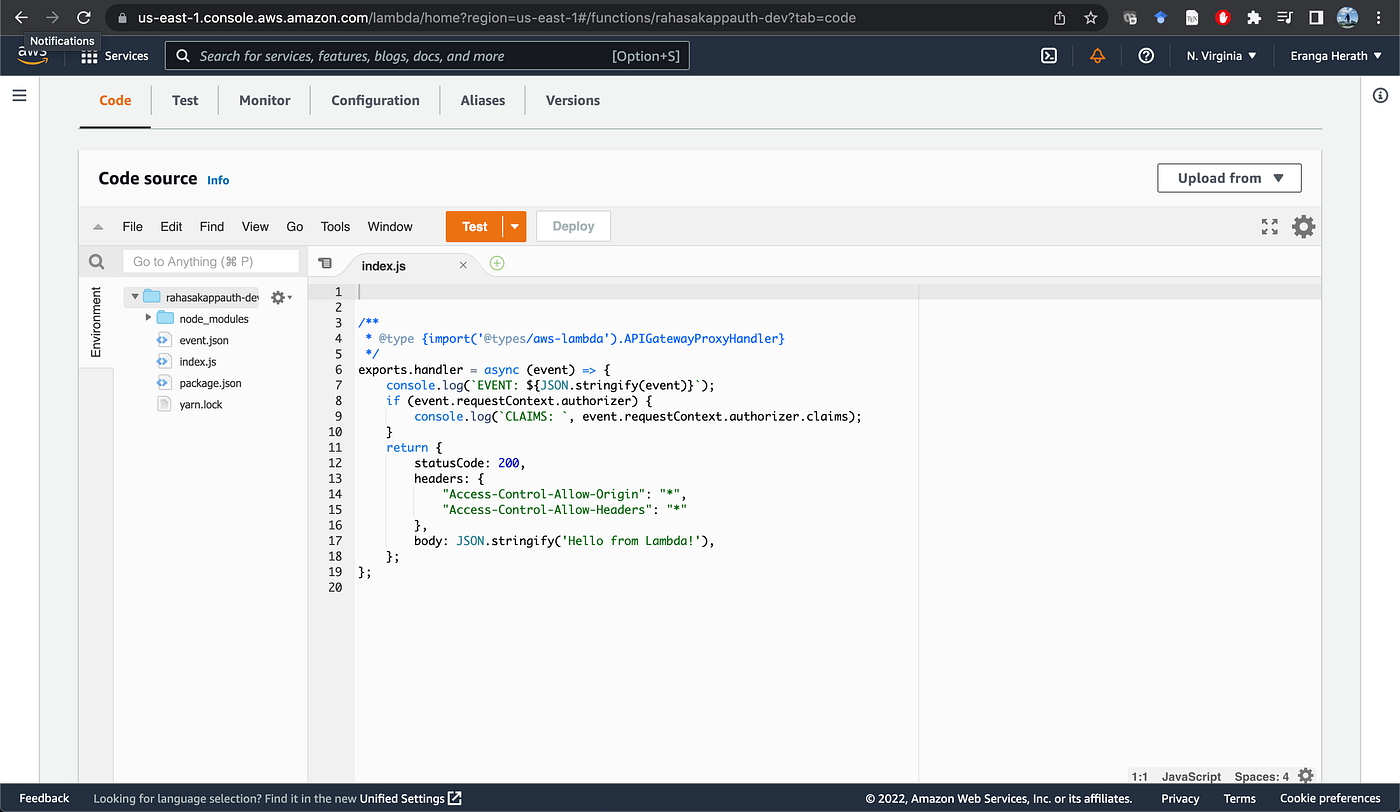
9. Modify Lambda Function
The Lambda function implementation can be found in the amplify/backend/function/rahasakappauth/src/index.js. I have enabled CORS and some console logging(e.g authorized user details) in the Lambda function.
10. Deploy API Service
Similar to the previous backend service(auth service), I need to deploy the API service and its associated Lambda function in the AWS cloud. Following is the way to do that with amplify push.
Once pushed the services, it will create new endpoint in the API Gateway for the REST API and create new Lambda function.
11. Call API From Frontend Web
I have added callApi() function in the Frontend web(in App.js) to invoke the /documents REST API which I have deployed previously. The function adds JWT token of the currently signed in user into the request header. When button clicks it calls to the /documents API endpoint. The name of the API can be found in the src/aws-exports.js file.
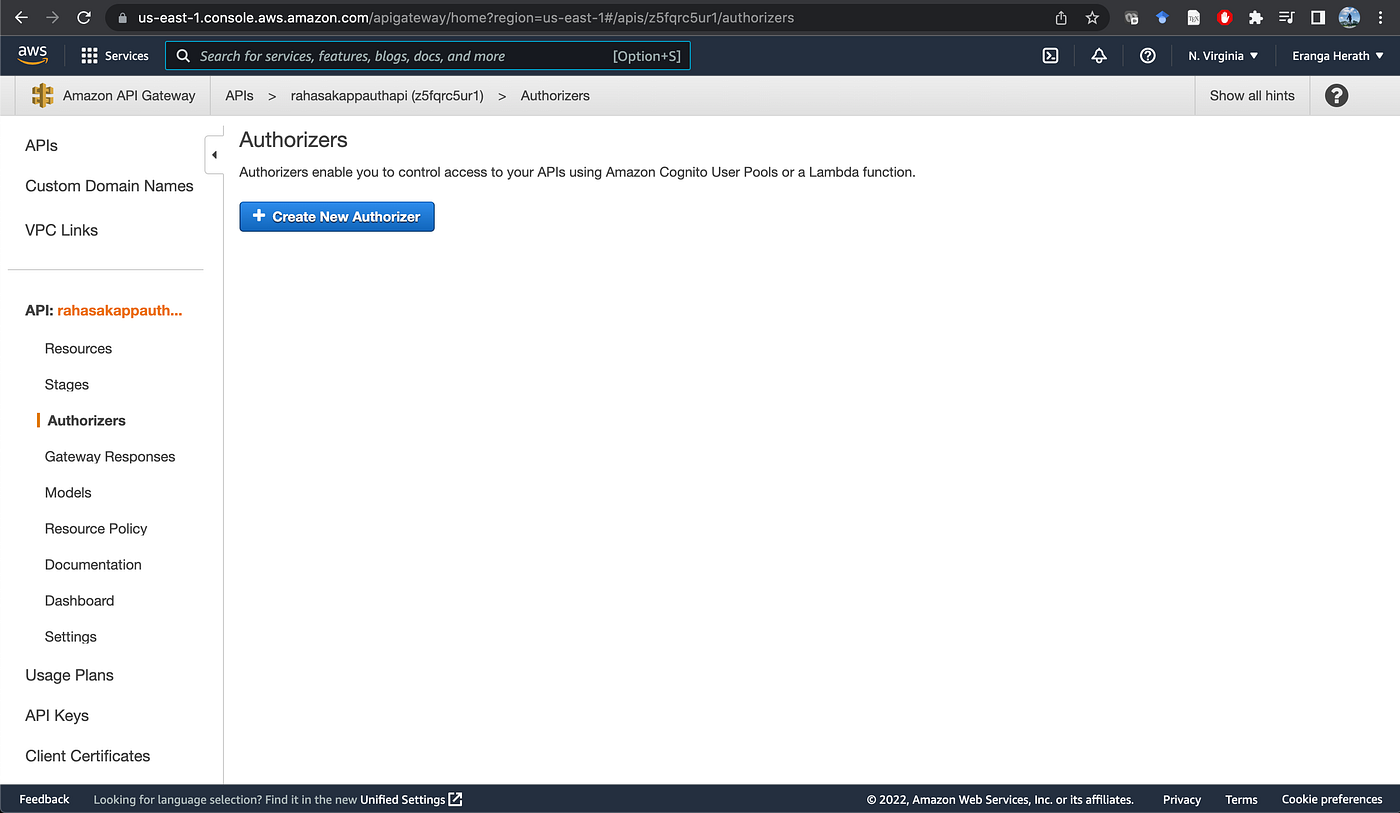
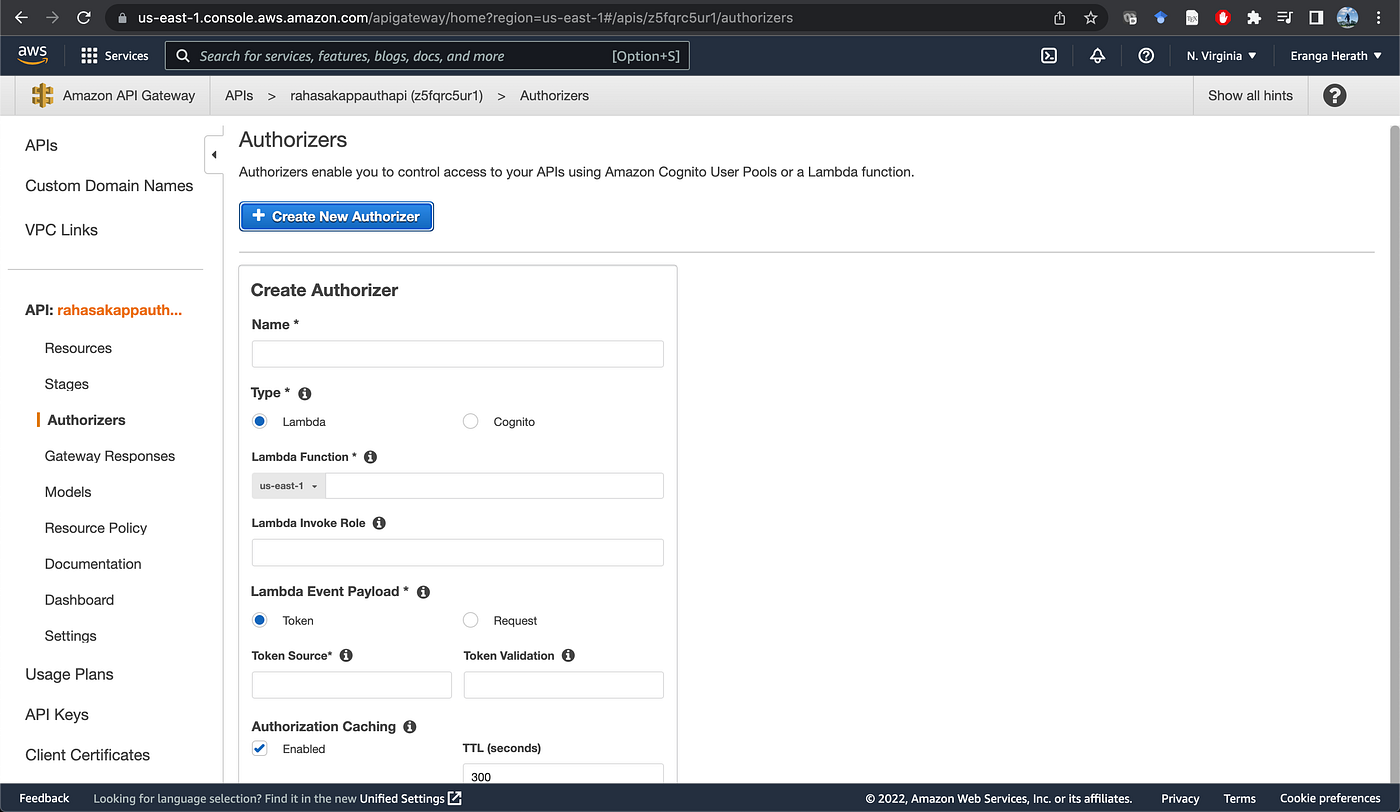
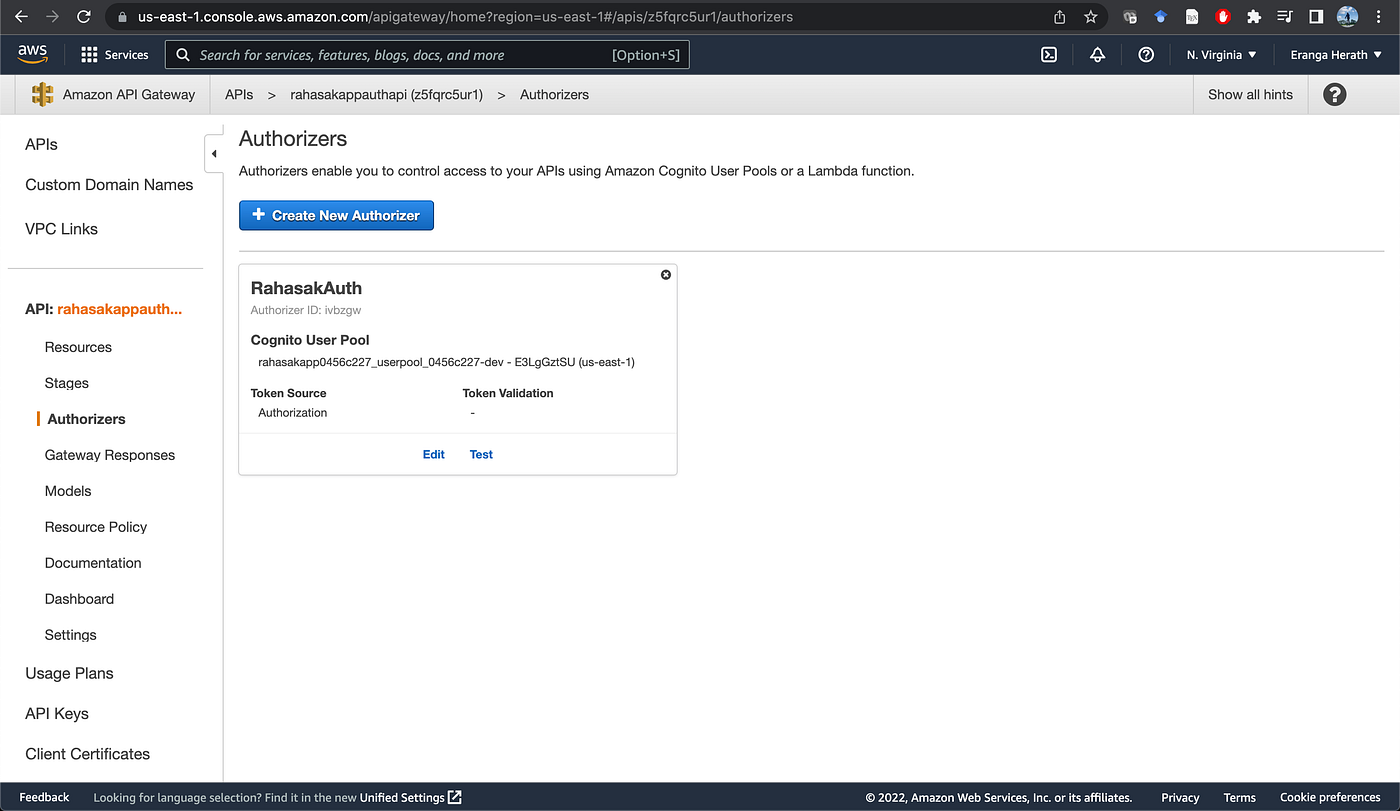
12. Create Authorizer in API Gateway
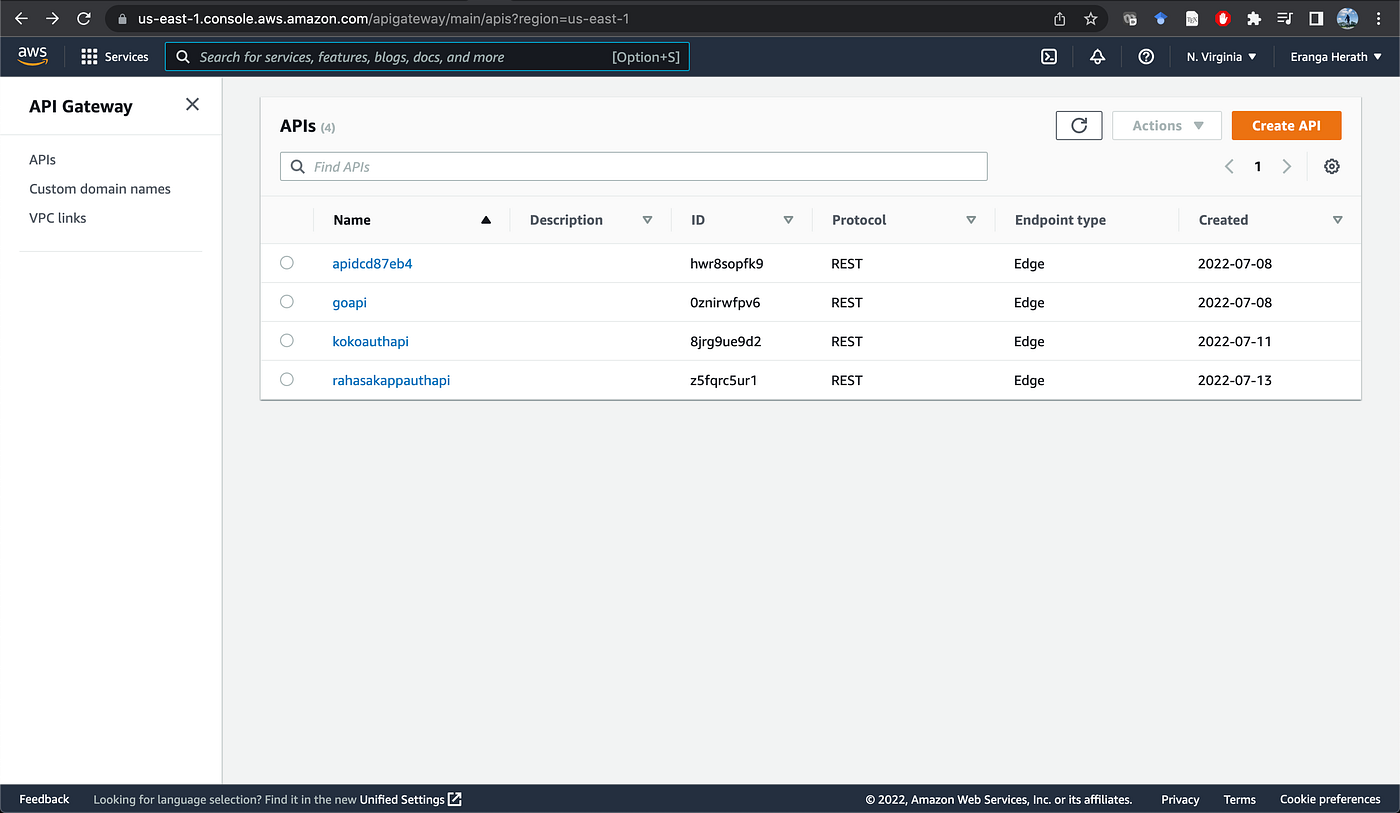
Goto API Gateway in AWS developer console and select the API created(e.g rahasakappauthapi). In here, I have added new Authorizer with Cognito type and selected the Congnito User Pool name. Token source given as the Authorization.
13. Add Authorizer to API
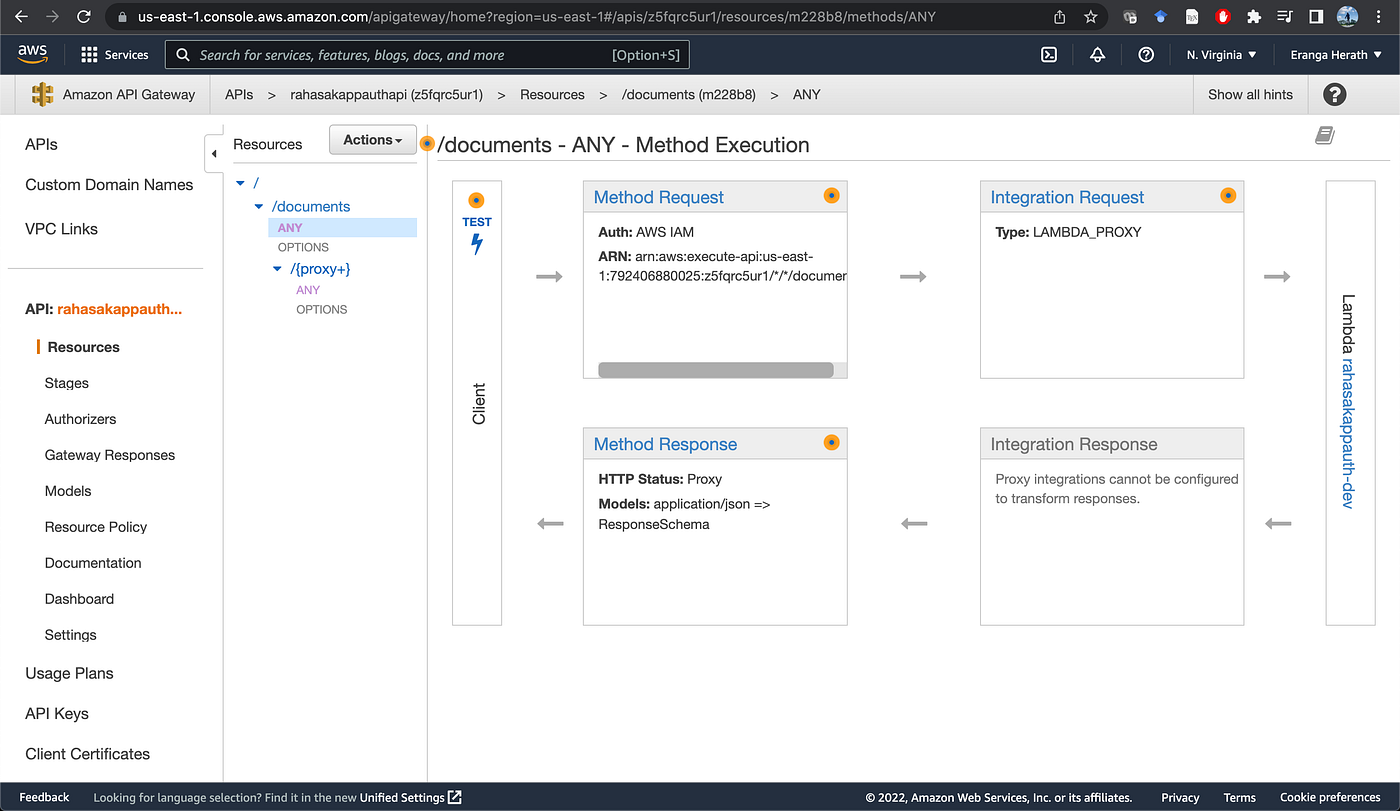
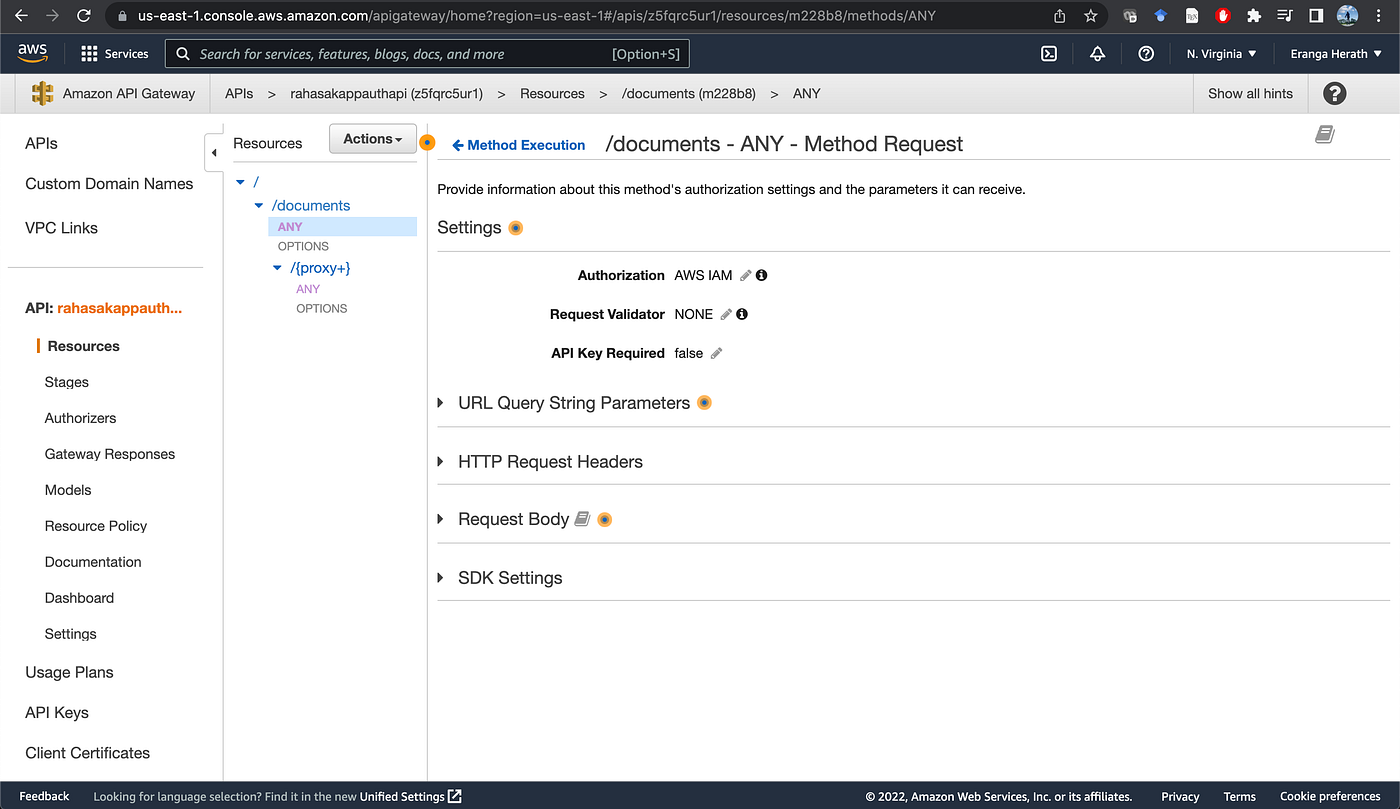
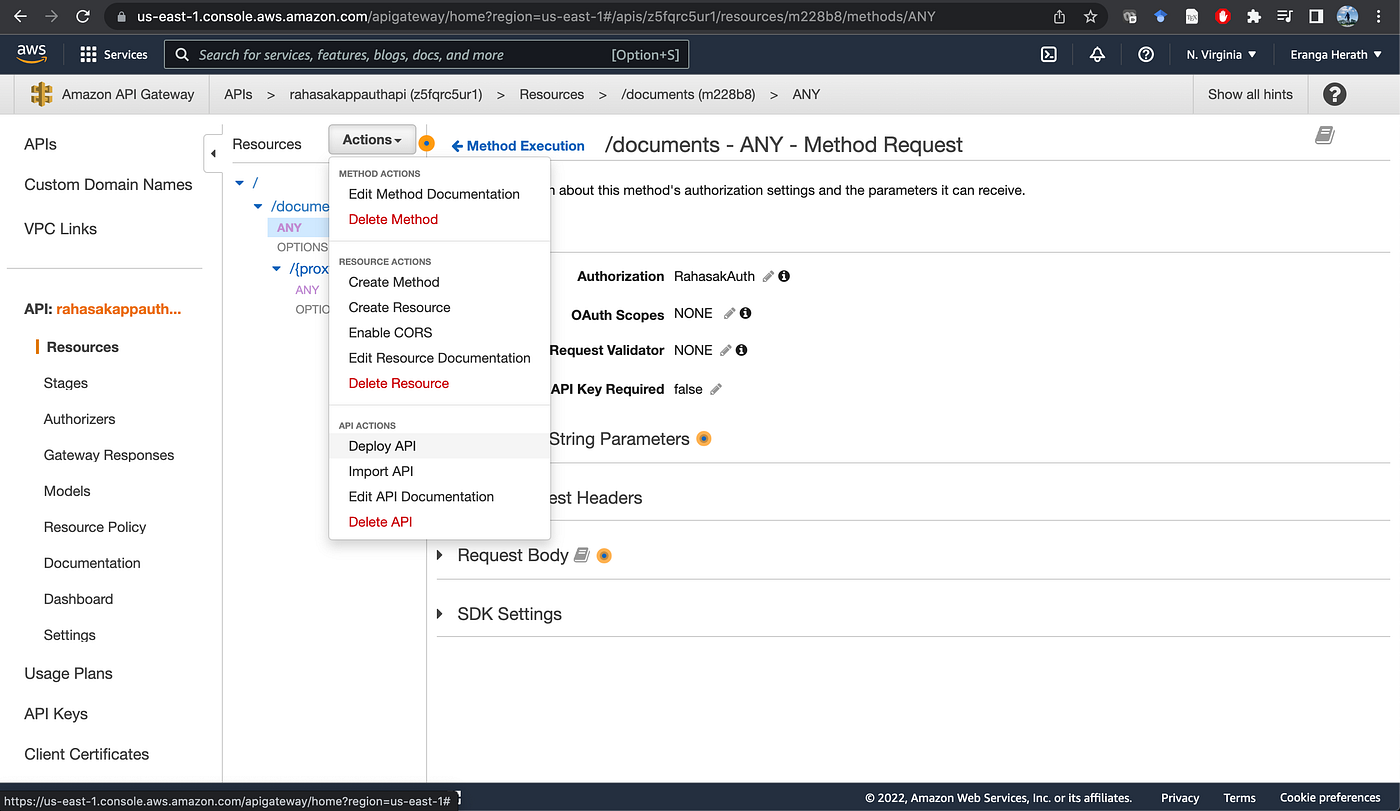
Goto API Gateway in AWS developer console, select the API created(e.g rahasakappauthapi) and Resources. It shows the /documents API. When goes Any Method Request it shows the configuration to add Authorization. Click the Edit icon on next to the Authorization and select the previously created Authorizer name(RahasakAuth).

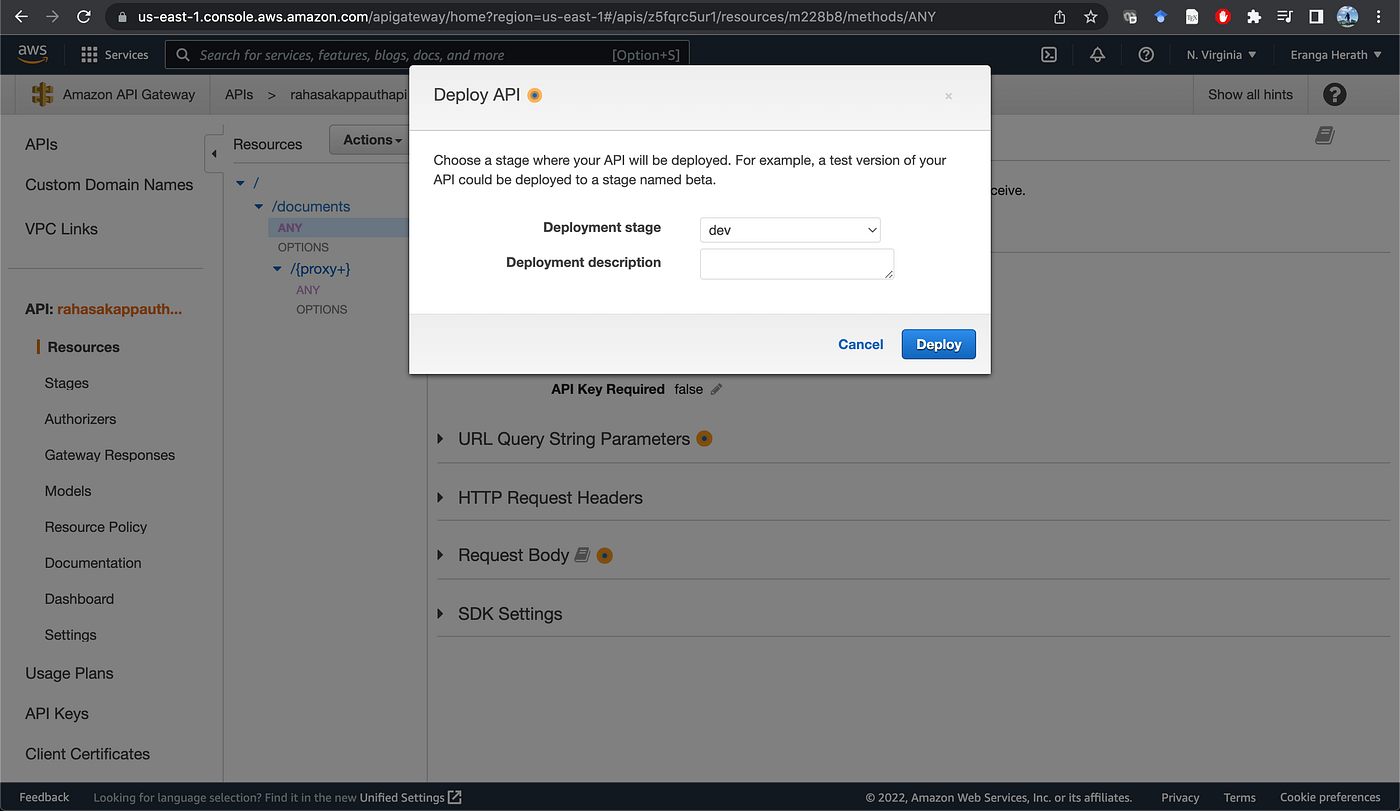
After that I can deploy the API with selecting Actions, Deploy API. It will asks deployment stage(e.g dev).
14. Test the API
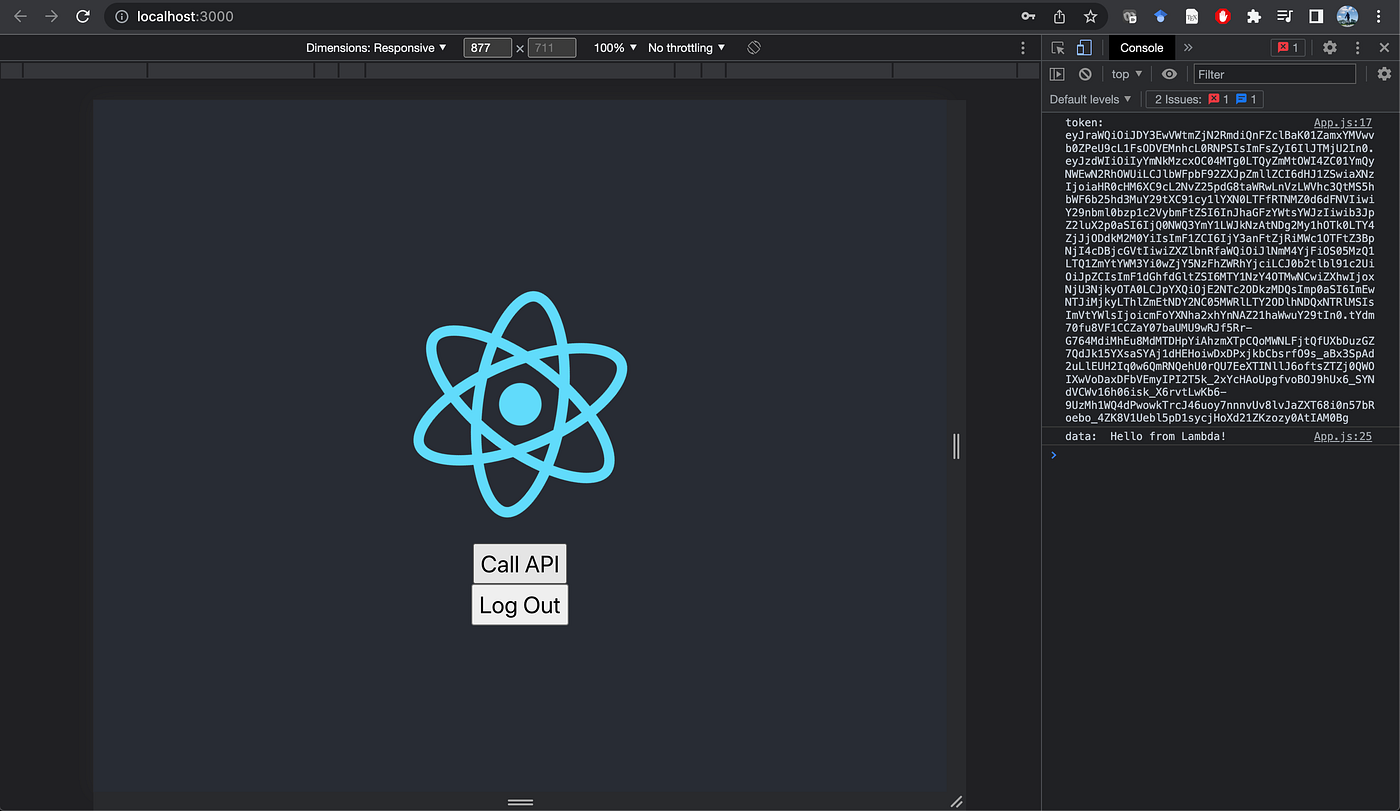
Now I can test the API functions through the React frontend web(with callApi function) which I have previously created. Once Sing In, it will shows Call API button. When click on this button it will send request to the /documents API with Authorization header. The request/response parameters can be viewed in the Console inspect. It logs token and the response of the /documents API.
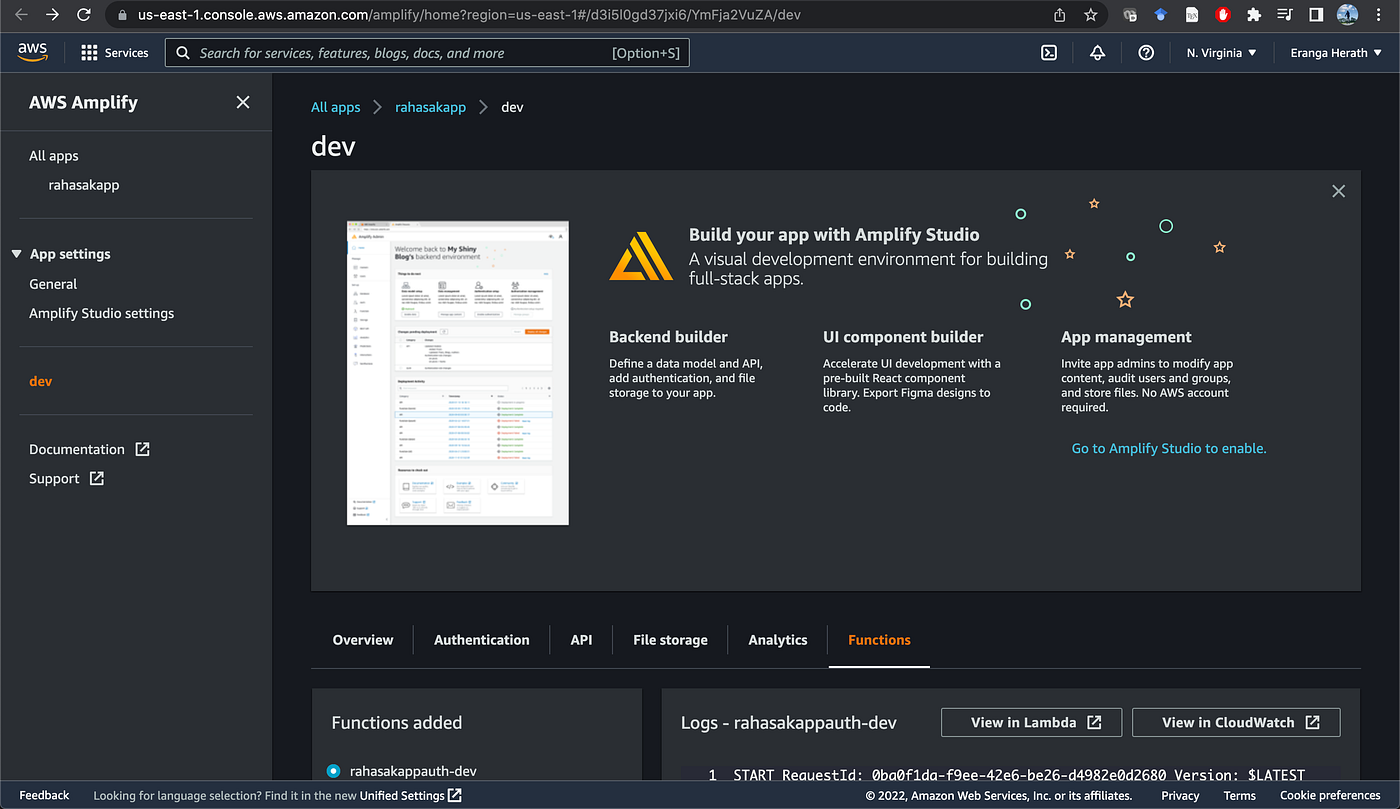
15. View Console Log
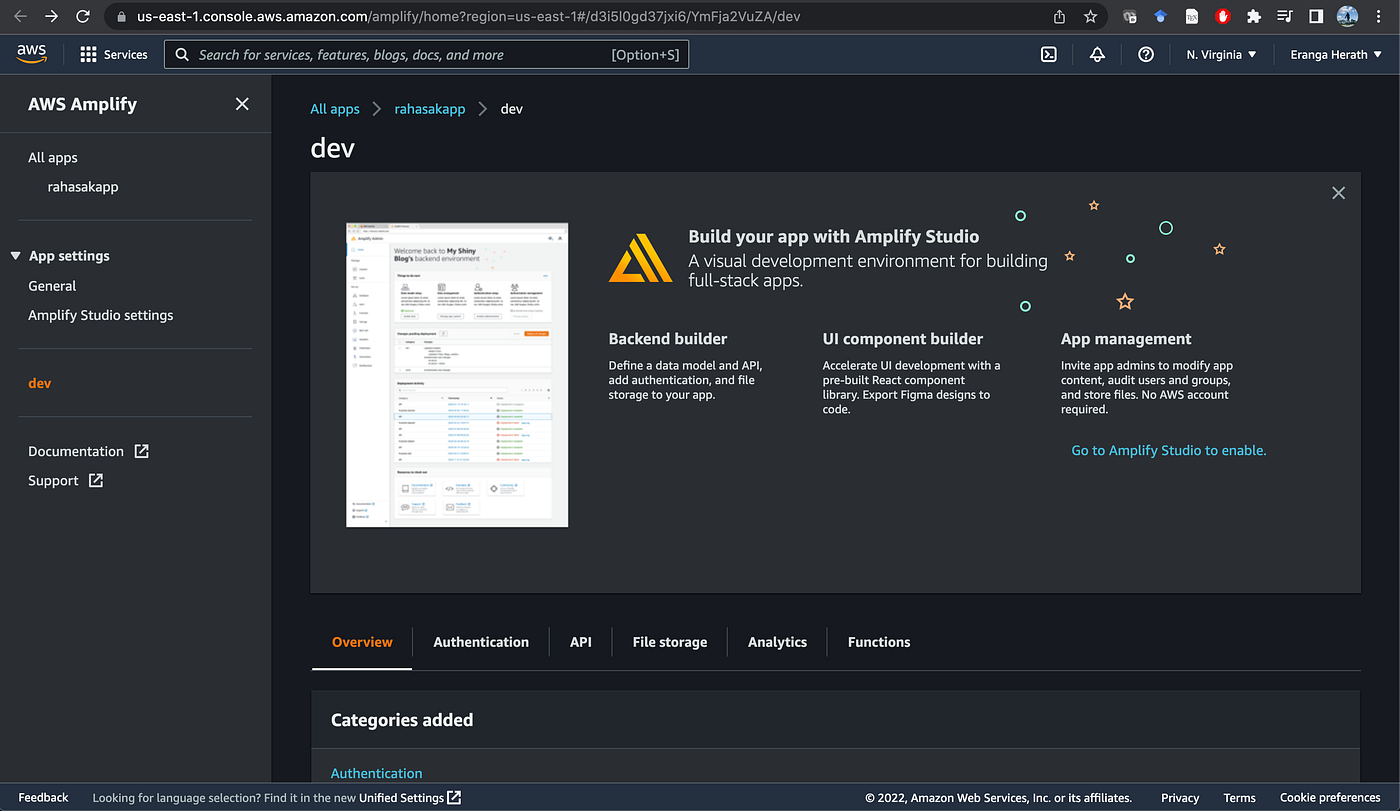
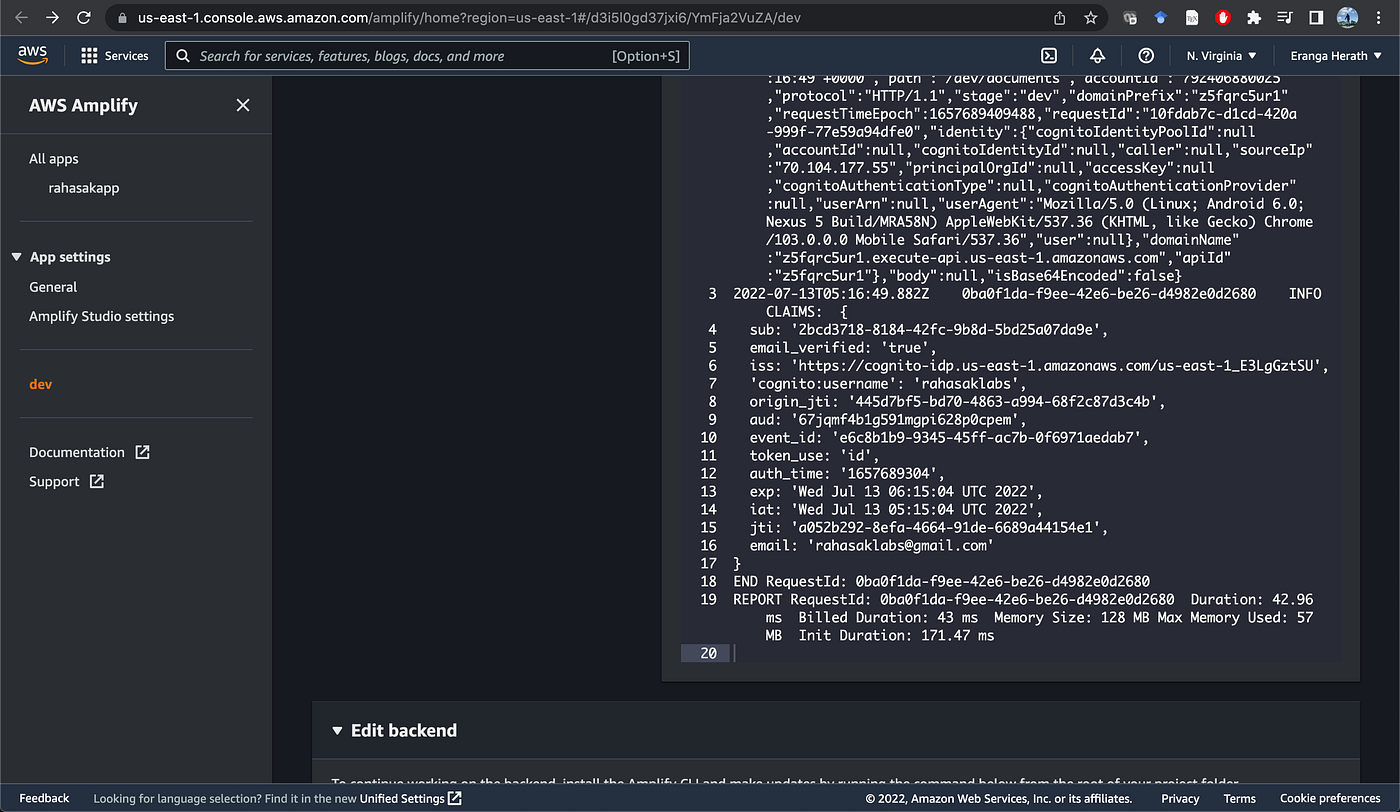
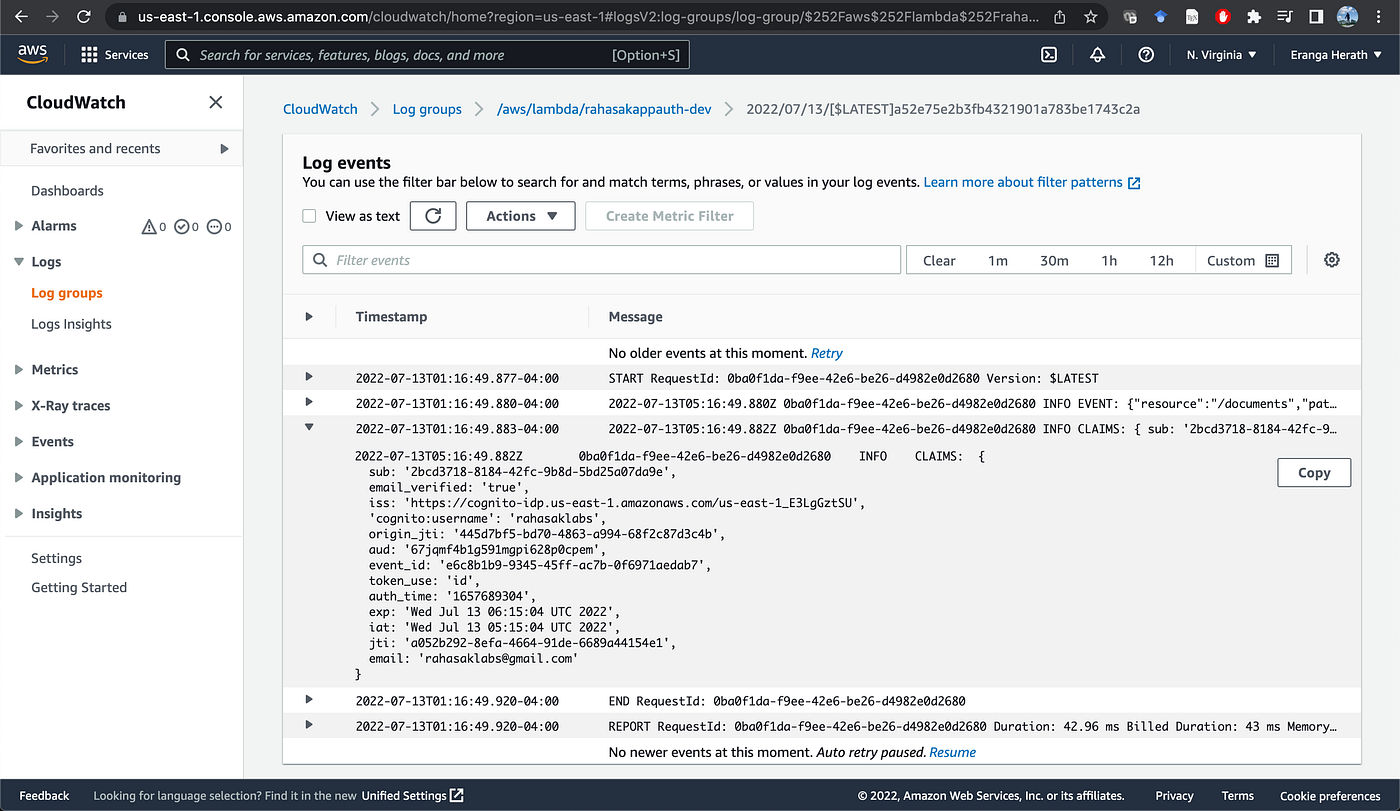
The Lambda function logs can be viewed in the AWS Console of the Amplify APP. I can directly launch the Console via amplify console command. When goes to the functions, I can see the logs of the Lambda function. It has the user claim object.
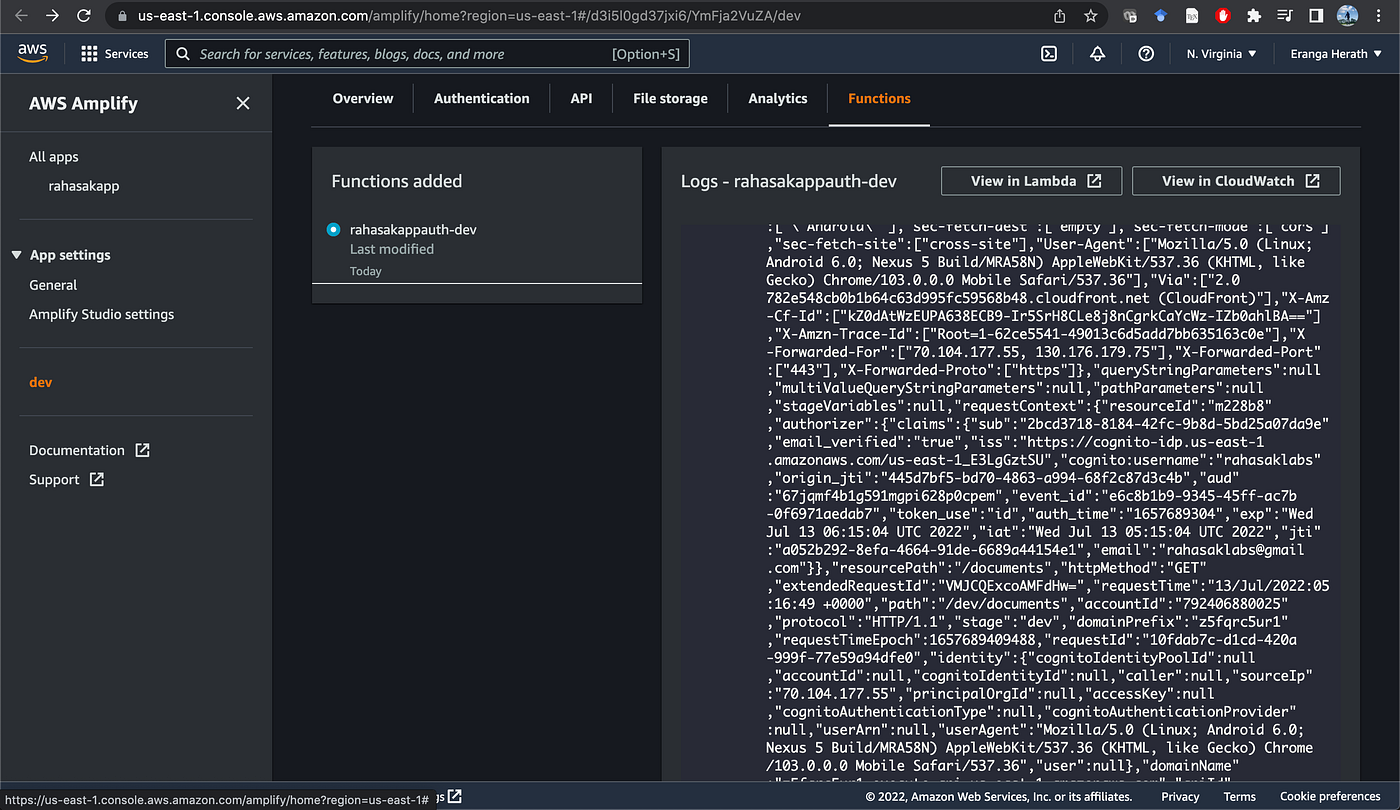
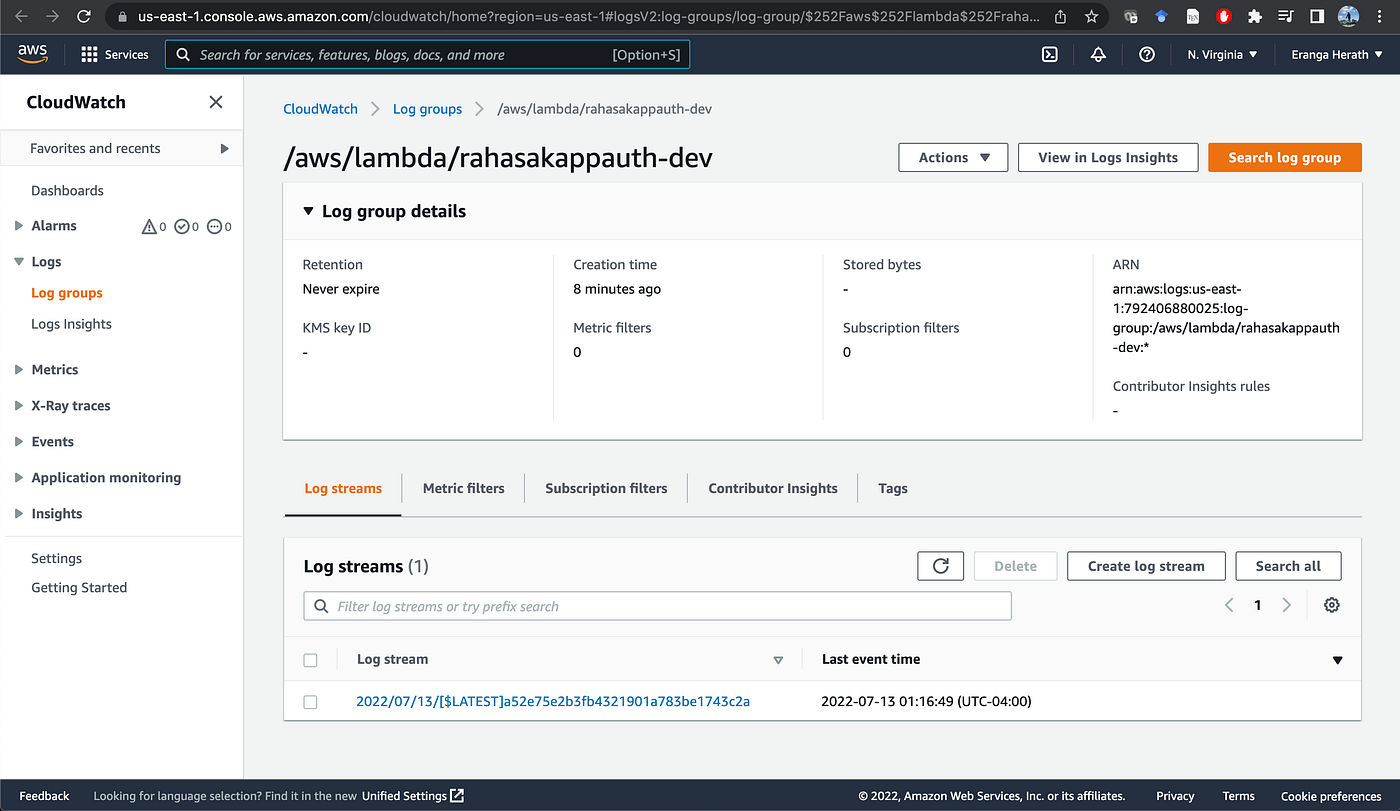
Further I can view the logs via the CloudWatch. CloudWatch available in the functions section of the Amplify App console.
Reference
Amazon Cognito identity pools provide temporary AWS credentials for users who are guests
Amazon Cognito User Pools - Amazon Cognito
- https://blog.back4app.com/aws-amplify-vs-lambda/#:~:text=AWS%20Amplify%20is%20primarily%20designed,to%20a%20pre%2Ddefined%20event.
- https://www.redhat.com/en/topics/cloud-native-apps/what-is-serverless
- https://medium.com/zenofai/serverless-web-application-architecture-using-react-with-amplify-part1-5b4d89f384f7
- https://blog.back4app.com/what-is-aws-amplify/
- https://blog.logrocket.com/aws-amplify-react-native-tutorial-with-examples/
- https://www.youtube.com/watch?v=fs9HfYbWjXQ&ab_channel=NaderDabit
- https://www.freecodecamp.org/news/ultimate-guide-to-aws-amplify-and-reacxt/
Comments